The Complete Guide to Soft and Chewy Cookies with White Chocolate Chips
A precise, ingredient-led approach to achieving golden edges, tender centers, and balanced sweetness every single bake.
Table of Contents
- Quick Formula for Chewy White Chocolate Chip Cookies
- Introduction: Rethinking White Chocolate in Baking
- Ingredient Chemistry: Cocoa Butter vs. Vegetable Oil Chips
- Balancing Moisture: Butter, Sugars, and Flour Ratios
- The Tested Master Formula (Metric & US Customary)
- Step-by-Step Instructions
- Fat & Mixing Technique Comparison
- Flavor Variations and Complementary Mix-Ins
- Common Baking Mistakes and Direct Fixes
- Advanced Tips for Texture and Shelf-Life
- Pantry Equipment and Tools
- Related Recipes and Guides
- Educational References
- Summary of Key Rules
- Frequently Asked Questions
Quick Answer: How to Make Chewy Cookies with White Chocolate Chips
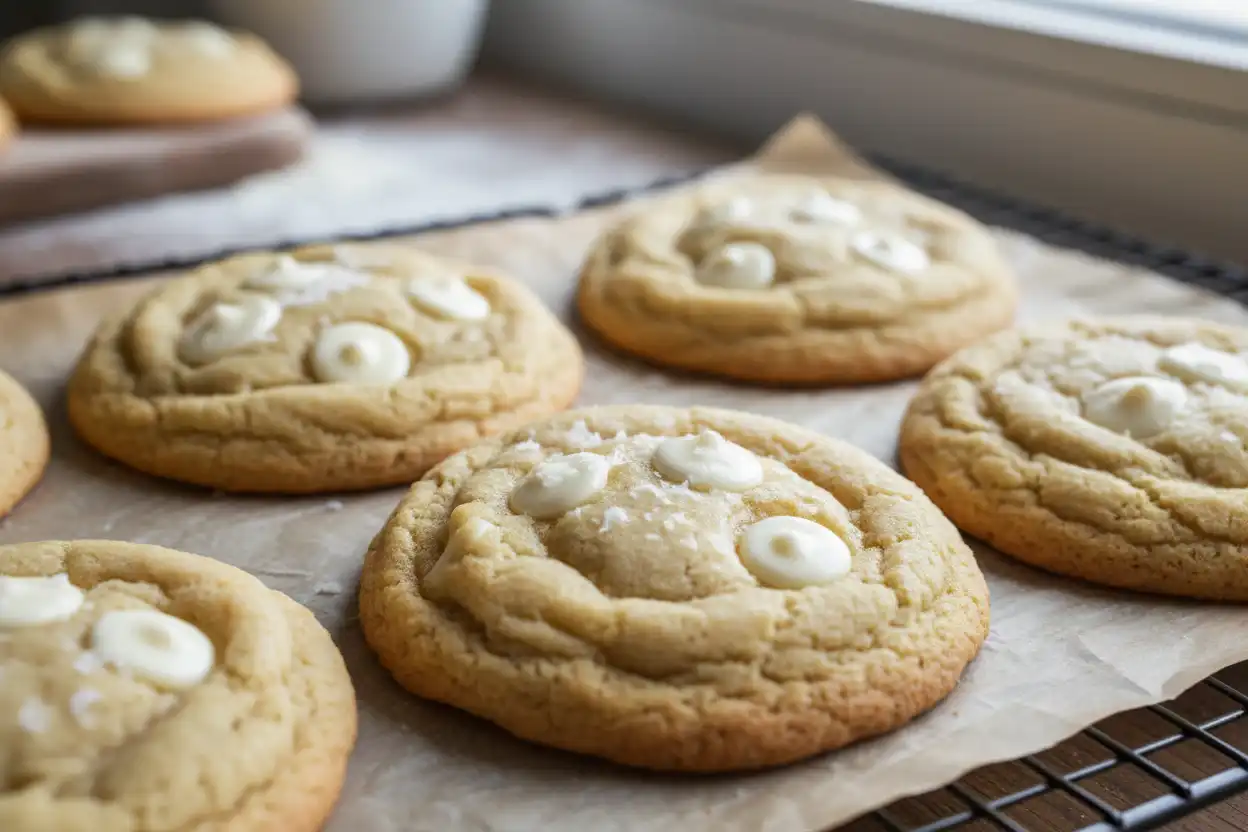
To make bakery-style cookies with white chocolate chips, use a 2:1 ratio of dark brown sugar to white granulated sugar. Melted butter combined with one whole egg and an extra egg yolk provides hydration and a dense, chewy interior without turning cakey.
Select real white chocolate containing at least 20% pure cocoa butter rather than palm oil-based confectionary drops. Bake at 350°F (175°C) for 9 to 11 minutes until the edges are golden while the center remains slightly underbaked.
- Fat Base: Unsalted butter, melted and cooled to room temperature.
- Sweetener Balance: Dark brown sugar for moisture and molasses depth; granulated sugar for crisp borders.
- Chilling Requirement: 45 minutes minimum to solidify fats and curb excessive pan spread.
Why This Recipe Requires a Different Approach
White chocolate behaves fundamentally differently in the oven than semisweet or dark chocolate. Because it contains milk solids, sugar, and cocoa butter without any cocoa liquor, it melts at a significantly lower temperature.
Many home bakers discover that swapping white chips into standard drop cookie dough yields overly sweet, greasy results. Without the natural bitterness of dark cocoa solids to cut through the sugar, the dough requires specific structural adjustments.
This guide breaks down the precise pastry science that balances sweetness, prevents scorch marks, and preserves a rich, buttery bite. Whether you are baking for a holiday platter or an afternoon treat, these principles guarantee consistent execution.
Ingredient Chemistry: Selecting the Right White Chocolate
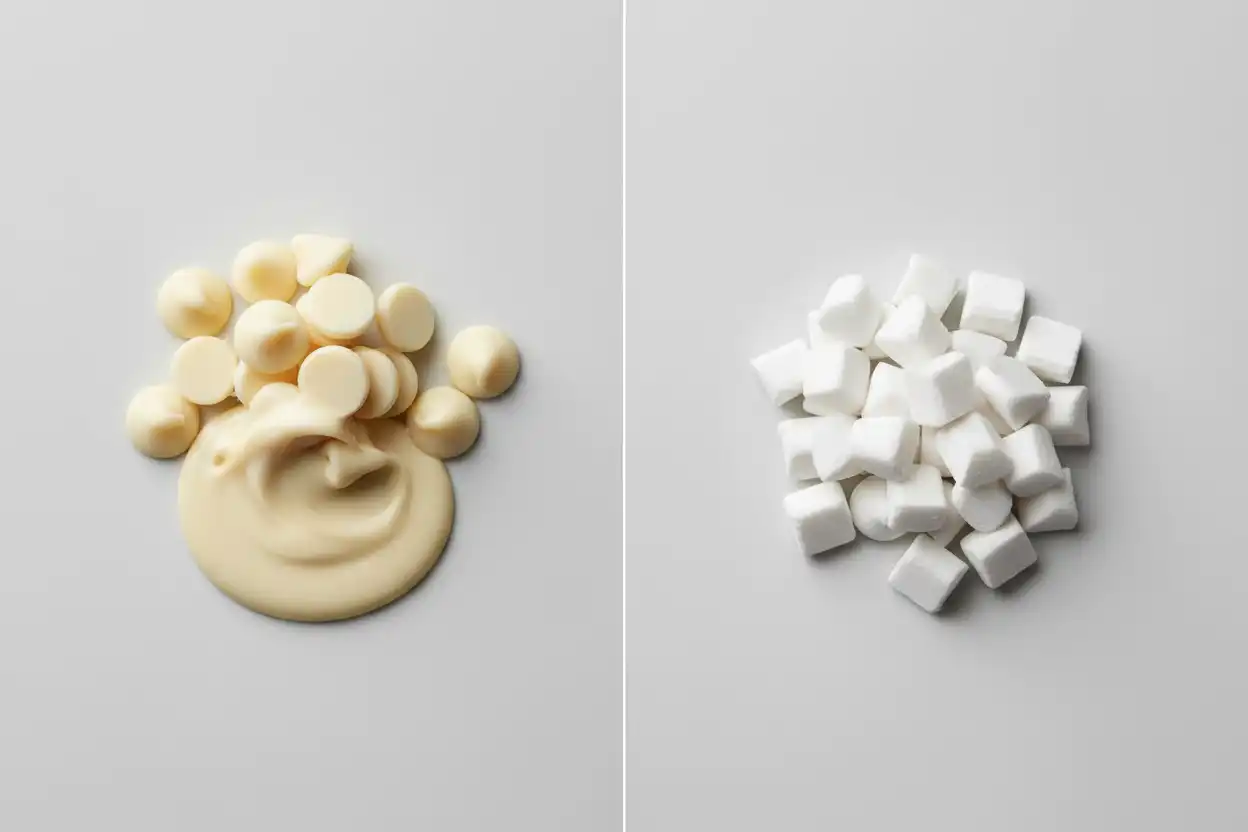
The label on your chocolate package dictates your finished cookie texture. High-quality white chocolate must contain at least 20% cocoa butter, 14% total milk solids, and no more than 55% sugar.
Budget baking morsels frequently swap out cocoa butter for fractionated palm kernel oil or hydrogenated vegetable oils. While vegetable oil chips hold their physical shape well under heat, they deliver a waxy mouthfeel and excessive artificial vanilla notes.
Real Cocoa Butter Chips
True white chocolate chips melt luxuriously on the tongue because cocoa butter has a melting point right around 93°F to 97°F (34°C to 36°C), just below normal human body temperature. In the oven, they soften into creamy pockets that complement chewy dough.
Check the ingredient statement on the back of the package before purchasing. The first listed fat must explicitly say “cocoa butter.”
Confectionery Coating Drops
Packages labeled as “vanilla baking chips” or “white morsels” often contain zero real cocoa butter. These rely on hydrogenated fats that melt above 102°F (39°C), leaving a stiff, chalky residue in your mouth.
If you prefer a cookie with pronounced, visually pristine white dots that do not spread, confectionery chips can be used. For superior flavor and delicate texture, genuine cocoa butter remains the standard.
Balancing Moisture: Butter, Sugars, and Flour
Creating chewiness in a drop cookie is an exercise in managing water loss and starch gelatinization. Standard all-purpose flour containing 10.5% to 11.5% protein provides adequate gluten structure without producing bread-like toughness.
Liquid control determines whether your cookie spreads into a thin puddle or mounds into a dense biscuit. Balancing wet and dry weights is essential when dealing with sugar-heavy mix-ins.
The Role of Sugars
Brown sugar contains hygroscopic invert sugars along with natural molasses, meaning it actively attracts and holds moisture during baking. Using a dominant ratio of brown sugar to white granulated sugar ensures a soft, bendable core.
White granulated sugar encourages lateral spreading and edge caramelization. A small proportion remains critical to create crisp, scalloped perimeters.
Egg Architecture
Whole eggs contribute water from the white and fat from the yolk. The water hydrates flour proteins to build structure, while egg white albumin sets during baking.
Replacing one whole egg white with an additional egg yolk introduces concentrated lecithin and healthy fats. This emulsifies the batter smoothly while eliminating the rubbery texture caused by excess baked egg white.
The Tested Master Formula
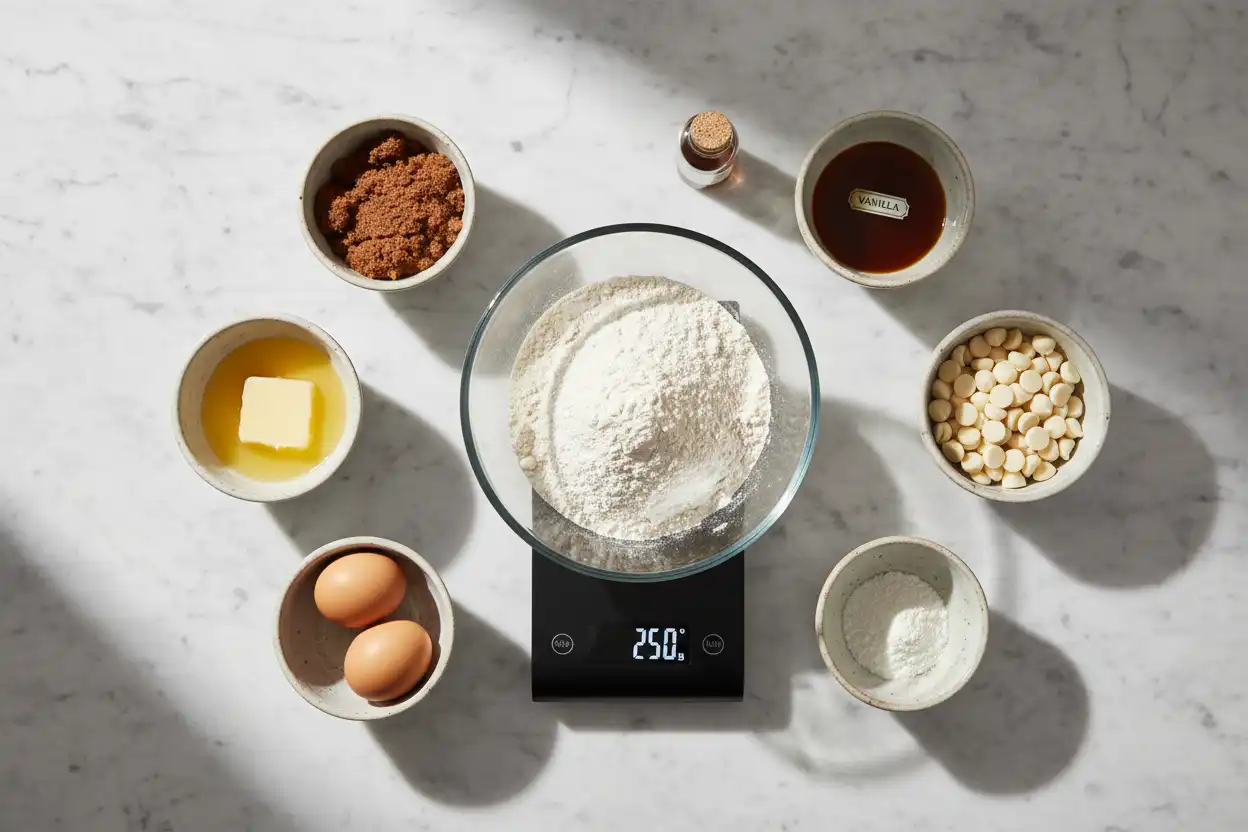
Baking requires precision. Volumetric measuring with cups often leads to dry, flour-heavy dough because flour packs down over time.
Use a digital food scale set to grams for foolproof consistency. If using measuring cups, employ the gentle “spoon and level” technique without packing the dry goods down.
Batch Ingredients (Yield: 16 Bakery-Style Cookies)
- Unsalted Butter: 115g (1/2 cup / 1 stick), melted and cooled slightly
- Dark Brown Sugar: 150g (3/4 cup, firmly packed)
- Granulated White Sugar: 50g (1/4 cup)
- Large Whole Egg: 1 cold egg (approx. 50g out of shell)
- Large Egg Yolk: 1 cold yolk (approx. 18g)
- Pure Vanilla Extract: 8g (2 teaspoons)
- All-Purpose Flour: 240g (2 cups spooned and leveled)
- Cornstarch: 6g (2 teaspoons)
- Baking Soda: 4g (3/4 teaspoon)
- Fine Sea Salt: 4g (3/4 teaspoon)
- Real White Chocolate Chips: 225g (1 and 1/4 cups), divided
- Flaky Sea Salt: Optional, for finishing garnish
Step-by-Step Baking Guide
Step 1: Melt and Condition the Butter
What: Melt the unsalted butter completely in a heat-resistant bowl and let it cool for 8 to 10 minutes until warm to the touch.
Why: Using hot, liquid butter will cook the eggs upon contact and dissolve the sugar granules instantly, leading to an oily dough that flattens out.
How: Microwave in short 20-second bursts, or melt over low heat on the stovetop. It should be fluid, glossy, and comfortable to touch with a clean fingertip.
Common Mistake: Pouring steaming butter directly onto cold raw eggs.
Pro Tip: Browning 30% of the butter in a pan first adds nutty aromas that balance the high sugar content of white chocolate.
Step 2: Emulsify Fats and Sugars
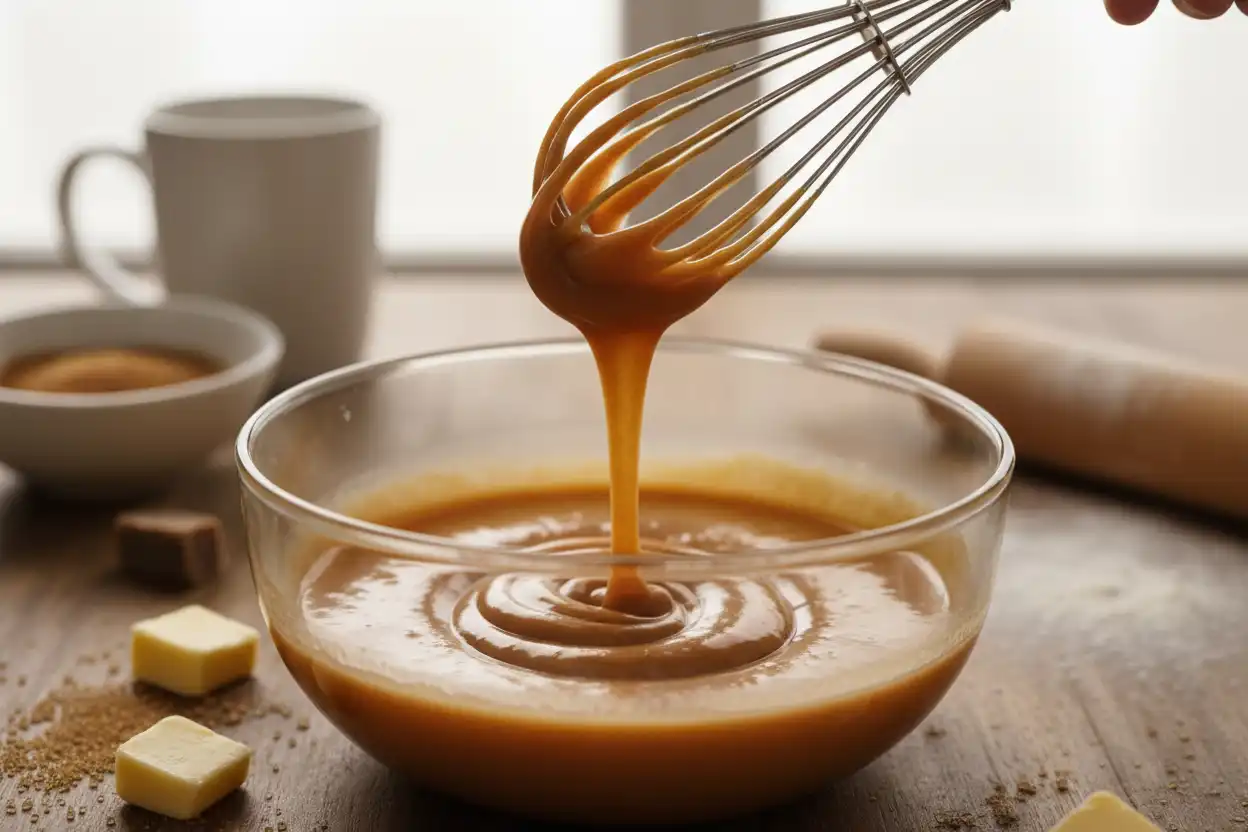
What: Combine the melted butter, dark brown sugar, and granulated white sugar in a mixing bowl. Whisk vigorously for a full 60 seconds.
Why: Whisking incorporates the liquid butter fat with the molasses syrup from the brown sugar, creating a smooth suspension.
How: Use a sturdy balloon whisk. The mixture will transition from separated grains of sugar to a thick, caramel-like slurry.
Common Mistake: Stirring casually for five seconds, which leaves butter pooling around the edge of the bowl.
Pro Tip: Let the sugar-butter mix rest for two minutes, then whisk again for thirty seconds before adding eggs to jumpstart sugar breakdown.
Step 3: Introduce Eggs and Vanilla
What: Add the whole egg, additional egg yolk, and pure vanilla extract directly into the sugar base.
Why: The natural lecithin in egg yolks binds the water content to the melted fat, building a velvety emulsion that traps air.
How: Whisk gently until the batter turns pale, glossy, and falls off the whisk in ribbons. This typically takes 90 seconds of moderate whisking.
Common Mistake: Using warm eggs that disrupt the temperature balance of the emulsion.
Pro Tip: Pure bourbon vanilla extract works best here to complement the natural milk notes of the cocoa butter.
Step 4: Sift and Fold the Dry Ingredients
What: In a separate bowl, whisk together the all-purpose flour, cornstarch, baking soda, and fine sea salt. Pour into the wet base.
Why: Cornstarch softens the flour’s rigid gluten strands, producing an ultra-tender center. Baking soda interacts with acidic molasses to generate rise.
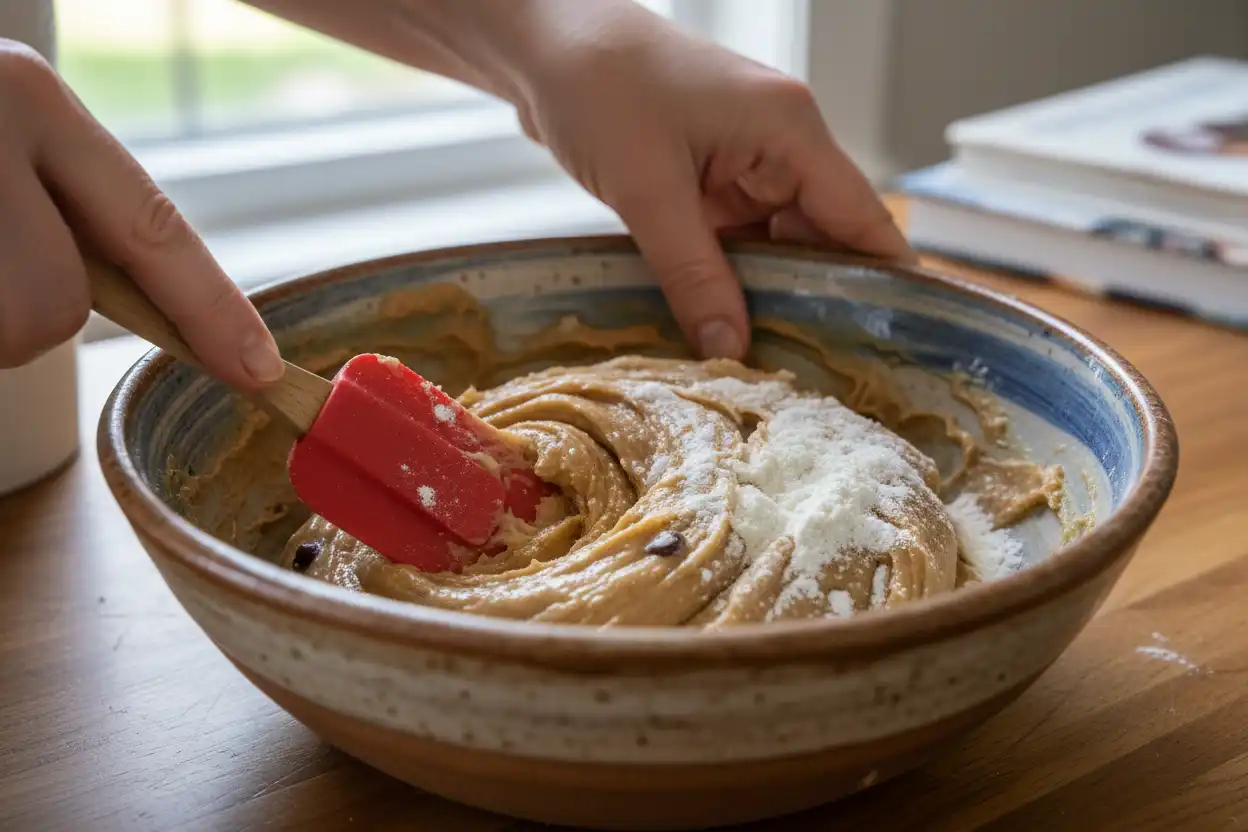
How: Switch to a flexible silicone spatula. Fold the ingredients together from bottom to top just until the flour streaks disappear.
Common Mistake: Aggressive stirring or using an electric mixer on high speed, which overworks gluten and produces rubbery cookies.
Pro Tip: Stop mixing while a few dusty specks of flour remain visible before folding in the chips.
Step 5: Fold the White Chocolate Chips
What: Add 175g of the white chocolate chips into the dough, reserving the remaining 50g for baking tray decoration.
Why: Reserving chips allows you to press them onto the surface of dough balls right before baking for a picture-perfect presentation.
How: Gently cut through the center of the dough with your spatula to distribute the chips evenly without smashing them.
Common Mistake: Dumping all chips into the base mixture before the flour is added, which inhibits uniform gluten hydration.
Pro Tip: Keep chips at room temperature so they integrate cleanly without solidifying surrounding butter fat.
Step 6: Portion and Chill
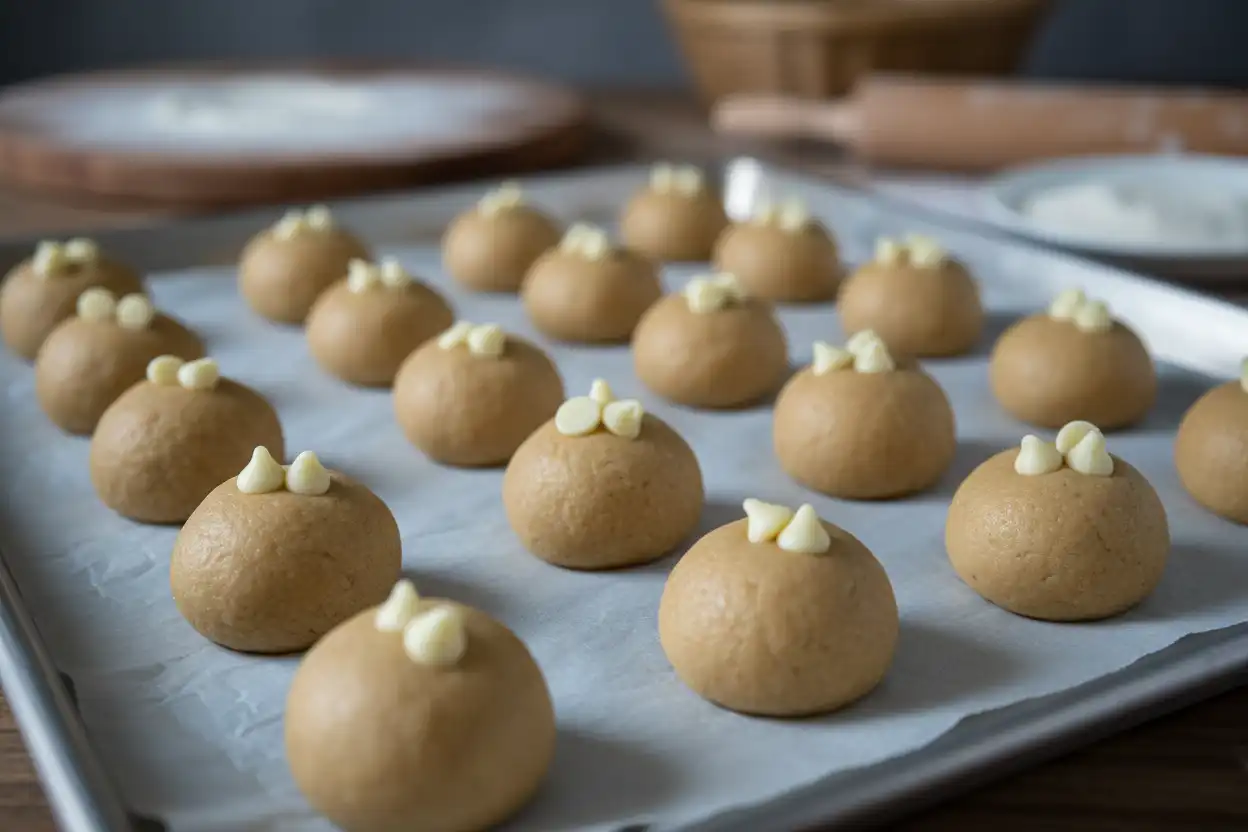
What: Scoop dough into 55g balls (about 2 generous tablespoons each) and place onto a plate. Chill in the refrigerator for 45 to 60 minutes.
Why: Chilling firms up the butter fats and allows flour starches to absorb moisture fully. This deepens flavor and limits uncontrolled spread.
How: Use a #24 or #30 spring-loaded cookie scoop for uniform sizing. Cover lightly with parchment paper to prevent dough dehydration.
Common Mistake: Baking warm, freshly mixed dough straight into a hot oven.
Pro Tip: Press two or three reserved white chocolate chips directly onto the crown of each chilled ball before loading them into the oven.
Step 7: Bake to Golden Perfection
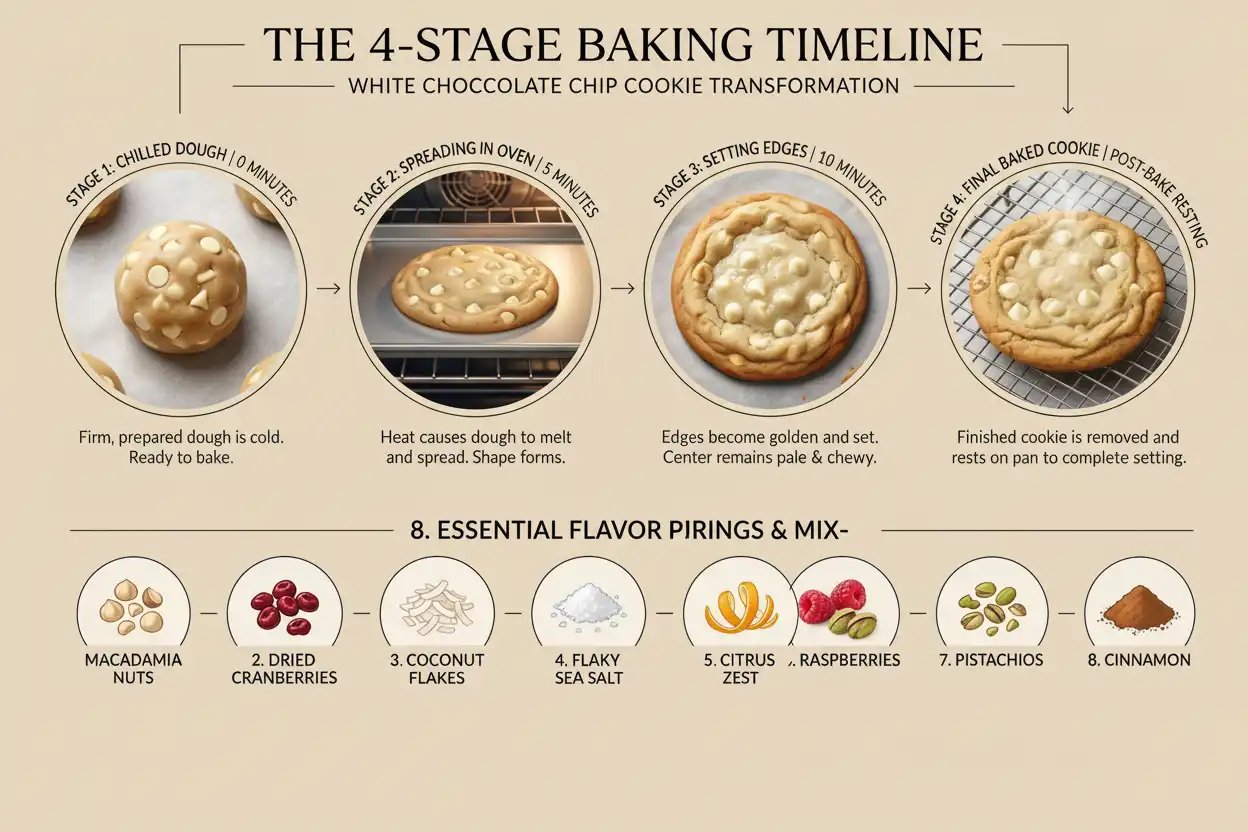
What: Bake on parchment-lined heavy baking sheets at 350°F (175°C) for 9 to 11 minutes.
Why: White chocolate chips can scorch and taste burnt if exposed to sustained high temperatures or prolonged bake cycles.
How: Position baking sheets on the center oven rack. Pull the trays out when the cookie borders turn golden brown while the centers stay pale and soft.
Common Mistake: Waiting for the centers to brown, which results in dry, rock-hard cookies once cool.
Pro Tip: Immediately swirl a round biscuit cutter or bowl over each hot cookie on the pan to nudge edges into a circle.
Step 8: Pan-Cooling and Maturation
What: Leave cookies on the warm metal baking sheet for 10 minutes, then transfer them to a wire rack.
Why: Residual pan heat gently completes baking in the soft center without burning delicate bottom crusts.
How: Dust with optional flaky sea salt while hot. Move individual cookies with a thin metal offset spatula.
Common Mistake: Moving cookies immediately, causing the delicate soft centers to crack and tear.
Pro Tip: Enjoy warm after 20 minutes of cooling when the white chocolate settles into a soft, velvety texture.
Technique Comparison: Fat State and Mixing Dynamics
The state of butter and your mixing technique dramatically affect the chew, thickness, and spread of cookies with white chocolate chips.
Review this comparison to choose the precise texture that suits your personal taste.
| Method | Butter Condition | Internal Texture | Spread Level | Primary Characteristic |
|---|---|---|---|---|
| Melted Butter (Recipe Standard) | Liquid, warm (85°F / 29°C) | Dense, fudgy, chewy | Moderate | Maximum molasses notes; tender centers |
| Creamed Butter | Softened room temp (65°F / 18°C) | Fluffy, airy, cake-like | Low | Tender crumb; pronounced lift from aeration |
| Browned Butter | Cooked until nutty, cooled liquid | Extremely chewy, thin-crisp edges | High (moisture evaporated) | Toasted hazelnut aromas; cuts sweetness |
| Chilled Solid Butter Cubes | Cold, cut into dry mix | Scone-like, crumbly | Very Low | Thick, dome-like visual shape |
Flavor Pairings and Mix-In Variations
White chocolate acts as a sweet, creamy canvas that welcomes acidic, nutty, or bitter complementary ingredients. Adding textured mix-ins balances the sugar profile of the chips.
When introducing secondary elements, maintain a total mix-in ceiling of 250 grams per batch to preserve dough cohesion.
Macadamia Nut Pairing
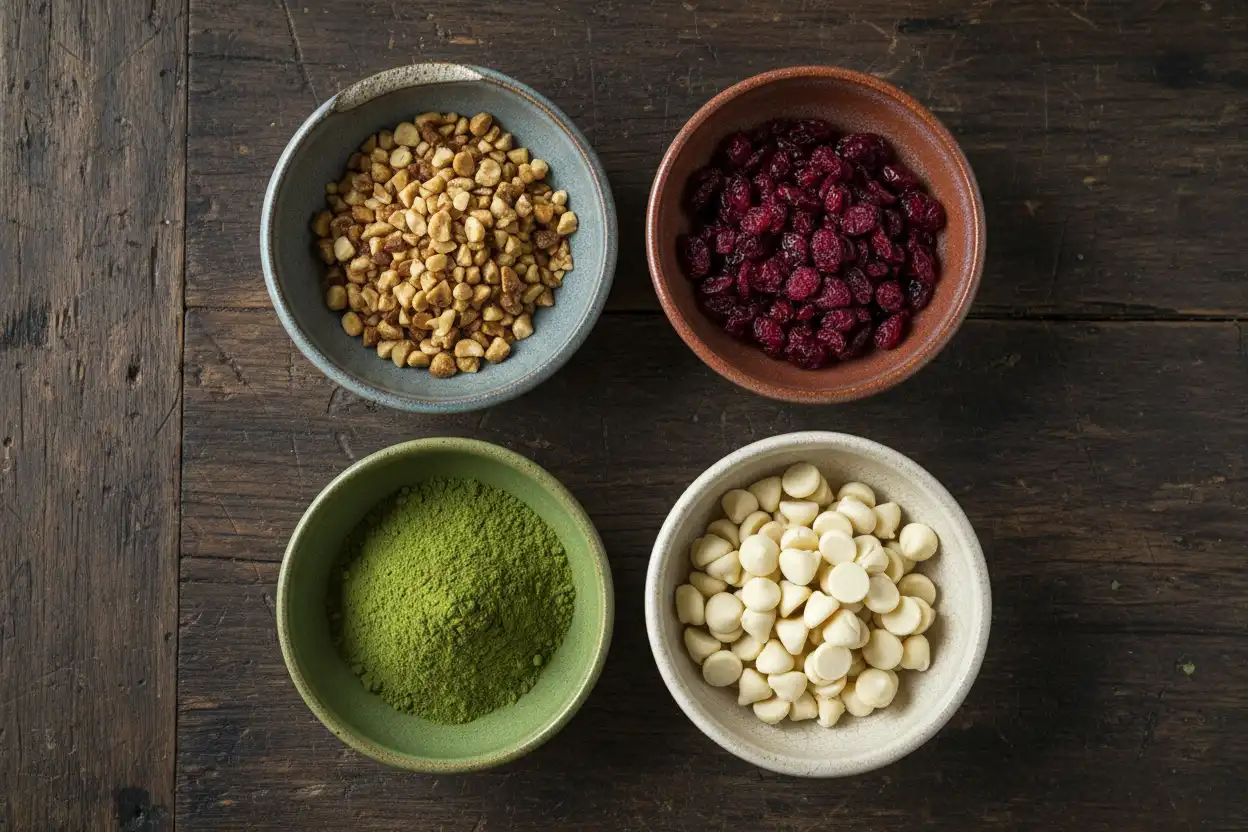
Fold in 75g of raw, roughly chopped macadamia nuts toasted in a dry skillet for 4 minutes. The buttery crunch and subtle earthy flavor cut through the sweetness of the white chocolate chips.
Lightly salted macadamias provide a built-in savory note that enhances the dough’s caramelized butter flavor.
Tart Dried Cranberry Pairing
Incorporate 70g of unsweetened or low-sugar dried cranberries into the dough. The sharp natural acidity cuts through rich cocoa butter, providing bright flavor in every bite.
Ensure dried fruit pieces are pliable; overly dry cranberries can draw essential hydration out of your surrounding dough.
Matcha Green Tea Infusion
Whisk 8g (1 tablespoon) of culinary-grade Japanese matcha powder directly into your dry flour blend. The floral, astringent notes of green tea harmonize naturally with sweet white chocolate.
This creates a vivid green visual contrast against pale white chocolate chips.
Citrus Zest Enhancement
Rub 1 tablespoon of freshly grated orange or Meyer lemon zest into the granulated sugar using your fingers before mixing. The citrus oils infuse the sugar crystals with refreshing brightness.
This easy step balances the sweet profile without introducing excess water that could cause spreading.
Common Mistakes and Direct Solutions
1. The Cookies Spread Into One Thin Sheet
Cause: The butter was too hot when mixed with sugar, or the prepared dough skipped the mandatory chilling period in the refrigerator.
Correction: Chill the unbaked dough balls until they are firm to the touch. If baking in a hot kitchen, keep unused dough in the fridge between baking rounds.
2. The White Chocolate Chips Scorched and Turned Grainy
Cause: Excessive bottom heat from thin pans, or placing trays too low in the oven where heating elements sit.
Correction: Always position racks in the upper-middle third of the oven. Use heavy commercial-grade aluminum pans that distribute thermal energy evenly.
3. Cookies Are Dry, Crumbly, and Stiff
Cause: Too much flour scooped directly out of the bag with a measuring cup, or overbaking past the 11-minute mark.
Correction: Measure flour by weight on a digital scale (240 grams). Pull cookies out while the center is pale and soft; it will continue cooking on the hot sheet.
4. Oily Tops with Puddles of Butter
Cause: The butter and sugar emulsion split because cold eggs were whisked into liquid butter that was still hot.
Correction: Allow melted butter to cool to room temperature before incorporating eggs. Whisk until an opaque, silky paste forms.
Pro Tips for Texture and Storage
The 24-Hour Dough Aging Effect
While 45 minutes of chilling is sufficient, resting dough in an airtight container for 24 hours creates an even better cookie. During this rest, flour enzymes break starches down into simple sugars, and hydration equalizes completely.
The result is a richer toffee-like flavor profile and deeper browning around the perimeter.
High-Altitude Adaptations
Baking at altitudes above 3,500 feet requires minor adjustments due to lower atmospheric pressure and faster evaporation. Increase oven temperature to 365°F (185°C) to set cookie structure quickly.
Add an extra 15 to 20 grams of all-purpose flour, and decrease baking soda by 1/8 teaspoon to avoid excessive spreading.
Freezing Dough for On-Demand Baking
Portion the dough into balls and place them on a tray in the freezer for two hours until frozen solid. Transfer frozen balls into an airtight zip-top freezer bag for up to three months.
Bake directly from frozen at 350°F (175°C), simply adding 90 to 120 seconds to the standard baking duration.
Recommended Kitchen Tools
Consistent baking results rely on having the right equipment. These essential kitchen tools help eliminate guesswork:
- Digital Kitchen Scale: Ensures accuracy down to single grams for uniform flour and butter ratios.
- Heavy Rimmed Baking Sheets: Thick commercial-grade aluminum distributes heat evenly without hot spots.
- Pre-Cut Baking Parchment: Prevents sticking and provides clean release without adding extra greasing fats.
- Spring-Loaded Cookie Scoop (#24 Size): Standardizes dough portions so every cookie bakes at the same rate.
- Oven Thermometer: Verifies real internal oven temperature, which often strays 15 to 25 degrees from digital dials.
Authoritative Educational References
For more technical details on baking science and ingredient standards, explore these reliable educational resources:
- United States Food and Drug Administration (FDA): 21 CFR 163.124 — Standard of identity detailing legal requirements for white chocolate components.
- USDA FoodData Central: Nutritional composition and fat profiles comparing cocoa butter to palm kernel substitutes.
- King Arthur Baking School: Protein levels in unbleached all-purpose flours and their impact on cookie chewiness.
Key Baking Takeaways
- Check the Chocolate: Look for at least 20% cocoa butter on the label to avoid waxy, palm oil-based chips.
- Scale by Weight: Weigh your flour (240g) to prevent dense, dry cookie texture.
- Control the Spread: Chill shaped dough balls for at least 45 minutes before baking.
- Do Not Overbake: Pull trays out when the borders turn light golden; the soft centers finish setting on the warm pan.
- Balance Sweetness: Dark brown sugar and a pinch of flaky sea salt balance the sweet profile of white chocolate chips.
Bake Your Best Batch Today
Baking exceptional cookies with white chocolate chips comes down to balancing sweet mix-ins with solid pastry fundamentals. By pairing genuine cocoa butter with brown sugar and an extra egg yolk, you can turn a simple home recipe into a bakery-worthy treat.
Weigh your ingredients, chill your dough, and enjoy warm, fresh cookies straight from your oven.
Frequently Asked Questions
Why do cookies with white chocolate chips brown faster than classic chocolate chip cookies?
White chocolate contains higher ratios of dairy milk solids and sugar than dark chocolate. These milk proteins caramelize and scorch quickly when exposed to sustained radiant oven heat. Bake on the middle rack at 350°F (175°C) and pull the cookies before the top surfaces brown.
What is the real difference between white chocolate chips and vanilla baking chips?
True white chocolate chips are made with genuine cocoa butter extracted from cacao beans. Vanilla baking chips replace expensive cocoa butter with hydrogenated palm kernel or vegetable oils. Real white chocolate melts smoothly at body temperature, while vanilla chips have a higher melting point and a waxy mouthfeel.
Can I freeze the dough for cookies with white chocolate chips?
Yes, portion the dough into balls and place them on a tray in the freezer for two hours until solid. Store the frozen dough portions in an airtight freezer bag for up to three months. Bake straight from frozen at 350°F (175°C), adding two minutes to the normal baking duration.
Why did my white chocolate chip cookies turn out flat and greasy?
This happens when hot melted butter is mixed with sugar without cooling first, or when the dough is baked without chilling. Warm butter breaks down gluten structure and melts before starches can expand. Chill your dough for at least 45 minutes to firm up fats before baking.
Should I melt or cream the butter for chewy cookies with white chocolate chips?
Melt the butter for a dense, chewy crumb. Creaming butter incorporates micro air pockets that produce a light, cake-like texture. Melted butter mixes smoothly with brown sugar to retain moisture and create a satisfying, fudgy center.
How do I prevent white chocolate chips from turning hard or chalky in the oven?
Hard, chalky white chips are a sign of heat damage. Real cocoa butter chips dry out and separate into chalky curds when exposed to excessive heat. Use heavy baking sheets, avoid baking past 11 minutes, and press a few fresh chips on top right after the pan leaves the oven.
Can I add macadamia nuts or cranberries without changing the base dough?
Yes, you can easily add nuts or dried fruit. Replace 50 to 75 grams of the white chocolate chips with chopped toasted macadamias or dried cranberries so the total mix-in weight stays around 225 to 250 grams. This keeps the dough cohesive and easy to scoop.
How long do freshly baked white chocolate chip cookies stay soft?
When stored in an airtight container with a slice of plain sandwich bread, these cookies stay soft for five to six days. The high brown sugar content and extra egg yolk hold moisture well. The bread provides ambient humidity so the cookies do not dry out.