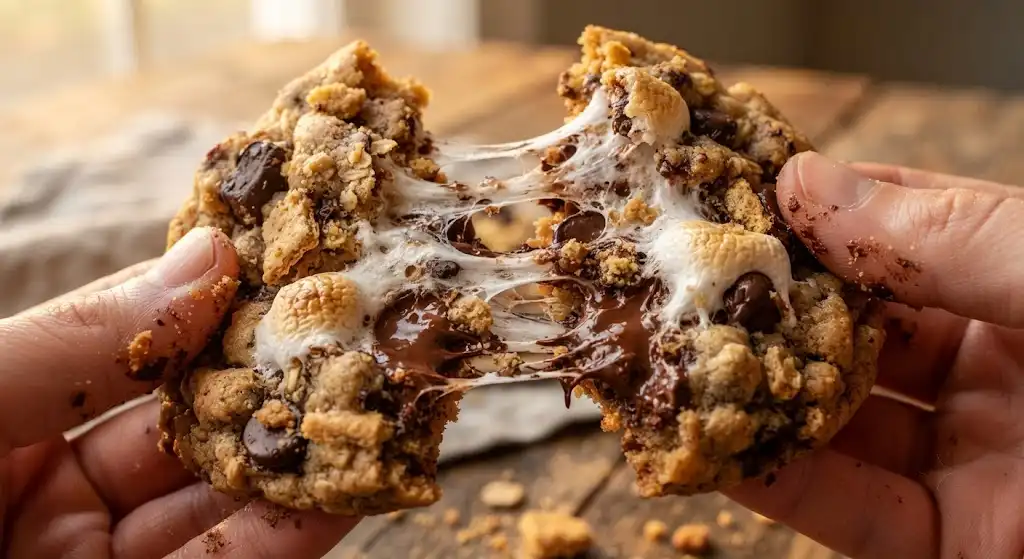
There’s something nostalgic about the combination of graham crackers, gooey marshmallows, and melted chocolate. This s’mores cookie recipe brings that campfire flavor into a soft, chewy cookie you can bake any time of year—no fire pit required.
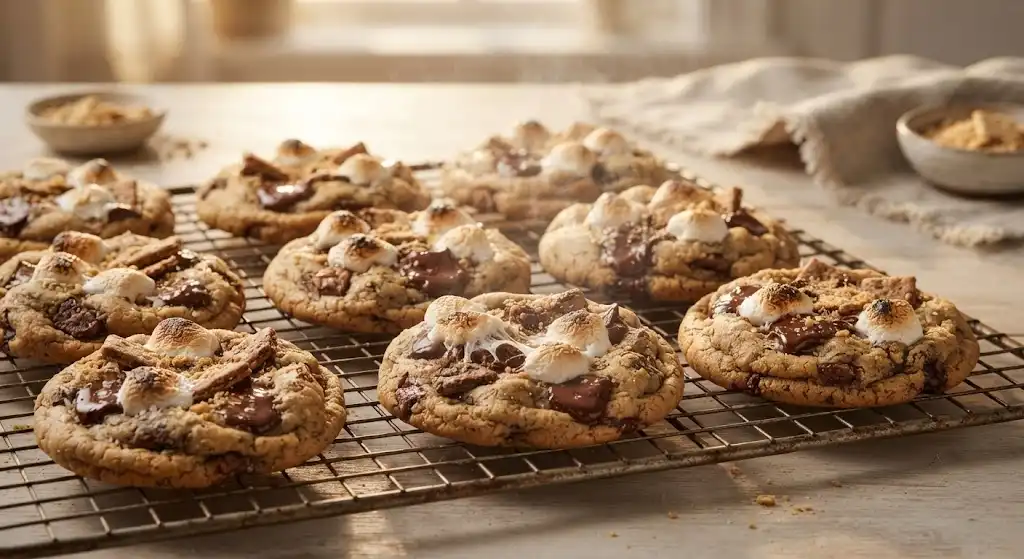
These cookies are rich, buttery, slightly crisp at the edges, and packed with chocolate and marshmallow in every bite. They’re perfect for bake sales, summer parties, cozy weekends, lunchbox treats, or whenever you want a dessert that feels playful but still homemade.
What Makes These Cookies So Good?
Classic s’mores are simple, but turning them into cookies gives you more texture, more control, and a treat that travels well. Instead of stacking graham crackers, chocolate, and marshmallows by hand, you fold those flavors into a cookie dough that bakes into golden, chewy rounds.
This recipe works because it balances three key elements:
- Graham cracker crumbs add a warm, honey-like flavor and a slightly sandy texture.
- Chocolate chips or chopped chocolate melt into pockets throughout the cookie.
- Mini marshmallows create gooey centers and lightly toasted tops.
If you love s mores cookies but want something easier to serve than traditional campfire s’mores, this is the kind of recipe you’ll come back to again and again.
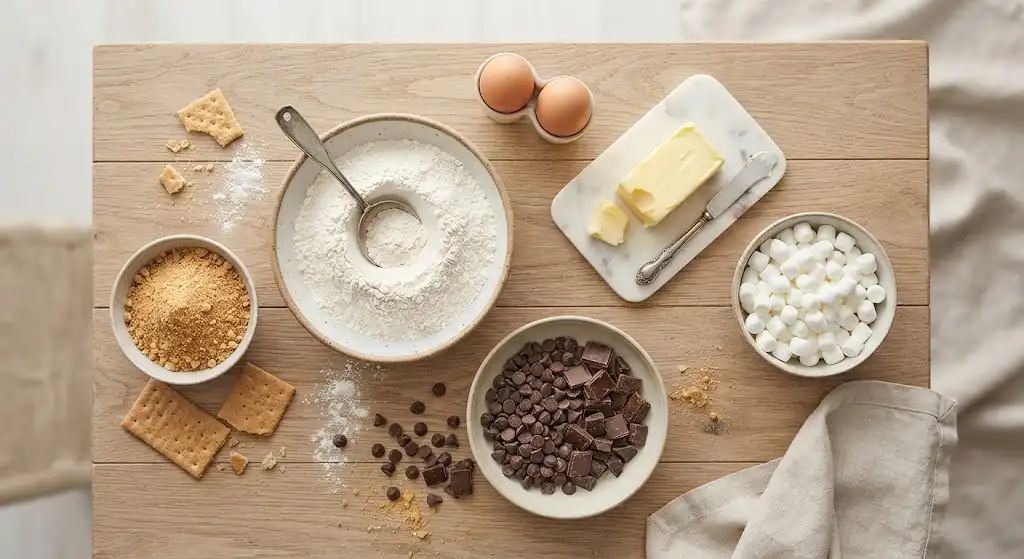
Ingredients You’ll Need
Before you start baking, gather everything so the process feels smooth. The ingredients are simple, but each one plays an important role.
Dry Ingredients
- All-purpose flour: Gives the cookies structure.
- Graham cracker crumbs: Bring that signature s’mores flavor.
- Baking soda: Helps the cookies spread and rise properly.
- Salt: Balances the sweetness and deepens the chocolate flavor.
Wet Ingredients
- Unsalted butter: Use softened butter for a creamy dough and chewy texture.
- Brown sugar: Adds moisture and caramel-like flavor.
- Granulated sugar: Helps the edges become lightly crisp.
- Egg: Binds the dough together.
- Vanilla extract: Rounds out the flavor.
Mix-Ins
- Chocolate chips: Semi-sweet chocolate works well, but milk chocolate gives a more traditional s’mores flavor.
- Mini marshmallows: Easier to distribute than large marshmallows.
- Extra graham cracker pieces: Optional, but great for texture.
- Extra chocolate chunks: Perfect for pressing on top before baking.
Step 1: Prepare Your Baking Sheets
Line two baking sheets with parchment paper. This helps prevent sticking, especially because marshmallows can melt onto the pan and become sticky. Parchment also makes cleanup much easier.
Preheat your oven to 350°F. Let the oven fully preheat before baking so the cookies spread evenly and bake at the right pace.
If you have time, set out your butter in advance so it softens naturally. Softened butter should be cool to the touch but easy to press with your finger. If it’s melted or greasy, the cookies may spread too much.
Step 2: Crush the Graham Crackers
Place graham crackers in a zip-top bag and crush them with a rolling pin, or pulse them in a food processor. You want mostly fine crumbs with a few small pieces for texture.
Avoid leaving large chunks in the dough unless you like extra crunch. Fine crumbs blend better with the flour and help the cookie taste more like a true s’mores dessert.
For extra flavor, reserve a handful of small graham cracker pieces to press onto the tops of the cookies before baking.
Step 3: Mix the Dry Ingredients
In a medium bowl, whisk together:
- All-purpose flour
- Graham cracker crumbs
- Baking soda
- Salt
Whisking helps distribute the baking soda evenly, which prevents uneven spreading or bitter spots in the dough.
Set the dry mixture aside while you make the butter and sugar base.
Step 4: Cream the Butter and Sugars
In a large mixing bowl, beat the softened butter, brown sugar, and granulated sugar together until the mixture looks light and creamy. This usually takes about 2 to 3 minutes with an electric mixer.
This step matters because creaming adds air to the dough. That air helps create cookies that are soft in the middle and lightly crisp around the edges.
If mixing by hand, use a sturdy spoon or spatula and take your time. The mixture should look smooth and fluffy, not grainy and dense.
Step 5: Add the Egg and Vanilla
Beat in the egg until fully combined, then mix in the vanilla extract.
Scrape down the sides of the bowl with a spatula so everything blends evenly. This helps avoid streaks of butter or sugar in the finished dough.
At this stage, the mixture should look creamy and slightly glossy.
Step 6: Combine Wet and Dry Ingredients
Add the dry ingredients to the wet ingredients in two additions. Mix on low speed or stir gently by hand until just combined.
Do not overmix. Once you no longer see dry streaks of flour, stop mixing. Overworking the dough can make the cookies tougher instead of soft and chewy.
The dough should be thick, slightly sticky, and easy to scoop.
Step 7: Fold in Chocolate and Marshmallows
Gently fold in the chocolate chips and mini marshmallows. If you’re making s mores chocolate chip cookies for a more classic cookie texture, use plenty of chocolate chips and keep the marshmallows modest. If you want a gooier dessert, add a few extra marshmallows on top of each dough ball before baking.
One helpful tip: try to keep most marshmallows inside the dough rather than exposed on the bottom. Marshmallows that touch the baking sheet can melt and caramelize quickly. They’ll still taste good, but they may stick or create crisp candy-like edges.
Step 8: Chill the Dough
Chill the dough for at least 30 minutes before baking. This step helps control spreading and gives the graham cracker crumbs time to absorb moisture.
If you want thicker cookies, chill the dough for 1 to 2 hours. If you’re short on time, even a brief chill is better than skipping it entirely.
You can also make the dough ahead and refrigerate it overnight. Let it sit at room temperature for a few minutes before scooping if it becomes too firm.
Step 9: Scoop and Shape the Cookies
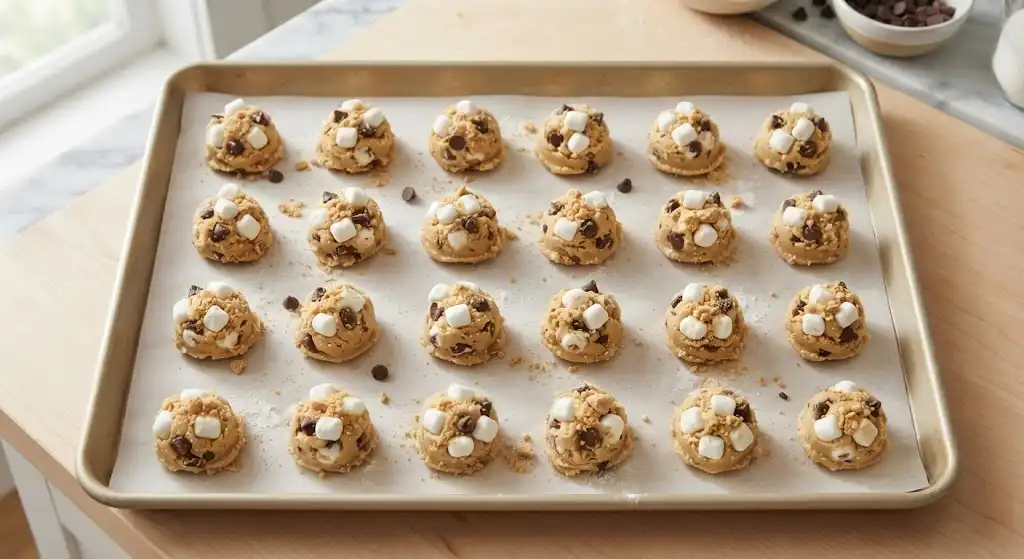
Use a cookie scoop or spoon to portion the dough into balls. Place them a few inches apart on the prepared baking sheets.
For a bakery-style look, press a few extra chocolate chips, graham cracker pieces, and mini marshmallows onto the top of each dough ball. This makes the finished cookies look more inviting and ensures every bite shows off the s’mores ingredients.
If your dough balls have marshmallows on the bottom, gently rotate the dough so the marshmallows are tucked toward the top or center.
Step 10: Bake Until Golden
Bake the cookies at 350°F until the edges are set and lightly golden. The centers should still look slightly soft when you remove them from the oven.
This is important: cookies continue to bake on the hot baking sheet after they come out of the oven. If you wait until the centers look completely firm in the oven, they may become dry once cooled.
For extra gooey chocolate marshmallow cookies, press a few chocolate chunks into the tops right after baking. The residual heat will soften the chocolate without fully melting it away.
Step 11: Let Them Cool Properly
Allow the cookies to cool on the baking sheet for several minutes before moving them to a wire rack. This gives the melted marshmallow time to set and helps the cookies hold their shape.
If any marshmallow has spread around the edges, use a spoon or butter knife to gently nudge the cookie back into a round shape while it’s still warm.
Once cooled, the cookies should be soft in the center, chewy around the edges, and filled with pockets of chocolate and marshmallow.
Tips for the Best Results
A few small adjustments can make a big difference when baking s’mores-inspired cookies.
Use Mini Marshmallows
Mini marshmallows distribute more evenly and melt more predictably than large marshmallows. If you only have large marshmallows, cut them into smaller pieces with kitchen scissors.
Don’t Skip the Parchment Paper
Marshmallows are sticky when melted. Parchment paper protects your baking sheets and makes it easier to lift the cookies without tearing them.
Add Chocolate on Top
Pressing chocolate into the cookies before or after baking creates a more decadent look and flavor. Chopped chocolate bars melt especially well.
Watch the Bake Time
S’mores cookies are best when slightly underbaked in the center. Look for set edges and soft middles.
Balance the Sweetness
Because marshmallows and chocolate are sweet, salt is important. Don’t leave it out. A tiny sprinkle of flaky salt on top can also make the flavor more balanced.
Easy Variations to Try
Once you’ve made the basic recipe, you can customize it based on what you have in your pantry.
Double Chocolate S’mores Cookies
Replace a small portion of the flour with unsweetened cocoa powder and use chocolate chunks. This creates a deeper chocolate flavor and turns the recipe into an even richer version of chocolate marshmallow cookies.
Peanut Butter S’mores Cookies
Add peanut butter chips or a few spoonfuls of creamy peanut butter to the dough. Peanut butter pairs beautifully with graham crackers and chocolate.
Salted Caramel S’mores Cookies
Fold in soft caramel bits and finish the baked cookies with a light sprinkle of flaky sea salt.
Milk Chocolate Campfire Style
Use chopped milk chocolate bars instead of semi-sweet chips for a flavor closer to traditional s’mores.
Cookie Bar Version
If you don’t want to scoop individual cookies, press the dough into a parchment-lined baking pan and bake it as s’mores cookie bars. This method is great for parties because you can slice the bars into squares once cooled. Keep an eye on the center, since bars usually need a little more baking time than individual cookies.
How to Store S’mores Cookies
Store cooled cookies in an airtight container at room temperature. They’re usually best within a few days, when the texture is still soft and the marshmallows remain chewy.
To keep them fresh, place a small piece of bread in the container. The cookies absorb moisture from the bread, helping them stay softer for longer.
If the cookies become firm, warm one in the microwave for a few seconds. The chocolate will soften and the marshmallow will become gooey again.
Can You Freeze Them?
Yes, these cookies freeze well. You can freeze either the baked cookies or the unbaked dough.
To Freeze Baked Cookies
Let the cookies cool completely. Place them in a freezer-safe container with parchment between layers. Thaw at room temperature before serving.
To Freeze Cookie Dough
Scoop the dough into balls and freeze them on a baking sheet until firm. Transfer the frozen dough balls to a freezer-safe bag or container. Bake from frozen, adding a little extra time as needed.
Freezing the dough is especially convenient when you want fresh s’mores cookies without making a full batch at once.
Common Mistakes to Avoid
Even simple recipes can go sideways. Here are the most common issues and how to prevent them.
The Cookies Spread Too Much
This usually happens when the butter is too warm or the dough wasn’t chilled. Chill the dough longer and make sure your baking sheets are cool before adding the next batch.
The Marshmallows Melted Everywhere
Some melting is normal, but too many exposed marshmallows can spill out. Tuck marshmallows into the dough and avoid placing them directly on the bottom.
The Cookies Turned Dry
They may have baked too long or had too much flour. Measure flour carefully and remove the cookies when the centers still look soft.
The Flavor Isn’t Strong Enough
Add more graham cracker crumbs, use chopped chocolate instead of only chips, and finish with a tiny pinch of salt to make the flavors pop.
Serving Ideas
These cookies are delicious on their own, but you can make them feel extra special with simple serving ideas:
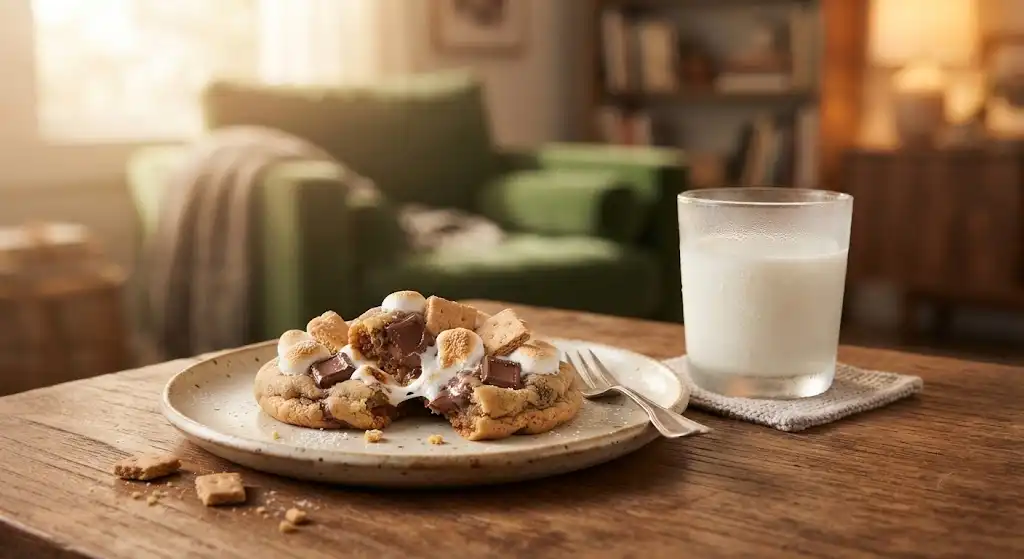
- Serve warm with a glass of cold milk.
- Crumble over vanilla ice cream.
- Pack into picnic boxes or lunch bags.
- Add to a dessert board with fruit, pretzels, and chocolate.
- Sandwich a scoop of ice cream between two cookies.
They’re casual enough for everyday snacking but fun enough for birthdays, cookouts, and holiday dessert trays.
Final Baking Notes
The best s’mores cookies taste like a campfire treat in cookie form: buttery dough, sweet graham cracker flavor, gooey marshmallow, and plenty of chocolate. Chilling the dough, using parchment paper, and keeping an eye on the bake time will help you get soft, chewy cookies with just the right amount of toasted sweetness.
Whether you make classic rounds, extra-chocolatey versions, or easy s’mores cookie bars, this recipe is a simple way to bring a favorite nostalgic dessert into your kitchen all year long.