Small Batch of Chocolate Chip Cookies: The Definitive Bakery-Style Guide
Table of Contents
- Featured Baker’s Summary
- Introduction: Why Small-Batch Baking Requires Different Science
- The Science of Scaling Down: Why Standard Division Fails
- Cracking the Egg Problem: Yolks, Whites, and Volume Ratios
- Fat and Sugar Dynamics: Melted Butter vs. Creamed Butter
- The Master Recipe: 6 Large Bakery-Style Cookies
- Step-by-Step Baking Method
- Small-Batch Formulation Comparison Matrix
- Baking Appliance Dynamics: Standard Oven vs. Toaster Oven vs. Air Fryer
- Professional Pastry Tips for Small Batches
- Common Small-Batch Mistakes and Fixes
- Freezing, Storing, and Single-Cookie Baking
- Essential Equipment for Small-Scale Baking
- Related Baking Guides
- Authoritative Culinary Resources
- Key Takeaways
- Next Steps for the Home Baker
- Frequently Asked Questions
Quick Answer: The Golden Ratio for 6 Perfect Cookies
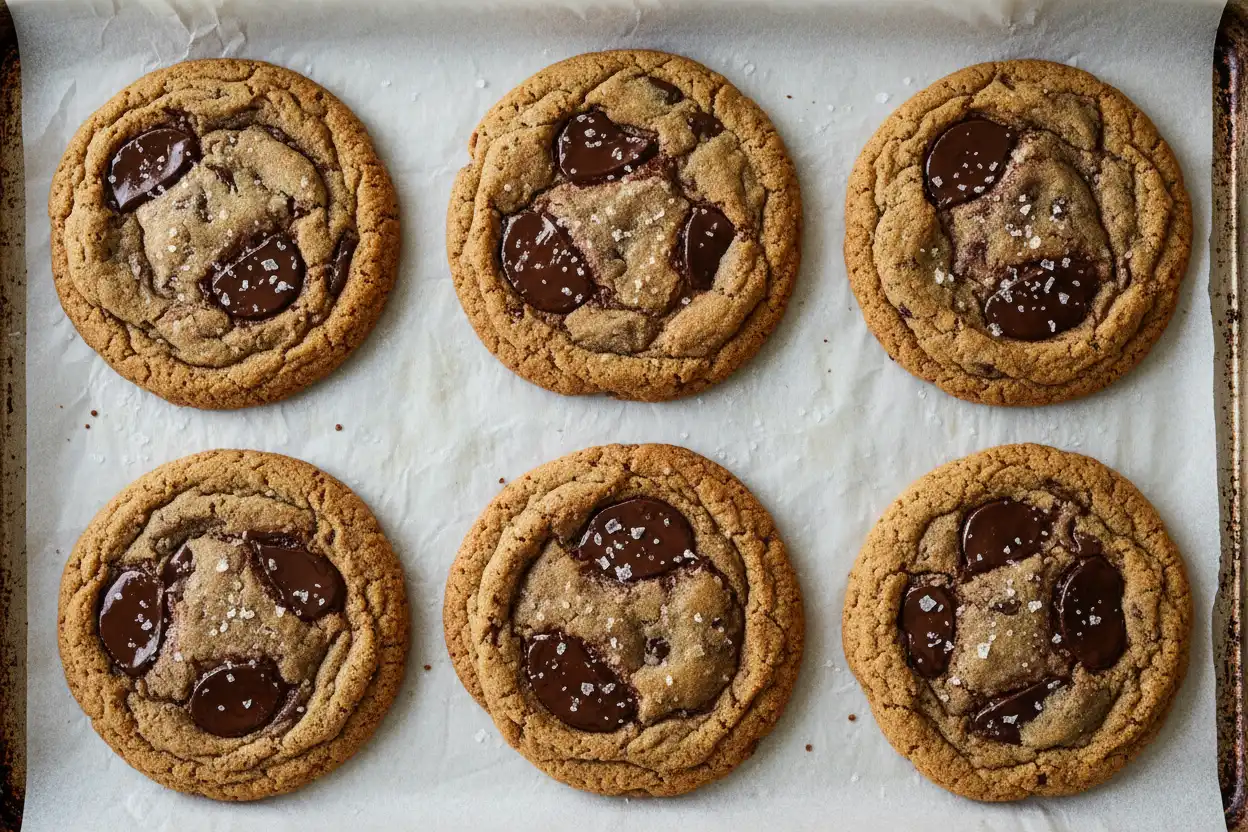
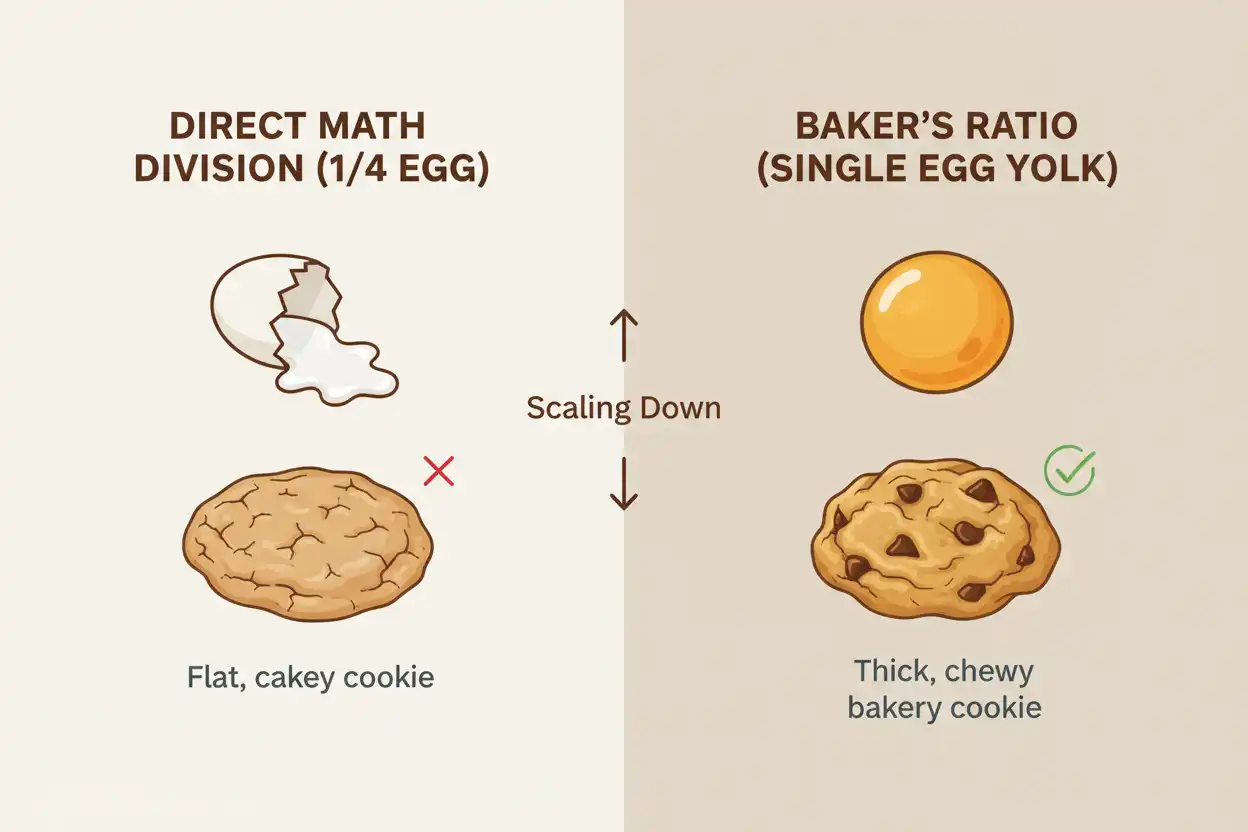
To bake a true small batch of chocolate chip cookies yielding 6 thick bakery-style cookies, you cannot simply divide a standard 24-cookie recipe by four. Dividing by four leaves you with one-quarter of an egg, which creates structural imbalances, dry edges, or rubbery crumb profiles.
The solution is using one single large egg yolk combined with 57 grams (1/2 stick) of unsalted butter, 65 grams of dark brown sugar, 25 grams of granulated white sugar, and 115 grams of all-purpose flour. The fat and emulsifying lecithin in the yolk provide moisture and chew without the excess water contained in the white.
- Yield: Exactly 6 bakery-scale cookies (approx. 65 grams raw dough each).
- Core Secret: A single egg yolk eliminates cakey texture and preserves a gooey center.
- Active Time: 15 minutes preparation, zero electric stand mixers required.
Introduction: Why Small-Batch Baking Requires Different Science
Baking a small batch of chocolate chip cookies is the ideal solution for singles, couples, or small households craving fresh dessert without dozens of leftovers lingering on the counter. Standard recipes yield between 24 and 36 cookies, demanding massive mixing bowls, multiple baking sheets, and days of consumption before staleness sets in.
Scaling down cookie dough is not simple arithmetic. In pastry arts, ingredients do not scale down linearly when dealing with volatile factors like moisture evaporation, surface-area-to-mass ratios, and whole egg fractions. A recipe cut down incorrectly produces thin, greasy puddles or dry, sponge-like biscuits.
This guide breaks down the physical and chemical mechanics behind miniature-yield baking. You will learn the exact weights, fat choices, sugar ratios, and thermal steps needed to produce a professional-grade batch of 6 to 8 cookies directly from a single mixing bowl.
The Science of Scaling Down: Why Standard Division Fails
Traditional culinary recipes scale by volume, but baking operates strictly on baker’s percentages, where every ingredient is quantified as a percentage of total flour weight. When you scale down a standard family-sized batch, three critical variables break down: evaporative loss, mixing shear, and mechanical air entrapment.
In a commercial-sized batch of 30 cookies, minor evaporation during mixing and portioning accounts for less than 1% of total moisture loss. In a micro-batch yielding 6 cookies, the ambient air in your kitchen strips surface moisture from the bowl at a significantly higher proportion. If your hydration balance is even 5 grams off, your dough will either spread uncontrollably or refuse to collapse into a disk.
Furthermore, standard electric stand mixers fail with miniature dough quantities. The paddle attachment cannot make sufficient friction-contact with 50 grams of sugar and 57 grams of butter, skimming overhead and leaving unmixed pockets of fat. Hand-whisking with melted butter eliminates the need for mechanical creaming while ensuring complete emulsification.
Thermal Mass and Oven Airflow
A single cookie sheet bearing only six dough portions absorbs heat differently than a crowded sheet carrying twelve to sixteen portions. The increased open surface area of the baking sheet causes radiant heat to rise rapidly around the perimeter of each cookie.
Because there is less overall mass inside the oven to absorb heat energy, ambient oven temperatures experience fewer drop-offs when opening the door. This higher sustained heat requires precise bake timing to prevent scorched bottoms and overcooked centers.
Cracking the Egg Problem: Yolks, Whites, and Volume Ratios
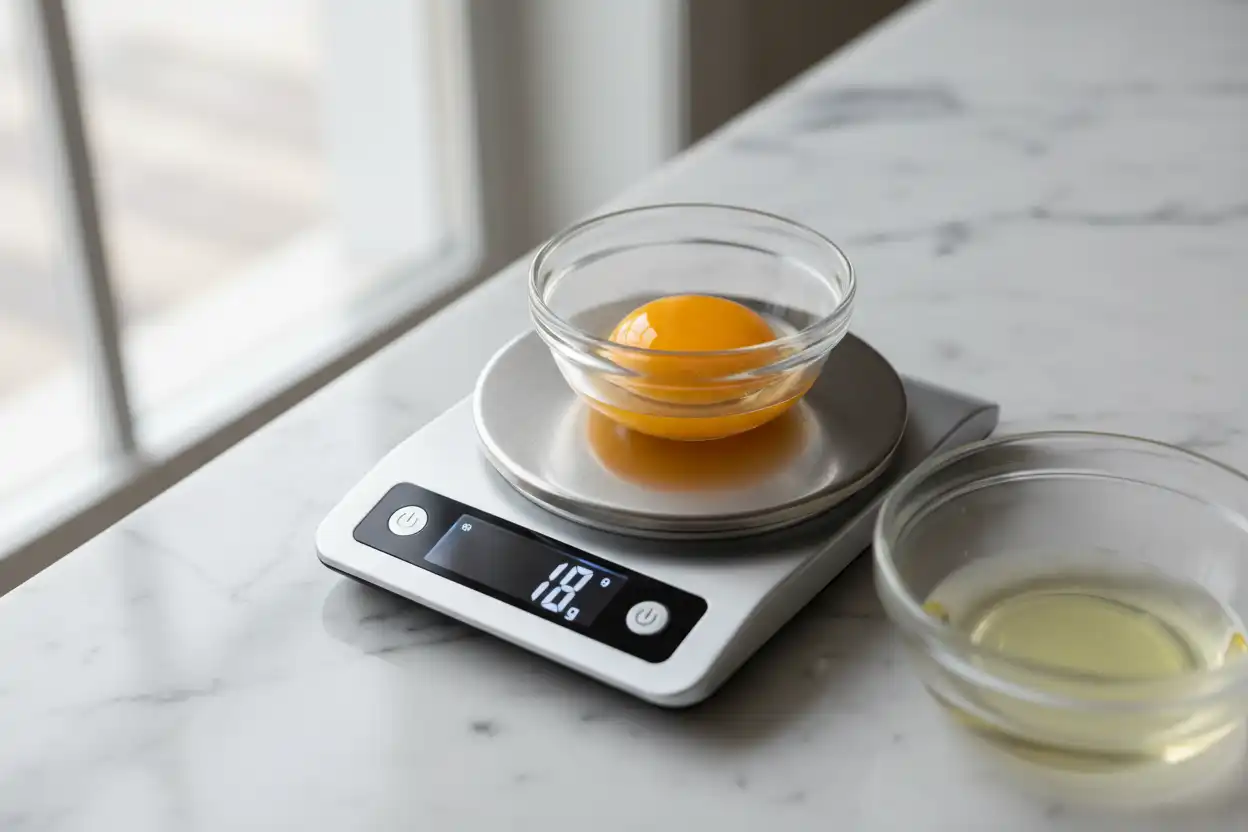
The single greatest hurdle in formulating a small batch of chocolate chip cookies is the egg. A standard large USDA egg weighs approximately 50 grams out of the shell, consisting of roughly 30 grams of egg white (albumen) and 18 to 20 grams of yolk.
When dividing a standard two-egg recipe into quarters to yield 6 cookies, the mathematical requirement is 12.5 to 15 grams of whole egg. Attempting to eyeball one tablespoon of beaten egg frequently introduces too much white or too much yolk, destroying batch consistency.
The Danger of Excess Egg White
Egg white is roughly 88% water and 10% protein. Introducing excessive white into a small-batch dough over-hydrates the flour, stimulating gluten development and creating steam pockets during baking.
This excess steam leads to a cake-like, domed cookie lacking chewiness and crisp borders. Without sufficient sugar-to-water concentration, the dough fails to spread properly, resulting in a pale, puffy disc rather than a golden, corrugated perimeter.
Why One Whole Egg Yolk Is the Ideal Solution
Using exclusively one large egg yolk (18–20 grams) provides the exact volume of liquid and fat needed for a 6-cookie batch. The yolk contains natural lecithin, an emulsifier that bonds the water from the vanilla and butter solids with the fat molecules.
This emulsification produces a dense, rich crumb with a velvety interior that remains soft for days. The lower water content prevents the premature dissolution of sucrose crystals, encouraging proper Maillard browning and spread.
Fat and Sugar Dynamics: Melted Butter vs. Creamed Butter
Butter controls spread, crispness, and flavor delivery. The physical state of the butter when it enters the mixing bowl dictates the final texture of your cookie.
Melted Butter: The Chewy, Dense Profile
Melted butter binds easily with granulated and brown sugars without incorporating micro-pockets of air. When liquid butter coats the flour particles, it forms an immediate barrier against excessive gluten synthesis.
This method produces cookies with glossy surfaces, crinkled tops, and dense, fudgy interiors. It also eliminates the need to wait for butter to soften to room temperature, reducing prep time to under ten minutes.
Browned Butter: Moisture Loss Calculations
Browning the butter elevates flavor through toasted milk solids, imparting notes of hazelnut and butterscotch. However, browning evaporates the natural 16–18% water content inherent to dairy butter.
If you use 57 grams of browned butter without replacing the lost liquid, the dough will be dangerously dry and crumbly. When substituting browned butter in this small batch, stir in 1 teaspoon (5 ml) of whole milk or water alongside the vanilla extract to restore baseline hydration.
The Sugar Matrix: Brown vs. Granulated
Brown sugar is hygroscopic, meaning it attracts and retains moisture even after baking. It contains acidic molasses that activates chemical leaveners like sodium bicarbonate (baking soda).
Granulated white sugar promotes spreading and caramelizes at high surface temperatures to produce delicate, crisp rims. The ideal ratio for a chewy, bakery-style small batch is approximately 2.5 parts brown sugar to 1 part white sugar.
The Master Recipe: 6 Large Bakery-Style Cookies
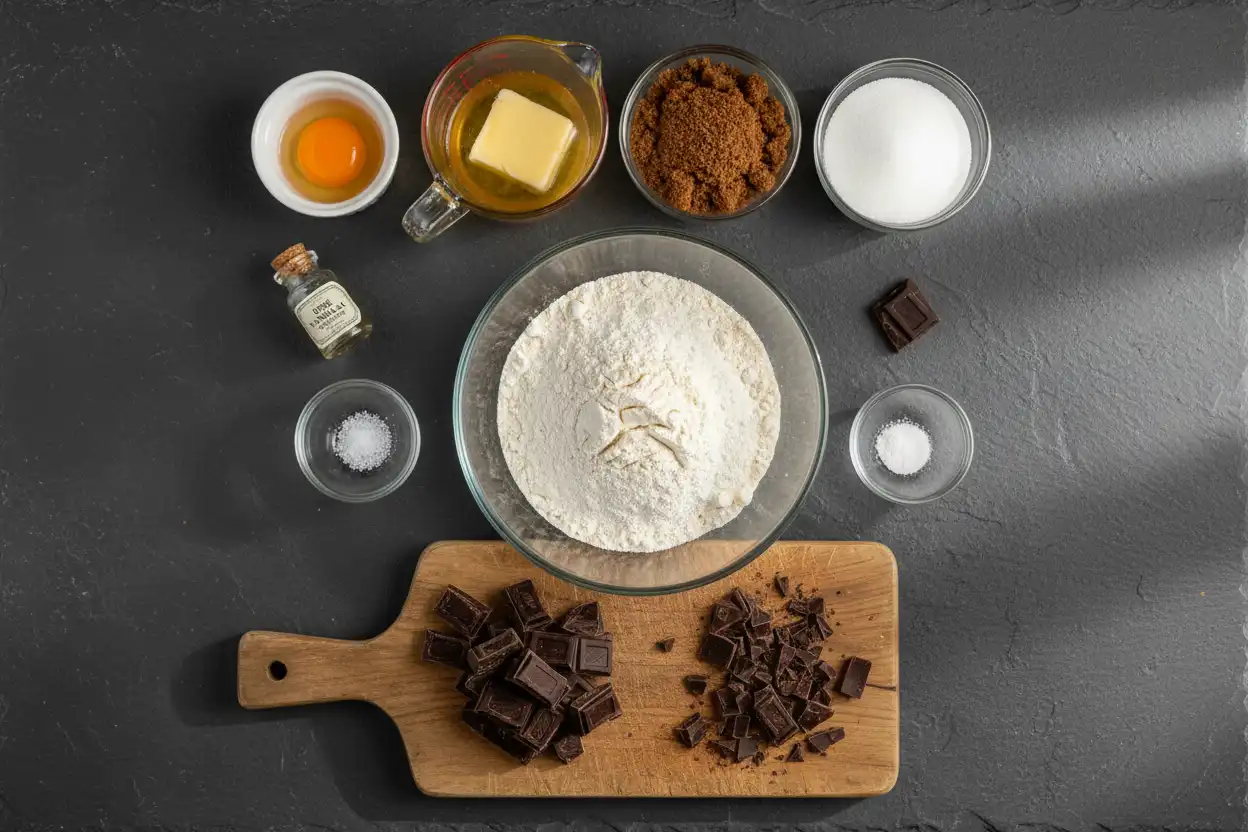
This formula is balanced by weight to ensure uniform execution in every kitchen environment. Measuring by weight with an inexpensive digital food scale is strongly recommended over volumetric cups.
Ingredient Formulation by Weight & Volume
- Unsalted Butter: 57 grams (4 tablespoons / 1/2 stick), melted warm.
- Dark Brown Sugar: 65 grams (1/3 cup firmly packed).
- Granulated White Sugar: 25 grams (2 level tablespoons).
- Large Egg Yolk: 1 single yolk (18–20 grams), cold or room temperature.
- Pure Vanilla Extract: 2.5 grams (1/2 teaspoon).
- All-Purpose Flour: 115 grams (3/4 cup + 1 tablespoon spooned and leveled).
- Baking Soda: 1.2 grams (1/4 level teaspoon).
- Fine Sea Salt: 1.5 grams (1/4 rounded teaspoon).
- Semi-Sweet or Bittersweet Chocolate: 85 grams (3 ounces), roughly chopped into coarse chunks and fine shards.
- Flaky Sea Salt: Optional, for finishing garnish.
Yield & Batch Profile: Exactly 6 bakery-scale cookies weighing approximately 60–65 grams per dough ball, or 8 medium home-style cookies weighing approximately 45 grams each.
Step-by-Step Baking Method
Follow these progressive stages to build emulsion, develop structure, and achieve uniform caramelization across all six cookies.
Step 1: Fat and Sugar Emulsification
What: Combine warm melted butter with the brown sugar and granulated sugar in a medium mixing bowl.
Why: The warm fat begins dissolving the exterior sucrose crystals, releasing molasses compounds from the brown sugar and laying the foundation for a glossy crust.
How: Whisk vigorously by hand for 60 to 90 seconds. The mixture will transition from separated oil and sugar granules into a unified, glossy suspension resembling smooth caramel.
Common Mistake: Using scalding hot butter straight off the burner. If the butter is hotter than 120°F (49°C), it will partially cook the egg yolk in the next step.
Pro Tip: Let the melted butter rest for 3 minutes before pouring it over the sugars to achieve an optimal blending temperature.
Step 2: Incorporating the Binding Liquids
What: Add the single egg yolk and pure vanilla extract directly into the butter-sugar mixture.
Why: Egg yolk contains natural fats and lecithin, which bind the hydrophobic butter fats with the hydrophilic sugar syrup into an emulsion.
How: Whisk briskly for 45 seconds until the mixture thickens visibly and takes on an opaque, ribbon-like consistency when you lift the whisk.
Common Mistake: Whisking for several minutes. Excessive aeration creates a meringue-like sponge that causes the cookies to collapse into wrinkled hollows.
Pro Tip: Ensure the yolk is fully incorporated before adding dry components to prevent streakiness in the baked crumb.
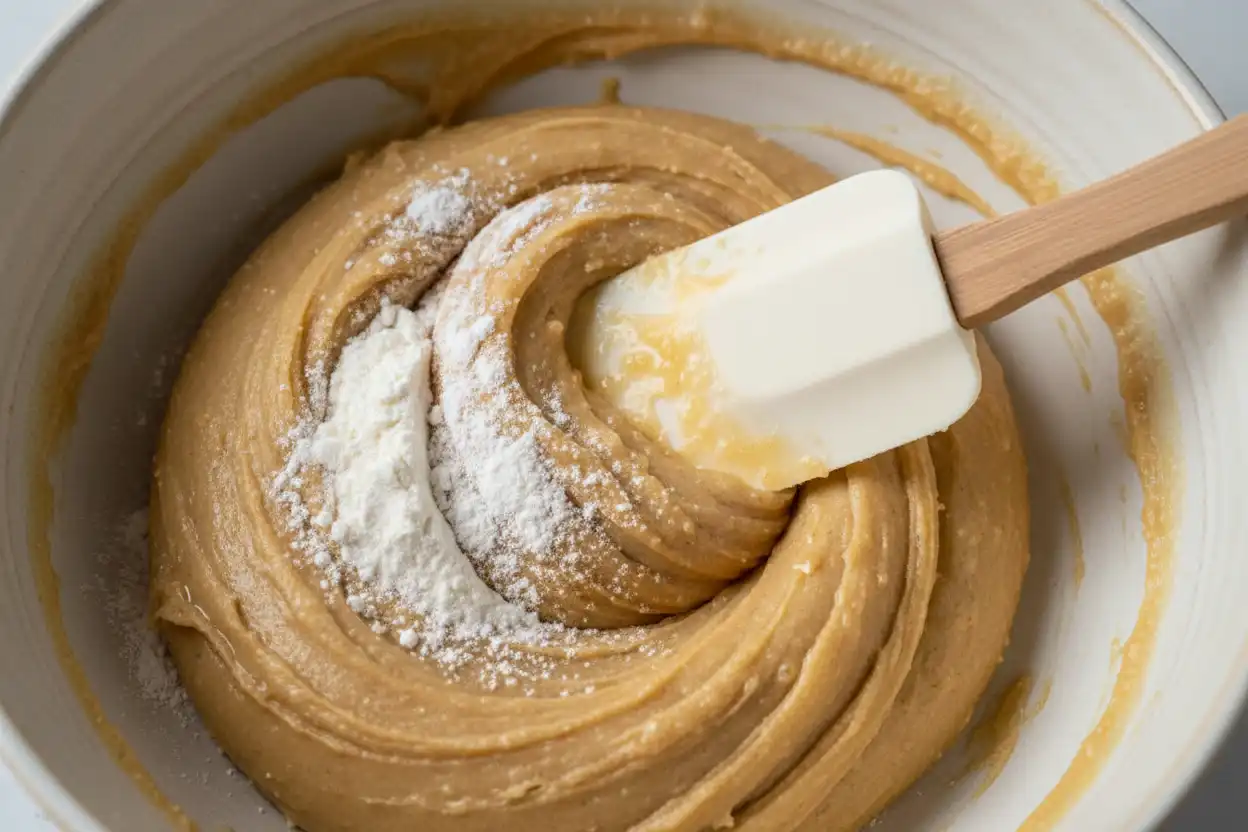
Step 3: Dry Ingredient Incorporation
What: Add the all-purpose flour, baking soda, and fine sea salt to the bowl.
Why: Chemical leavening must be evenly dispersed through the flour matrix to prevent localized bitter pockets of unreacted sodium bicarbonate.
How: Switch from a whisk to a stiff silicone spatula. Fold the mixture gently, scraping the sides and bottom of the bowl until a soft, cohesive dough forms and approximately 90% of the visible flour disappears.
Common Mistake: Over-mixing the dough. Stirring vigorously builds an elastic gluten network, turning tender, chewy cookies into tough, bready pucks.
Pro Tip: Stop mixing while a few faint streaks of white flour remain visible before adding the chocolate chunks.
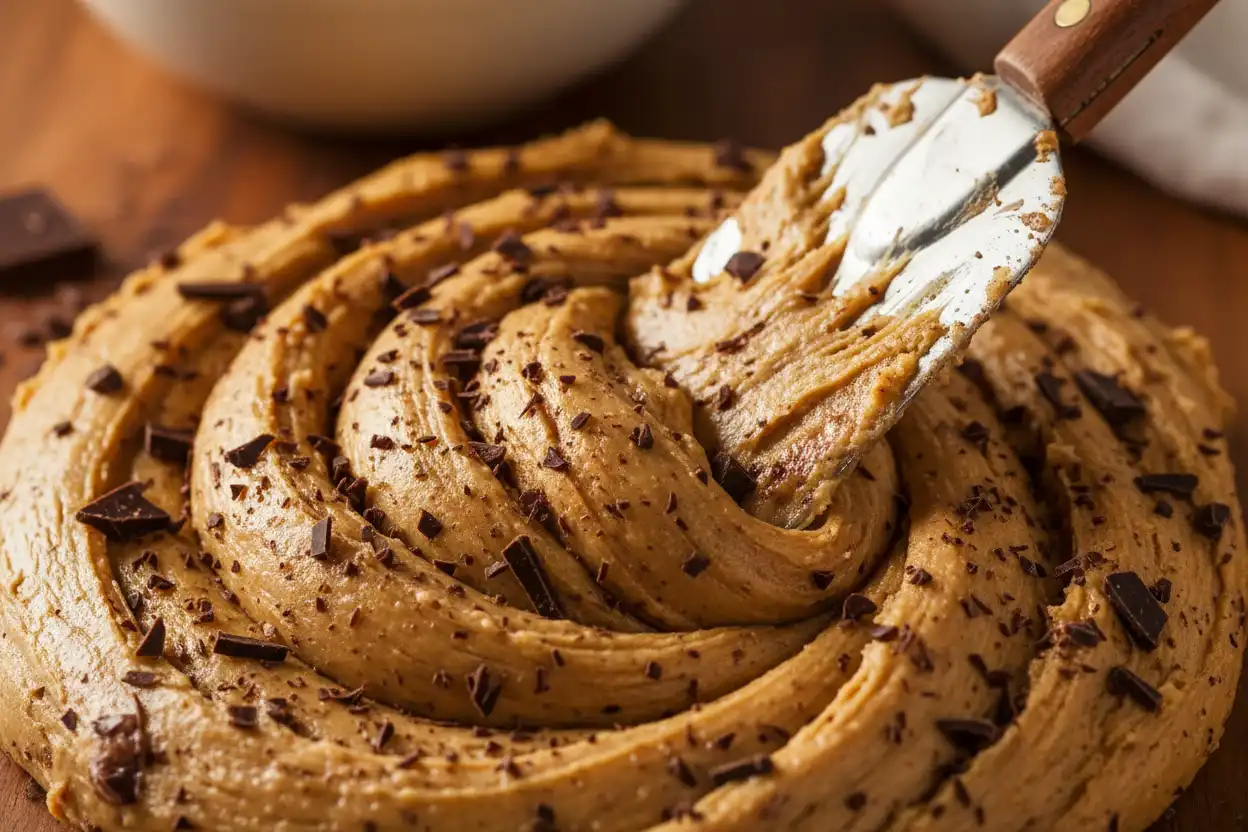
Step 4: Layering the Chocolate Matrix
What: Fold in the chopped chocolate chunks and fine chocolate shards.
Why: Chopped bar chocolate provides two structural advantages over commercial chocolate chips: irregular pockets of molten chocolate and micro-shards that disperse flavor throughout every bite of dough.
How: Pour the chopped chocolate into the bowl and fold with the spatula four to five times until evenly distributed throughout the dough mass.
Common Mistake: Using solely standard wax-stabilized chocolate chips. These contain stabilizers that inhibit spread and prevent decadent, molten pools.
Pro Tip: Reserve 1 tablespoon of clean chocolate chunks to press onto the top of the portioned dough balls right before baking.
Step 5: Portioning and Geometry
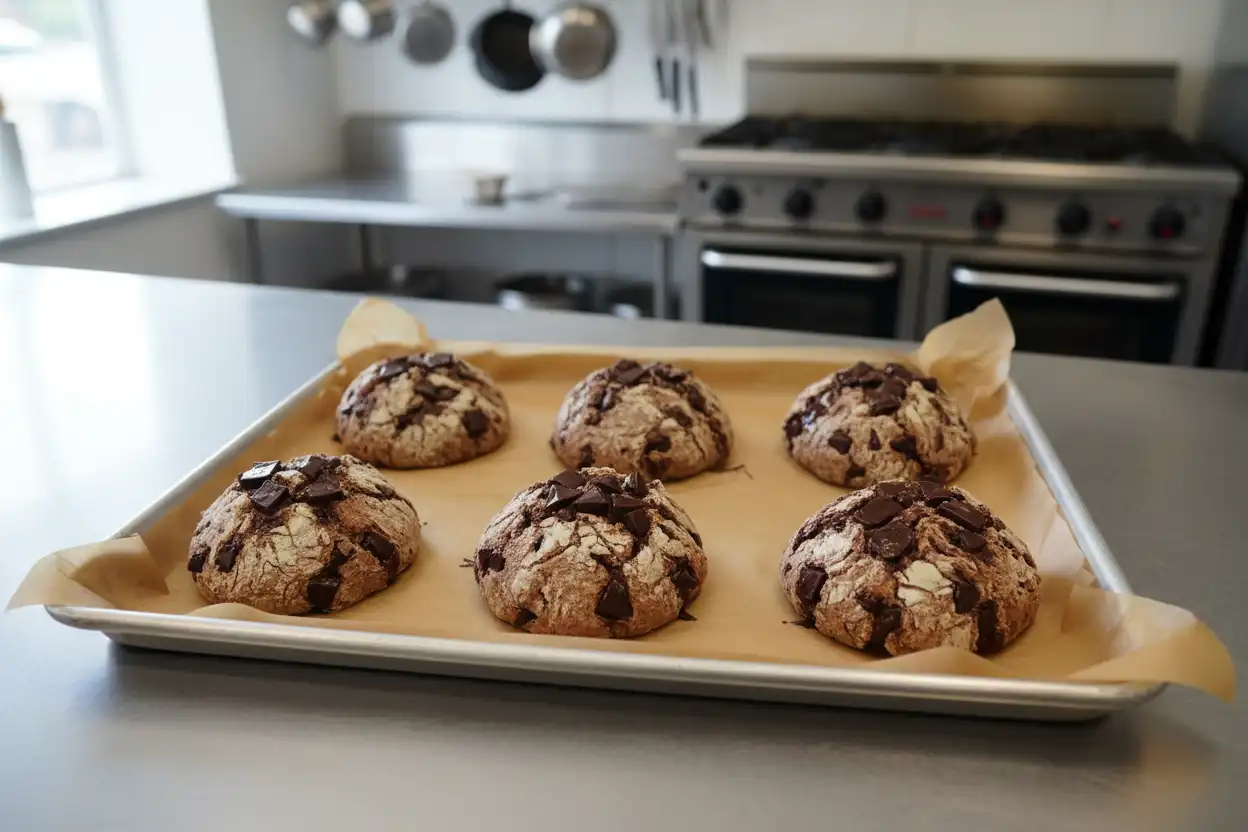
What: Divide the dough into exactly six equal portions, roughly 60 to 65 grams each (or roughly 2 standard tablespoons per portion).
Why: Uniform weight ensures identical heat penetration and simultaneous baking times across the entire tray.
How: Roll each portion between your palms into a tall cylinder or sphere, then tear the ball in half and press the two halves back together with the rough, jagged interior edges facing upward.
Common Mistake: Leaving the dough balls perfectly smooth. Smooth dough bakes with a flat, homogenous surface rather than deep, appetizing fissures.
Pro Tip: Arrange the six dough balls on a quarter-sheet pan lined with parchment paper, leaving at least 2.5 inches of open space between each cookie.
Step 6: Thermal Chilling (Hydration Window)
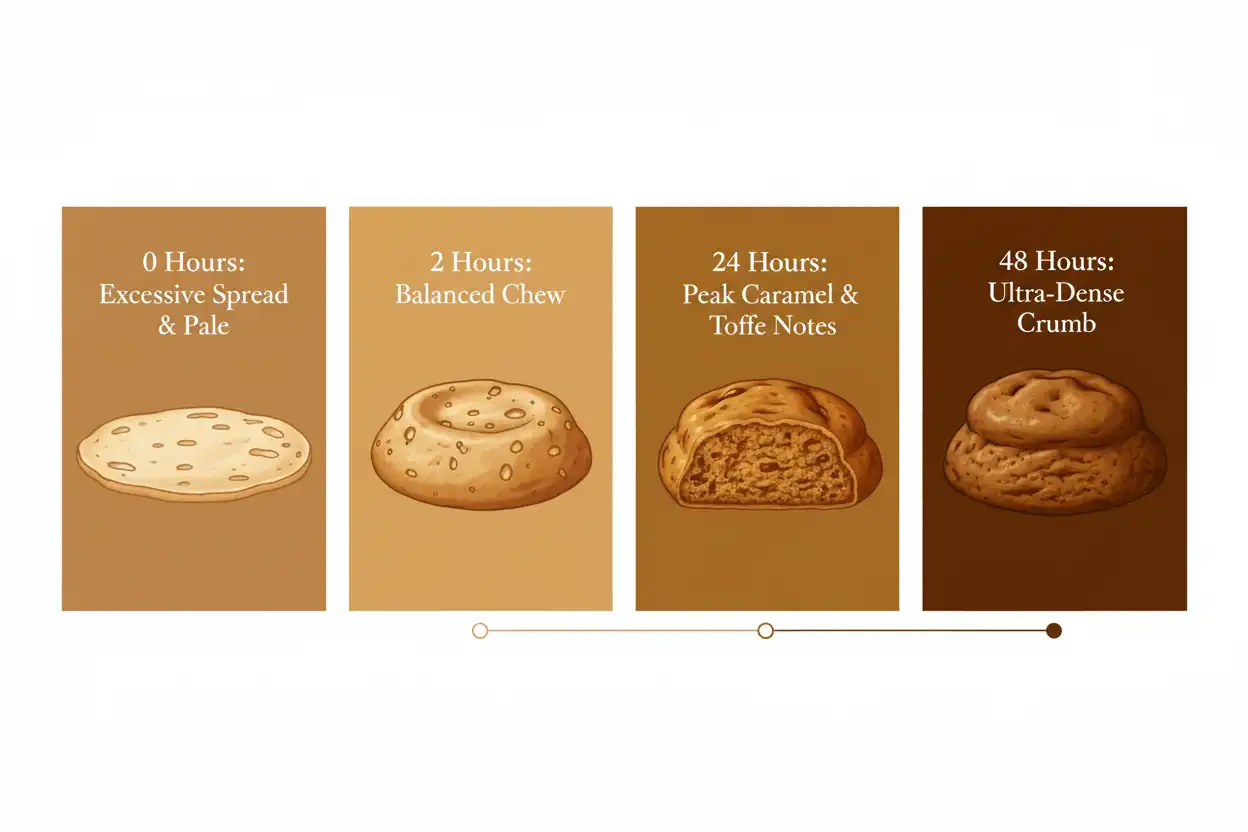
What: Place the portioned tray of dough balls into the refrigerator for a minimum of 30 minutes, or up to 24 hours.
Why: Chilling allows the flour proteins and starches to absorb moisture completely from the butter and yolk while solidifying the dairy fat. Solidified fat melts slower in the oven, curbing premature spreading.
How: Cover the pan loosely with wax paper or plastic wrap to shield the dough from ambient refrigerator odors.
Common Mistake: Skipping the chill step completely when baking with melted butter. Unchilled melted-butter dough spreads flat and thin within five minutes of hitting the oven.
Pro Tip: If you are in an extreme rush, chill the portions in the freezer for 12 minutes to drop the internal fat temperature quickly.
Step 7: The Bake and the Pan-Bang Technique
What: Bake in a preheated oven at 350°F (177°C) for 10 to 12 minutes.
Why: Moderate heat initiates the Maillard reaction on the cookie borders while keeping the core temperature low enough to preserve a tender center.
How: Bake until the outer rims are golden brown and set, while the very center remains slightly pale and puffed. At the 9-minute mark, remove the pan and rap it firmly against the oven rack twice to deflate rising steam pockets.
Common Mistake: Waiting until the center appears completely firm. Residual carry-over heat continues cooking the interior for three minutes after removal from the oven.
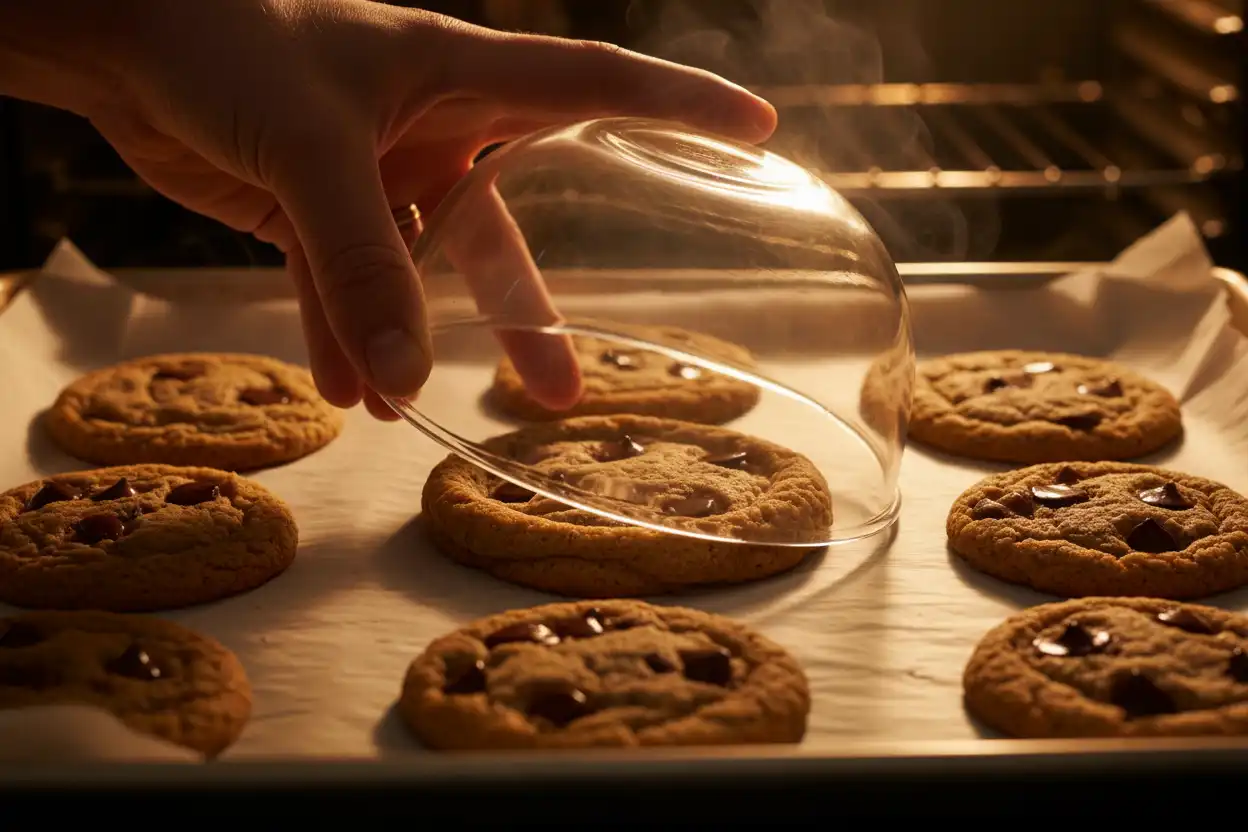
Pro Tip: Immediately after removing the pan from the oven, invert a round bowl or large cookie cutter over each hot cookie and swirl it in a circular motion for 5 seconds to mold them into perfect rounds.
Small-Batch Formulation Comparison Matrix
Adjusting individual ingredients changes the structural performance of a small batch. The table below illustrates how single alterations influence texture, spread, and shelf life.
| Formulation Style | Fat & Liquid Choice | Resulting Texture | Spread Factor | Best Used For |
|---|---|---|---|---|
| The Master (Recommended) | Melted Butter + 1 Egg Yolk | Crispy rim, dense chewy center | Moderate, controlled | All-around bakery style |
| The Cakey Home-Style | Creamed Butter + 2 Tbsp Whole Egg | Puffy, soft, sponge-like crumb | Minimal spread | Soft-bake enthusiasts |
| The Nutty Gourmet | Browned Butter + Milk + 1 Egg Yolk | Ultra-chewy, toffee undertones | Moderate to high | Complex flavor profiles |
| The Thin & Crisp | Melted Butter + Higher White Sugar | Snap-brittle edges, lacy surface | High, wide expansion | Dipping in coffee or milk |
Baking Appliance Dynamics: Standard Oven vs. Toaster Oven vs. Air Fryer
Small batches open up baking options beyond standard wall ovens. Because six cookies fit onto a compact pan, counter-top appliances are energy-efficient alternatives that preheat in minutes.
1. Standard Full-Sized Oven
The standard kitchen oven offers the most reliable radiant heat distribution and generous internal air capacity. Position your rack directly in the center of the oven cavity to avoid uneven heat from base heating elements.
Bake on an aluminum quarter-sheet pan at 350°F (177°C) for 10 to 12 minutes. Check early if using dark coated sheet pans, which absorb radiant heat faster and brown cookie undersides rapidly.
2. Toaster Ovens and Countertop Convection Units
Toaster ovens excel at small-batch baking, reaching full temperature in under five minutes. However, their heating elements sit significantly closer to the food than in conventional wall ovens.
Reduce the set baking temperature by 20°F to 25°F (approx. 325°F / 163°C) and check cookies at the 8-minute mark. Tent a piece of aluminum foil over the pan during the final 3 minutes if the chocolate toppings brown too quickly.
3. Air Fryers
Air fryers are intensely concentrated convection chambers with rapid air circulation. The powerful top fan can distort soft dough shapes and cook exterior surfaces before the centers set.
To bake in an air fryer, chill dough portions thoroughly until firm. Line the basket with perforated parchment paper, bake at 320°F (160°C) for 8 to 10 minutes, and limit the batch to 3 cookies at a time to maintain clear airflow.
Professional Pastry Tips for Small Batches
Elevate your results from ordinary homemade sweets to bakery showcase quality with these professional techniques.
- Embrace Chopped Bar Chocolate: Pre-bagged chocolate chips contain added emulsifiers (such as soy lecithin) and reduced cocoa butter to hold their teardrop shape during high heat. Chopping a high-grade 60% to 70% dark chocolate baking bar produces irregular pools of molten chocolate along with tiny chocolate dust particles that melt directly into the dough matrix.
- Weigh the Flour Religiously: A standard dry measuring cup can hold anywhere between 110 grams and 150 grams of flour depending on packing density. In a small batch of 6 cookies, a 20-gram accidental excess of flour represents an enormous 17% error, turning tender dough dry and crumbly.
- Control Ambient Kitchen Heat: If your kitchen is over 75°F (24°C), your butter and dough will soften rapidly during preparation. Chill your mixing bowl briefly if your room runs hot to keep dough fats stable.
- Season with Flaky Sea Salt at the Exit: Sprinkle coarse flaky sea salt (such as Maldon) onto cookies immediately as they emerge from the oven. The molten surface grabs the salt crystals, creating an appealing flavor contrast against the rich, sweet chocolate.
Common Small-Batch Mistakes and Fixes
When working with low ingredient volumes, small mistakes carry magnified consequences. Here is how to diagnose and correct common errors.
Mistake 1: Dough Spreads Into One Giant Sheet
Why It Happens: The butter was melted and mixed while excessively hot, or the dough went into the oven unchilled. It can also stem from measuring flour too lightly by volume.
The Fix: Chill the remaining dough balls for 20 minutes in the freezer before baking. If using volume tools, spoon the flour into the measuring cup and level it off with a straight knife rather than scooping directly from the bag.
Mistake 2: Cookies Are Puffy, Pale, and Cake-Like
Why It Happens: A whole egg was added instead of separating out a single yolk, overloading the dough with water-heavy egg white.
The Fix: Stick strictly to one large egg yolk. If you accidentally cracked a whole egg into the mixture, balance the formula by adding an additional 2 tablespoons of melted butter and 3 tablespoons of brown sugar.
Mistake 3: Over-Browning or Burnt Bottoms
Why It Happens: Using dark non-stick pans, thin single-ply baking sheets, or baking on the lowest oven rack.
The Fix: Use light-colored, heavy-gauge aluminum quarter-sheet pans lined with unbleached parchment paper. Stack two thin cookie sheets together (double panning) to insulate the base of the cookies if your oven runs hot from below.
Mistake 4: Harsh, Soapy, or Metallic Aftertaste
Why It Happens: Inaccurate leavener measurement. Standard 1/4 teaspoon measuring spoons often vary by 20% to 30% across budget spoon sets.
The Fix: Level off your measuring spoon perfectly with a flat edge. Never use a rounded or heaping spoon for baking soda in a small batch.
Freezing, Storing, and Single-Cookie Baking
One of the greatest advantages of a small batch is portion control. You can bake half the batch today and reserve the rest for fresh on-demand treats later in the week.
How to Freeze Raw Dough Balls
Portion the dough into individual balls and place them side-by-side on a small plate lined with parchment. Freeze for 60 minutes until rock solid, then transfer the frozen dough balls into an airtight zip-top freezer bag.
Frozen dough retains peak flavor and leavening performance for up to three months. Label the bag with the baking temperature (350°F / 177°C) for easy future reference.
Baking Single Cookies Straight From the Freezer
You can bake individual frozen dough portions without thawing them first. Place one or two frozen dough balls onto a parchment-lined tray or toaster oven pan.
Bake at the standard 350°F (177°C), adding an extra 90 to 120 seconds to the standard bake duration. The frozen core keeps the cookie center extra soft while the exterior crisps evenly.
Storing Baked Cookies
Keep baked cookies in an airtight glass container or metal tin at room temperature for up to four days. Place a small strip of parchment between cookie layers to prevent chocolate smearing.
To restore warm, bakery-fresh texture to day-old cookies, reheat an individual cookie in a toaster oven or standard oven at 300°F (149°C) for two minutes. Avoid microwave reheating, which turns the starches rubbery.
Essential Equipment for Small-Scale Baking
Specialized gear is unnecessary, but precise tools make small-batch baking faster, cleaner, and more consistent.
- Digital Kitchen Scale: An inexpensive scale measuring in 1-gram increments prevents the 15–20% volumetric measurement swings that ruin small batches.
- Quarter-Sheet Pan (9×13 Inches): Heavy-gauge aluminum quarter-sheet pans distribute heat evenly and fit easily into standard ovens and larger toaster ovens.
- Small Silicone Spatula: A compact 8-inch silicone spatula scrapes small-volume bowls cleanly without leaving precious butter or flour behind on bowl walls.
- Unbleached Parchment Paper: Parchment promotes an even, golden base, prevents sticking, and simplifies batch cleanup.
- #24 Cookie Scoop (approx. 3 Tablespoons): Produces uniform dough portions quickly, keeping your hands clean and cookies identical in size.
Authoritative Culinary Resources
For further study on the chemistry of baking and food science principles, consult these educational institutions and culinary authorities:
- King Arthur Baking Company — Master Ingredient Weight Chart
- Serious Eats (J. Kenji López-Alt) — The Science of Chocolate Chip Cookies
- USDA FoodData Central — Whole Egg vs. Yolk Nutrient and Moisture Specifications
Key Takeaways
- Use One Egg Yolk: Eliminates cakey moisture from egg whites while delivering rich fat, chewiness, and stable emulsion.
- Weigh Your Flour: 115 grams is the exact target. Over-measuring flour is the primary cause of dry, crumbly small-batch cookies.
- Use Melted Butter: Simplifies workflow, requires no stand mixer, and delivers a glossy top with chewy centers.
- Embrace Chopped Bar Chocolate: Creates irregular pools of melted chocolate and disperses flavor better than chips.
- Chill for 30 Minutes: Solidifies butter fats to control spread and allows flour starches to fully hydrate.
Next Steps for the Home Baker
Equipped with the proper weights, ratios, and baking mechanics, you are ready to prepare a bakery-grade small batch of chocolate chip cookies in under 30 minutes. Pull out your kitchen scale, melt the butter, and enjoy hot, molten-centered cookies without a mountain of leftovers.
Experiment with variations like browning the butter or folding in toasted pecans to craft your own custom signature small-batch recipe.
Frequently Asked Questions
Can I use a whole egg instead of just the yolk?
Using a whole egg adds roughly 30 grams of water-heavy albumen, transforming the dough into a wet batter. This produces pale, puffy, cake-like cookies that lack chewiness and spread. If you must use a whole egg, whisk it thoroughly in a small bowl first and measure out exactly one tablespoon plus one teaspoon (roughly 18 grams) into the dough.
Why are my small-batch cookies flat and greasy?
Cookies turn out flat and greasy when melted butter is mixed into the sugar while boiling hot, or if the portioned dough enters the oven without proper chilling. When butter fat lacks structure, it liquefies in the oven before the flour starches set. Chill your shaped dough balls for at least 30 minutes in the refrigerator to allow the fat to firm up.
Can I bake this small batch in a toaster oven?
Yes, toaster ovens work well for small batches. Because heating elements are close to the baking tray, reduce the oven temperature by 25°F to 325°F (163°C). Bake on an aluminum quarter-sheet pan lined with parchment paper for 9 to 11 minutes. Watch the tops closely during the final two minutes to prevent the surface chocolate from scorching.
How long does this small batch of dough keep in the fridge?
Covered tightly in an airtight container or wrapped in plastic film, the raw dough keeps well in the refrigerator for up to 72 hours. An extended chill period actually improves flavor, allowing flour enzymes to break down starches into simple sugars for deeper caramelization. For storage beyond three days, portion the dough into balls and freeze them.
Can I make this recipe without a digital kitchen scale?
You can make it using standard measuring spoons and cups, but volumetric measuring introduces variability. To measure flour without a scale, fluff the flour in your storage bin with a fork, spoon it gently into your measuring cup until mounded, and sweep the excess level with the back of a table knife. Avoid scooping directly from the bag, which packs down the flour.
Why do you recommend chopped chocolate instead of chocolate chips?
Commercial chocolate chips contain added emulsifiers and stabilizers designed to hold their pointed shape under oven heat, limiting melt. Chopping a quality chocolate bar produces varied pieces: large chunks that create pools of melted chocolate and fine slivers that disperse cocoa notes throughout every bite. It elevates both the flavor profile and the final appearance of your cookies.
Can I brown the butter for this small batch?
Yes, browning butter adds a wonderful toffee flavor. However, browning evaporates about 15% to 20% of the butter’s natural water content. To prevent dry or crumbly dough, weigh out 57 grams of the browned butter after cooking and stir in one teaspoon of whole milk or water along with the vanilla extract to restore baseline hydration balance.
How do I get those perfect bakery-style ripples on the edges?
Achieve bakery ripples using the pan-banging technique. Around the 9-minute mark of baking, when cookies are puffed with set edges, lift the baking pan two inches and rap it firmly against the oven rack. This releases steam pockets, forcing the edges to wrinkle. Repeat this step once more during the final two minutes of baking.