There’s something instantly festive about a tray of tree-shaped cookies waiting to be frosted, sprinkled, and shared. Whether you’re baking with kids, preparing edible gifts, or building a dessert platter for a holiday party, decorated Christmas tree cookies are one of the most cheerful projects of the season.
The best part is that they can be as simple or as detailed as you want. A classic sugar cookie with green icing and sprinkles is always welcome, but you can also create elegant designs with royal icing, textured buttercream, sanding sugar, edible pearls, or tiny candy ornaments. This guide walks you through the full process, from choosing the right cookie dough to decorating techniques that look beautiful without becoming stressful.
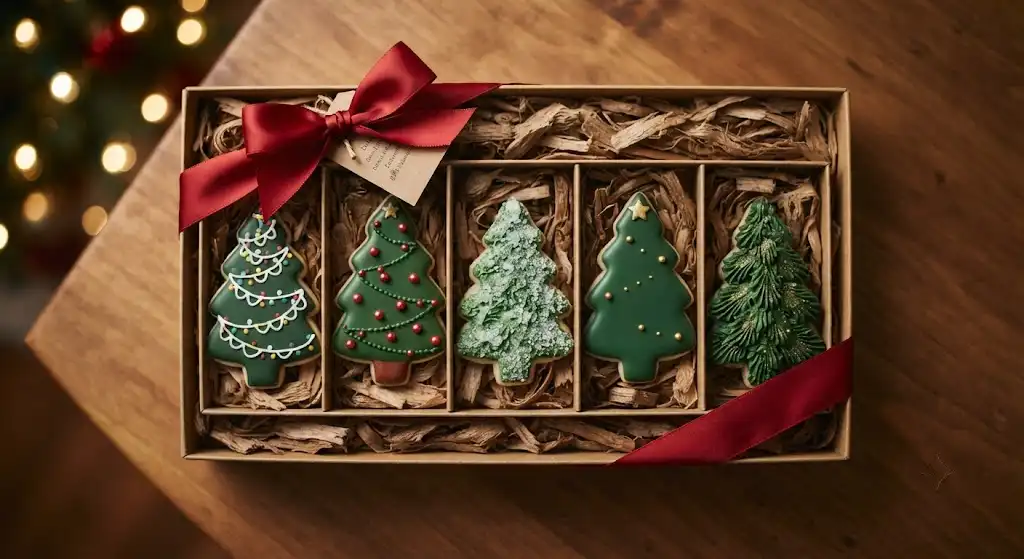
Why Christmas Tree Cookies Are Perfect for Decorating
Tree-shaped cookies work especially well because the design is instantly recognizable. Even simple lines of icing can suggest garland, lights, ornaments, or snow-covered branches. The shape also gives you plenty of decorating space without requiring advanced piping skills.
They’re also flexible for different occasions. You can make them playful for a family cookie night, polished for a cookie exchange, or minimal and elegant for a winter dessert table. Among popular holiday cookie recipes, tree cookies are especially beginner-friendly because small imperfections often make them look more handmade and charming.
They’re ideal for:
- Cookie decorating parties
- Christmas Eve dessert platters
- Homemade edible gifts
- School or office celebrations
- Holiday bake sales
- Family baking traditions
- Winter-themed birthdays or gatherings
If you’re looking for christmas baking ideas that feel festive but still manageable, tree cookies are a reliable choice.
Start With the Right Cookie Base
A beautiful decorated cookie starts with a sturdy cookie. Soft, delicate cookies may taste wonderful, but they can crumble under icing or lose their shape while baking. For crisp edges and a flat decorating surface, use a cut-out sugar cookie dough or shortbread-style dough designed for rolling and cutting.
A good decorating cookie should be:
- Firm enough to hold its shape
- Slightly soft in the center after baking
- Not too puffy
- Lightly sweet so icing doesn’t make it overwhelming
- Smooth on top for clean decorating
Basic Cut-Out Sugar Cookie Ingredients
For a classic batch, you’ll typically need:
- Unsalted butter, softened
- Granulated sugar
- Egg
- Vanilla extract
- All-purpose flour
- Baking powder
- Salt
Some bakers add almond extract, orange zest, lemon zest, or a little cinnamon for more holiday flavor. If you plan to use colorful icing and plenty of toppings, keep the cookie flavor simple so the decorations remain the focus.
Tips for Dough That Holds Its Shape
Tree cookies need clean points and defined edges. To prevent spreading, chill the dough before cutting and again before baking if the cookies become soft.
For best results:
- Roll dough between sheets of parchment paper to prevent sticking.
- Aim for an even thickness, usually about 1/4 inch.
- Chill the rolled dough before cutting for sharper shapes.
- Place cut cookies on a parchment-lined baking sheet.
- Chill the baking sheet briefly before baking if your kitchen is warm.
- Remove cookies when the edges are just lightly golden.
Let the cookies cool completely before decorating. Even slightly warm cookies can melt icing, blur details, or cause colors to bleed.
Choosing Icing for Decorated Tree Cookies
The icing you choose depends on the style you want. Some designs need a smooth, firm finish, while others look better with soft swirls or fluffy texture.
Royal Icing
Royal icing is the classic choice for detailed christmas tree cookies decorated with clean lines, smooth color, and crisp designs. It dries firm, making the cookies easy to stack, package, or gift.
Use royal icing if you want:
- Smooth green tree bases
- Piped garland
- Tiny ornaments
- Snow details
- Cookies that can be packaged
- A polished bakery-style look
Royal icing consistency matters. Thicker icing is best for outlines and details, while thinner icing works for filling larger areas. A good approach is to outline the tree first, then flood the center with slightly thinner icing.
Buttercream Frosting
Buttercream is softer, richer, and easier for casual decorating. It doesn’t dry as hard as royal icing, but it tastes creamy and can create beautiful texture.
Use buttercream if you want:
- Fluffy tree branches
- Rustic designs
- Kid-friendly decorating
- Richer flavor
- Swirls, stars, and piped texture
A star piping tip can make buttercream trees look full and dimensional. Pipe small overlapping stars from the bottom of the cookie upward, then add sprinkles as ornaments.
Glaze Icing
A simple powdered sugar glaze is easy and accessible. It creates a shiny finish and works well for casual decorating. It won’t set as firmly as royal icing, but it’s a good option when you want something simple.
A basic glaze usually includes powdered sugar, milk or water, and vanilla extract. Add food coloring gradually until you reach your desired shade.
Color Ideas Beyond Classic Green
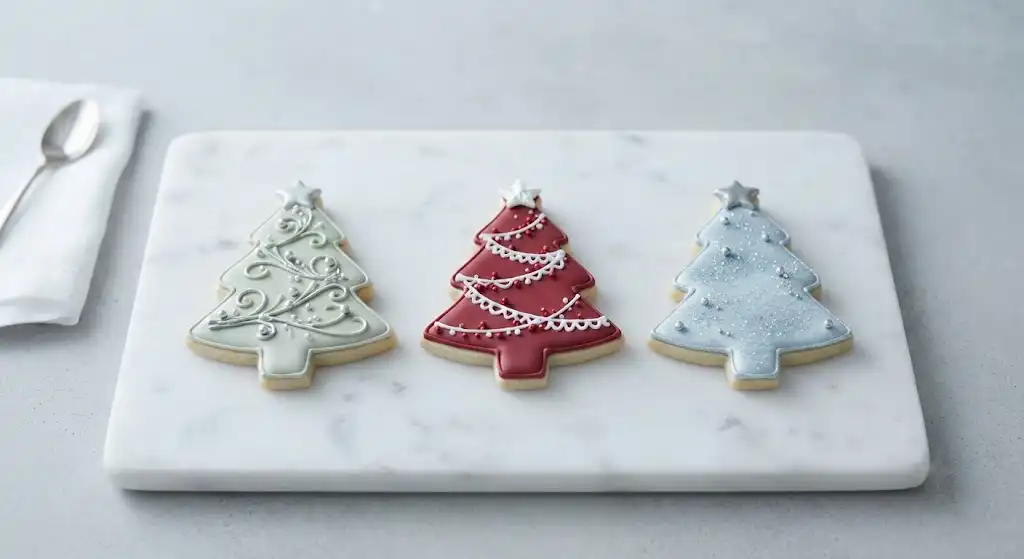
Green is traditional, but decorated cookies christmas tree designs don’t have to look the same every year. A limited color palette can make your cookies feel more intentional and stylish.
Try these combinations:
- Evergreen, white, and gold for a classic elegant look
- Pale green, blush pink, and silver for a soft modern style
- Deep green, red, and white for a traditional Christmas palette
- Blue, white, and silver for a winter wonderland theme
- White icing with green garland for a snowy tree effect
- Chocolate brown with powdered sugar snow for a rustic woodland style
For a natural tree color, use gel food coloring rather than liquid coloring. Gel color is more concentrated, so you can create deep shades without thinning your icing too much.
Easy Decorating Techniques for Beginners
You don’t need professional tools to make beautiful tree cookies. Start with simple designs that repeat well across a batch.
The Classic Sprinkle Tree
Cover the cookie with green icing, then add sprinkles while the icing is still wet. Use a yellow star sprinkle at the top if you have one.
This is one of the easiest christmas cookie decorations because it works with royal icing, glaze, or buttercream.
The Garland Drizzle
Frost the tree in green, then drizzle white or red icing in a zigzag pattern from top to bottom. Add tiny round sprinkles for ornaments.
For cleaner lines, use a piping bag with a small round tip. If you don’t have piping bags, a small zip-top bag with a tiny corner snipped off works too.
The Snowy Tree
Ice the cookie green, then add white icing along the edges of the branches. Sprinkle with white sanding sugar for sparkle. This gives the cookies a frosted, wintry look.
The Minimalist Tree
Leave the cookie mostly plain and pipe a simple green outline. Add a few white dots or gold sprinkles. This style is quick but still looks refined, especially on a neutral cookie platter.
The Textured Branch Tree
Use a star tip or small leaf tip to pipe rows of green frosting. Start at the bottom and work upward so each row overlaps slightly. This creates a dimensional tree effect that looks impressive but is simple once you get into a rhythm.
More Detailed Decorating Ideas
Once you’re comfortable with the basics, try adding more personality to each cookie. These ideas work well for cookie exchanges or gift boxes where variety makes the presentation more exciting.
Ornament Trees
Pipe a green base, then add small dots of red, white, gold, or blue icing. Use edible pearls, mini candies, or nonpareils for extra texture. Keep the dots small so the design looks balanced.
String Light Trees
Pipe a thin black or dark green line in a loose zigzag across the tree. Add tiny colorful dots along the line to look like lights. This design is playful and instantly recognizable.
Plaid Trees
Start with a solid icing base. Once dry, pipe thin vertical and horizontal lines in white, red, or gold. This works best with royal icing because the base needs to be firm before you add the plaid detail.
Marbled Trees
Flood the cookie with green icing, then add a few lines of lighter green or white while the icing is still wet. Use a toothpick to gently swirl the colors together. Don’t overmix, or the marble effect may become muddy.
Candy-Covered Trees
Use mini chocolate candies, crushed peppermint, gumdrops, or colored sugar to create a bold, kid-friendly design. This is a great option for family decorating nights because it doesn’t require precision.
Christmas Cookie Decorations That Make a Big Impact
The right toppings can turn basic cookies into something memorable. Choose decorations that match your icing style and the level of detail you want.
Good options include:
- Sanding sugar for sparkle
- Nonpareils for tiny ornaments
- Star sprinkles for tree toppers
- Edible glitter for shimmer
- Mini candy-coated chocolates for bold ornaments
- Crushed peppermint for flavor and color
- White sprinkles for snow
- Edible pearls for an elegant finish
- Colored sugar for quick coverage
A helpful tip is to decorate over a rimmed baking sheet. Sprinkles tend to scatter, and a baking sheet makes cleanup much easier. You can also reuse excess sprinkles that fall onto clean parchment.
How to Decorate With Kids
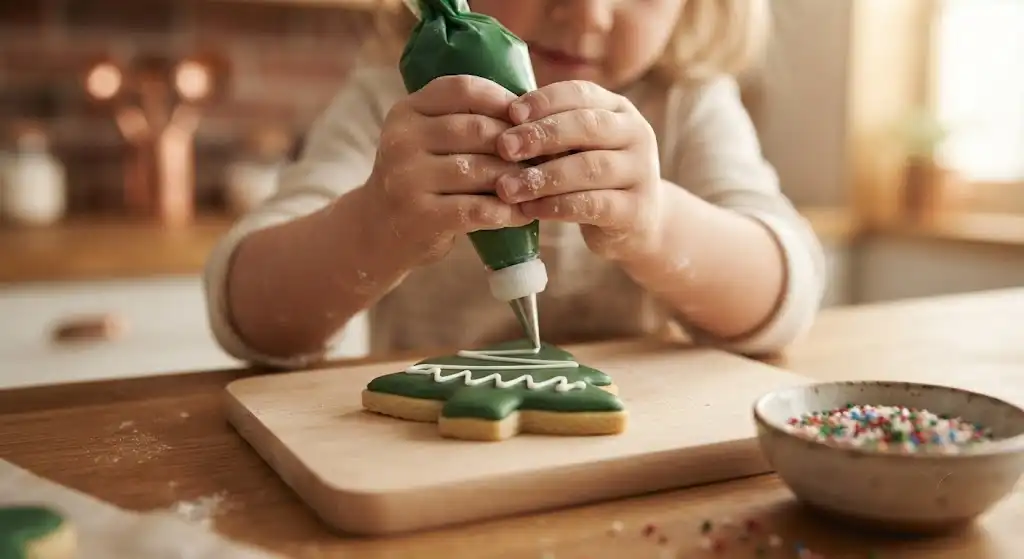
Decorating tree cookies with kids can be joyful, messy, and memorable. The key is to simplify the setup. Give each child a few cookies, small bowls of toppings, and one or two icing colors.
To make the process smoother:
- Use squeeze bottles for icing instead of piping bags.
- Choose larger sprinkles for younger children.
- Place cookies on parchment or paper plates.
- Let kids decorate before the final cleanup, not during a busy meal prep window.
- Expect creative designs rather than perfect ones.
- Have extra cookies available in case a few break.
For very young decorators, pre-frost the cookies and let them add sprinkles, candies, and stars. Older children may enjoy piping garlands, ornaments, or snowy branches.

Common Decorating Mistakes and How to Avoid Them
Even simple cookies can go wrong if the icing is too thin, the cookies are warm, or the decorations are added too late. Fortunately, most issues are easy to prevent.
Icing Runs Off the Cookie
The icing is probably too thin. Add more powdered sugar or use thicker icing to outline the cookie first. Let the outline set slightly before filling the center.
Colors Bleed Together
Color bleeding can happen when wet icing colors touch or when dark colors are heavily saturated. Let the base layer dry before adding details, especially when using red, black, or deep green.
Cookies Spread in the Oven
The dough may be too warm, or the recipe may not be designed for cut-out cookies. Chill the dough before baking and avoid over-softening the butter.
Sprinkles Won’t Stick
Sprinkles need to be added while icing is still wet. If the icing has already set, add a tiny dot of fresh icing as “glue” before placing decorations.
Piping Looks Uneven
Practice a few lines on parchment before decorating the cookies. Hold the piping bag at a consistent angle and use steady pressure. Simple repeated patterns usually look better than complicated designs rushed at the end.
Flavor Variations for Tree Cookies
While vanilla sugar cookies are classic, you can make your holiday cookie recipes more interesting with subtle flavor changes.
Try these variations:
- Almond extract for a bakery-style flavor
- Peppermint extract for a candy cane twist
- Orange zest for brightness
- Lemon zest for a fresh contrast to sweet icing
- Cinnamon or nutmeg for warm spice
- Cocoa powder for chocolate tree cookies
- Brown sugar for a deeper, caramel-like note
If you use strong flavors like peppermint, start with a small amount. Extracts can quickly overpower the cookie.
Make-Ahead and Storage Tips
Christmas baking often happens during a busy season, so planning ahead helps. You can make the dough, bake the cookies, and decorate them on separate days.
Helpful make-ahead options:
- Prepare dough in advance and refrigerate it until ready to roll.
- Freeze cut-out cookie dough shapes before baking.
- Bake cookies a day or two before decorating.
- Store undecorated cookies in an airtight container once fully cooled.
- Let decorated cookies dry completely before stacking.
If using royal icing, allow the cookies to dry in a single layer before packaging. Buttercream-decorated cookies should be stored more carefully because the frosting stays soft. Use parchment between layers if stacking is necessary.
For gifting, choose firmer icing and sturdy decorations. Delicate piped details and tall candies may break during transport.
How to Present Decorated Tree Cookies
Presentation makes a big difference, especially for parties and gifts. Arrange cookies by color palette or design style for a polished look.
Try these display ideas:
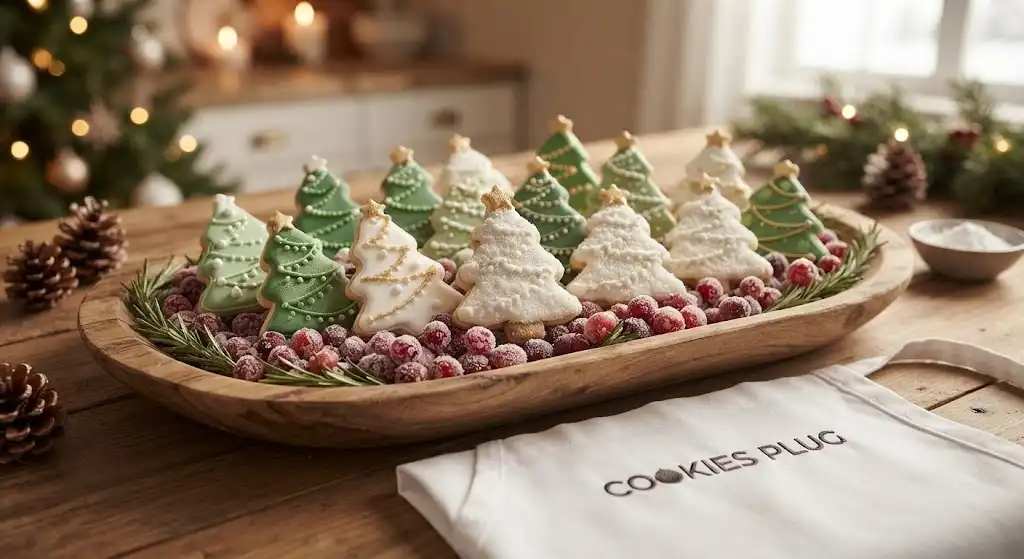
- Place cookies on a white platter with sugared cranberries and rosemary sprigs.
- Stack them in clear treat bags tied with ribbon.
- Add them to a mixed cookie box with gingerbread, shortbread, and chocolate crinkle cookies.
- Stand a few upright in a dessert board for height.
- Pair them with mugs of hot cocoa for a cozy dessert station.
- Use parchment, bakery twine, and gift tags for homemade presents.
For a cookie tray, include a mix of simple and detailed designs. A few highly decorated cookies can act as focal points, while simpler sprinkle trees fill in the platter beautifully.
A Simple Decorating Plan for a Full Batch
If you’re decorating a large batch, it helps to choose three or four designs rather than making every cookie different. This keeps the process organized and makes the finished set look cohesive.
A balanced batch could include:
- Green trees with white garland and red ornaments
- Snowy trees with white sanding sugar
- Minimal outline trees with gold stars
- Textured buttercream trees with colorful sprinkles
Set out all supplies before you begin. Mix icing colors, fill piping bags, open sprinkles, and line your workspace with parchment. Decorating feels much easier when you’re not searching for tools with icing on your hands.
Final Tips for Beautiful Christmas Tree Cookies
The most memorable cookies aren’t always the most complicated. Clean shapes, thoughtful colors, and a few well-placed decorations can create a festive result without hours of work.
Keep these best practices in mind:
- Use a dough made for cut-out cookies.
- Chill dough to help tree shapes stay sharp.
- Cool cookies completely before icing.
- Match your icing type to your decorating goals.
- Use gel food coloring for stronger colors.
- Add sprinkles while icing is wet.
- Let layers dry before adding fine details.
- Stick to a color palette for a more polished look.
- Make extra cookies for testing designs.
- Enjoy the process, especially if decorating with family.
Christmas tree cookies are more than a seasonal dessert. They’re a creative activity, a homemade gift, and a festive tradition all in one. With the right dough, a few decorating techniques, and a little imagination, you can create cookies that look joyful, taste delicious, and bring a little extra sparkle to your holiday table.