Creative Halloween Cookie Cutter Ideas
Halloween cookie cutters turn rolled dough into pumpkins, ghosts, bats, and bite-size party treats. This guide pairs creative decorating ideas with practical cutter comparisons, a shape-friendly sugar cookie recipe, and techniques for cleaner edges. Start with a few versatile shapes rather than a crowded set you rarely use.

Table of Contents
- Why Quality Halloween Cookie Cutters Matter
- The Best Halloween Cookie Cutters on Amazon (Top Picks)
- Material Breakdown: Stainless Steel vs. Plastic vs. Plunger Stamps
- Essential Buyer’s Guide: What to Look For Before Buying
- Master No-Spread Sugar Cookie Recipe for Crisp Shapes
- Pro Step-by-Step Cutting Technique: Zero Sticking, Sharp Edges
- Troubleshooting Cut-Out Cookie Mistakes
- Proper Cleaning, Drying & Rust Prevention
- Frequently Asked Questions
1. Why Quality Halloween Cookie Cutters Matter
Quality matters because your cutter should release a recognizable silhouette without requiring repairs before baking. Look for rigid walls, a clean cutting edge, and enough depth to clear your dough. However, preserving intricate details also depends on cold dough and a suitable recipe—not the cutter alone. King Arthur recommends well-chilled dough for cleaner cutting and reduced spreading.
Cheap, thin tin-plated cutters deserve careful inspection: bending can distort outlines, while blunt or uneven edges can pull and tear dough rather than cut it. Tinplate also needs prompt drying to prevent rust. Don’t dismiss every tin-plated cutter, though; construction and care matter more than a low price alone.
Choose sturdy, deep-wall cutters for sharp Halloween silhouettes, then protect those details with chilling. Try these decorating ideas:
- Pumpkin patch: Use pumpkin cookie cutters for orange jack-o’-lanterns, white pumpkins, and purple monster faces.
- Haunted gathering: Give identical ghosts different expressions using dots, eyebrows, and tiny mouths.
- Midnight platter: Surround one large moon cookie with bats and miniature pumpkins.

2. The Best Halloween Cookie Cutters on Amazon (Top Picks)
Treat these as a shopping shortlist, not a tested ranking. Ann Clark links to its Amazon store, but individual Amazon listings and stock could not be confirmed here. Compare the exact product name, dimensions, seller, and care instructions before ordering.
- For a coordinated collection: Ann Clark Halloween Cookie Cutters 7 pc Set. Consider this manufacturer-listed set when you want variety for a shared decorating session. Check the included silhouettes against your planned designs before buying.
- For a statement pumpkin: Ann Clark Tall Pumpkin Cookie Cutter, 4 inches. Try this shape for personalized place-setting cookies or a centerpiece pumpkin surrounded by smaller treats. The manufacturer lists its size as four inches.
- For embossed designs: Ateco 4 Piece Halloween Cutter Set, No. 1992. Ateco’s catalog specifies approximately two-inch polypropylene cutters. Search by model number and verify marketplace availability; consider these for simple, lightly decorated party cookies.

3. Material Breakdown: Stainless Steel vs. Plastic vs. Plunger Stamps
Material and mechanism are different choices: a plunger stamp can itself be plastic. Stainless steel and polypropylene both appear in professional cutter ranges, while plungers add embossing and release functions. Choose according to whether you want an open decorating surface or an impressed pattern.
| Type | Practical selection check | Creative use to try |
|---|---|---|
| Stainless steel | Inspect seams, rigidity, and the cutting rim. | Bat silhouettes with piped wing lines. |
| Plastic | Confirm food-contact suitability and washing directions. | Broad ghosts for group decorating. |
| Plunger stamp | Check pattern depth and access for cleaning. | Embossed shapes with minimal icing. |
For Halloween cookie cutters, plastic isn’t automatically dishwasher-safe. One plastic-cutter manufacturer explicitly requires handwashing and warns against heat exposure. Always follow the specific product’s directions rather than assuming all plastic behaves alike. (cookiekutter.com)
4. Essential Buyer’s Guide: What to Look For Before Buying
Read measurements before looking at set size. A large assortment may still lack the shape or usable cutting depth your project needs. Use this checklist to narrow your options:
- Cutter depth: Set a minimum one-inch wall depth when shopping for thick-cookie projects. Distinguish cutting depth from overall height, especially with handles or stamps.
- Edge sharpness versus top-rim comfort: Seek a clean lower edge and a smooth, comfortable pressing rim. Avoid exposed joins that could make repeated pressing uncomfortable.
- Dishwasher-safe versus handwash-only: Buy according to the manufacturer’s instructions. Tin-plated steel can rust when left wet and may explicitly prohibit dishwasher use.
- Size and detail: For large Halloween cookie cutters, check both width and height against your gift bags. For mini Halloween cookie cutters, favor recognizable outlines over cramped details.
Before committing to miniature Halloween cookie cutters, sketch their stated dimensions on paper. That simple check helps you decide whether your intended face, lettering, or icing border will fit.
5. Master No-Spread Sugar Cookie Recipe for Crisp Shapes
This half-batch adaptation of King Arthur’s roll-out sugar cookies aims for clear outlines; “no-spread” isn’t an absolute guarantee. Use weights where possible. Spoon measurements for eggs are approximate, so beat and weigh them.
Prep Time: 30 minutes Chill Time: 2 hours, plus 15-minute freezer flash Bake Time: 10–12 minutes per tray Yield: Approximately 24 three-inch cookies
Ingredients
- Unsalted butter, softened: 170 g | 3/4 cup
- Granulated sugar: 199 g | 1 cup
- Beaten whole egg: 50 g | 3 tablespoons plus 1 teaspoon
- Egg yolk: 18 g | approximately 1 tablespoon
- Vanilla extract: 8 g | 2 teaspoons
- Almond extract: 4 g | 1 teaspoon
- All-purpose flour: 300 g | 2 1/2 cups
- Table salt: 3 g | 1/2 teaspoon
- Baking powder: 2 g | 1/2 teaspoon
Method
- Cream butter and sugar until pale. Beat in egg, yolk, and extracts.
- Whisk flour, salt, and baking powder separately; mix into the butter mixture just until combined.
- Divide into two disks, wrap, and refrigerate for two hours.
- Heat oven to 325°F (163°C). Roll dough 1/4 inch thick and cut shapes onto parchment-lined trays.
- Freeze cut cookies for 15 minutes, following the technique below.
- Bake 10–12 minutes, checking for set centers and barely golden edges. Let firm briefly on the tray, then transfer carefully to a wire rack. Cool before decorating.

6. Pro Step-by-Step Cutting Technique: Zero Sticking, Sharp Edges
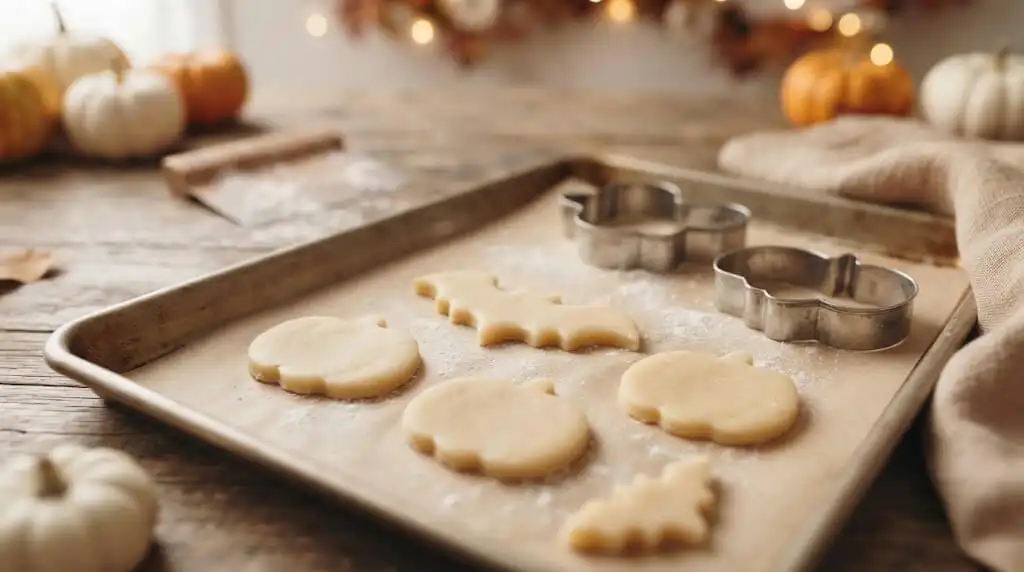
Aim for minimal handling rather than forcing warm dough through another round of cutting. Cold dough and parchment help preserve shapes; pause to rechill whenever lifting or releasing becomes difficult. Use this sequence as your working routine.
- The Flour-Dip Trick for Cutter Edges: Dip the cutting rim lightly into flour and tap off excess before pressing. Avoid packing flour into narrow details.
- Optimal Dough Thickness of 1/4 inch (6mm): Use rolling guides for this recipe’s thickness. Keep the sheet even rather than leaving thick centers and thin edges.
- The ‘Press-Down and Micro-Wiggle’ Method (no dragging): Press vertically; use only a tiny movement if needed to finish the cut. Lift straight up without pulling sideways.
- The Parchment Transfer Secret (move paper, not dough): Cut on baking parchment, remove surrounding scraps, and slide the paper onto a tray. Leave room between shapes.
- The 15-Minute Freezer Flash Before Baking: Try 15 minutes, checking that the shapes feel firm before baking. Chilling helps limit spread; the necessary time varies with dough temperature.
7. Troubleshooting Cut-Out Cookie Mistakes
Table 2: Cut-out cookie troubleshooting
| Common Problem | Root Cause | Instant Baker’s Fix |
|---|---|---|
| Dough sticking in narrow cutter areas | Warm dough or insufficient rim dusting | Rechill dough; lightly flour the rim before retrying. |
| Shape spreading in oven | Insufficient chilling or an unsuitable dough | Chill remaining shapes; bake a small test batch before proceeding. |
| Water-spot rust on cutters | Moisture remaining on rust-prone metal | Stop using the affected cutter; consult its care instructions before reuse. |
| Shapes stretching during transfer | Too much handling of soft dough | Cut on parchment and move the paper instead. |
Cold dough and a small test bake are useful first checks before changing ingredient ratios.
8. Proper Cleaning, Drying & Rust Prevention
Handwash tin-plated cutters and dry immediately; don’t leave them soaking or damp in storage. Follow product-specific directions for plastic, especially around water temperature and dishwasher use. Clean narrow corners before putting cutters away, and keep delicate shapes from being crushed beneath heavier tools.
9. Frequently Asked Questions

Should beginners choose large or miniature shapes?
Start with a broad pumpkin or ghost if you want room to practice faces and borders. Add minis when planning a mixed-size platter.
How can I avoid buying too many cutters?
Plan three designs around one silhouette before shopping. A pumpkin can become a jack-o’-lantern, a pastel fall pumpkin, or a one-eyed monster—just change the decoration.