How to Bake Cookies: The Complete Beginner-to-Pro Master Guide
Quick Guide: How to Bake Cookies in 5 Core Steps
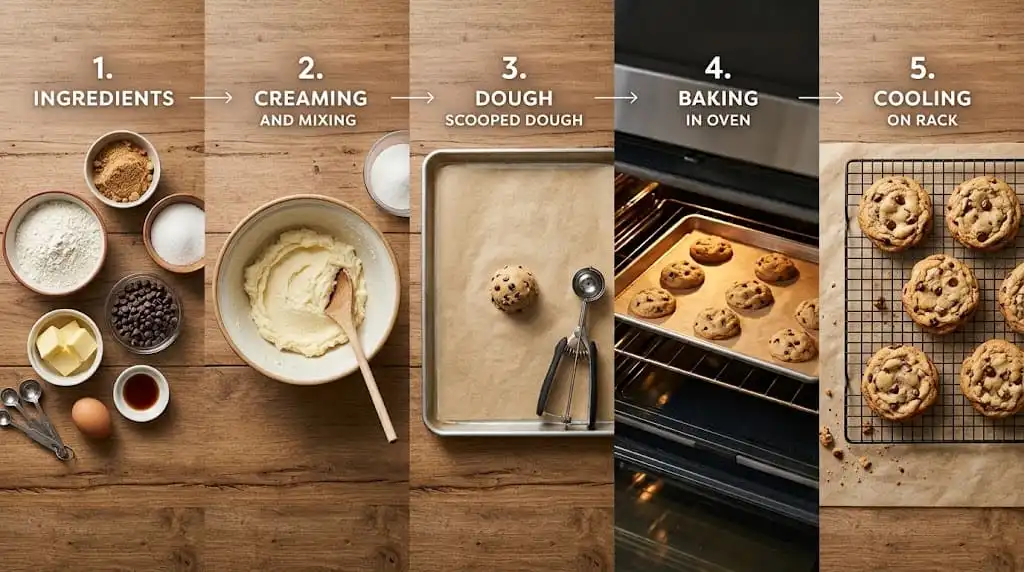
To bake cookies successfully, cream room-temperature butter and sugars together until smooth, blend in eggs and vanilla, and gently fold in combined dry ingredients (flour, leavening agent, and salt) until just incorporated. Fold in your chosen mix-ins, chill the dough for at least 30 to 60 minutes to control spread, and portion into uniform balls using a disher or spoon.
Bake on a parchment-lined, light-colored aluminum sheet at 350°F (177°C) for 9 to 12 minutes until edges are golden-brown and the centers remain slightly soft. Allow the cookies to rest on the hot pan for 5 minutes before transferring them to a wire rack to finish setting via carryover cooking.
- Standard Oven Temp: 350°F (177°C) for even spread and caramelization.
- Core Ratio: 1 part sugar, 2 parts fat, 3 parts flour by weight for balanced drop cookies.
- Golden Rule: Always weigh flour with a digital scale or use the spoon-and-level method to avoid dense, dry bakes.
Why Cookie Baking Is an Essential Culinary Skill
Baking homemade cookies is often the first venture into pastry arts for home cooks and students. It offers immediate gratification, requiring basic pantry staples and minimal specialized equipment.
Baking is fundamentally an exact chemical process disguised as comfort food. Every ingredient choice, mixing duration, and oven adjustment directly shapes the final rise, spread, chew, and crumb structure.
This comprehensive guide eliminates guesswork by detailing the foundational science, core mechanics, and common pitfalls of cookie baking. Whether you are baking for the first time or seeking bakery-grade consistency, these principles guarantee reliable success.
The Science of Baking Cookies: How Ingredients Function
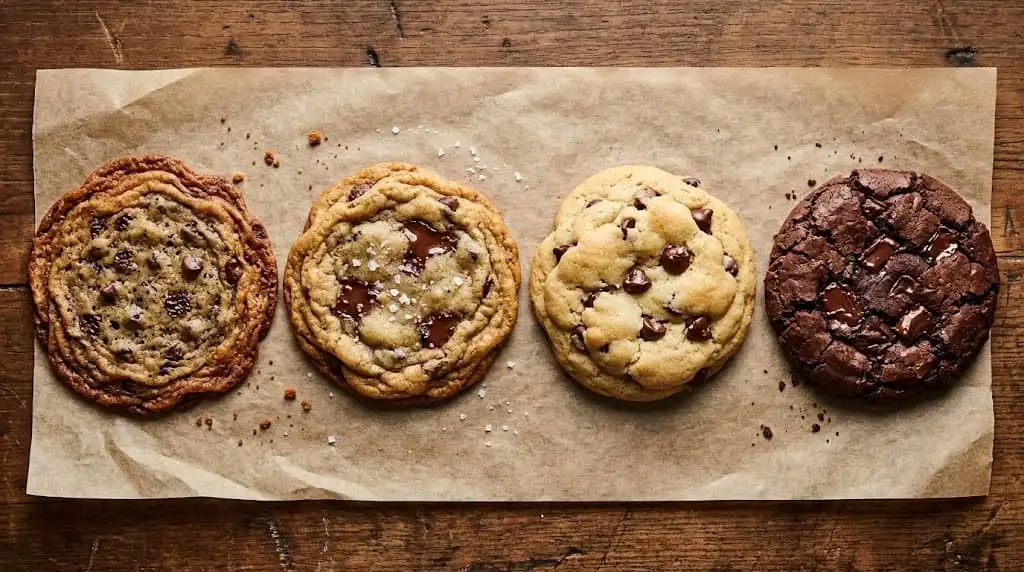
Understanding ingredient interactions allows you to control the outcome of every batch. Small adjustments in fat, sugar, and flour create wildly different textures ranging from thin and crispy to thick and cakey.
1. Flour and Gluten Formation
All-purpose flour provides the structural backbone of standard drop cookies, containing an average protein content of 10% to 12%. When flour hydrates and experiences mechanical agitation, two proteins—gliadin and glutenin—combine to form gluten.
Excessive gluten yields tough, rubbery, bread-like cookies instead of tender crumbs. For delicate cookies, lower-protein pastry or cake flour limits gluten strength, producing a melt-in-your-mouth bite.
Bread flour contains roughly 12% to 14% protein, retaining moisture and producing an exceptionally chewy texture. Blending bread flour with all-purpose flour creates a chewy interior with a crisp perimeter.
2. The Role of Fats: Butter, Shortening, and Oil
Fat coats flour proteins, shortening gluten strands to create a tender texture—the source of the term “shortbread.” The physical state of the fat dictates how the cookie spreads in the oven.
Butter brings irreplaceable flavor and contains roughly 80% to 82% butterfat, 16% to 18% water, and 1% to 2% milk solids. The water in butter converts to steam during baking, creating internal lift, while the milk solids caramelize to produce rich, nutty flavors.
Shortening and vegetable oils contain 100% fat with no water content. Shortening produces taller, softer cookies with less spread because it has a higher melting point (around 115°F/46°C) than butter (around 95°F/35°C).
3. Sugar Dynamics: White Granulated vs. Brown Sugar
Sugar contributes far more than sweetness; it is a primary liquid agent and tenderizer. As sugar heats in the oven, it melts into syrup, promoting spread before recrystallizing during cooling to provide crisp edges.
White granulated sugar is dry, neutral in acidity, and promotes moisture evaporation, yielding crispier, flatter cookies. It encourages surface cracking as water escapes during the bake.
Brown sugar contains molasses, making it naturally acidic and hygroscopic, meaning it actively retains moisture. Cookies made with higher proportions of brown sugar bake up moist, dense, chewy, and slightly darker.
4. Leavening Agents: Baking Soda vs. Baking Powder
Chemical leaveners release carbon dioxide gas bubbles when activated, aerating the dough and determining its ultimate lift and color. Using the incorrect leavening agent alters both texture and taste.
Baking soda (pure sodium bicarbonate) requires an acid like brown sugar, buttermilk, cocoa powder, or sour cream to react and produce gas. It creates an alkaline dough environment that weakens gluten and accelerates the Maillard browning reaction.
Baking powder contains sodium bicarbonate combined with a dry acidifying agent, typically cream of tartar or sodium aluminum sulfate. Most commercial baking powders are double-acting, releasing initial gas upon hydration and a second surge when exposed to oven heat.
5. Eggs: Emulsification, Moisture, and Protein
Eggs serve as the primary liquid binder, contributing hydration, structure, and emulsification to cookie dough. The balance of egg yolk to egg white shifts texture noticeably.
Egg whites consist primarily of water and albumin protein, providing structure, drying power, and leavening support. Recipes with extra whites yield lighter, cakier cookies that dry out quickly if overbaked.
Egg yolks contain concentrated fats and lecithin, a natural emulsifier that binds water-based liquids with fat molecules. Adding an extra egg yolk produces a rich, fudgy dough with superior chewiness.
Essential Cookie Baking Equipment (And Budget Alternatives)
Professional bakeries rely on reliable, conductive tools to ensure repeatable heat transfer. You do not need an industrial kitchen, but your cookware choices directly influence bake times and bottom browning.
Baking Sheets: Why Heavy-Gauge Aluminum Matters
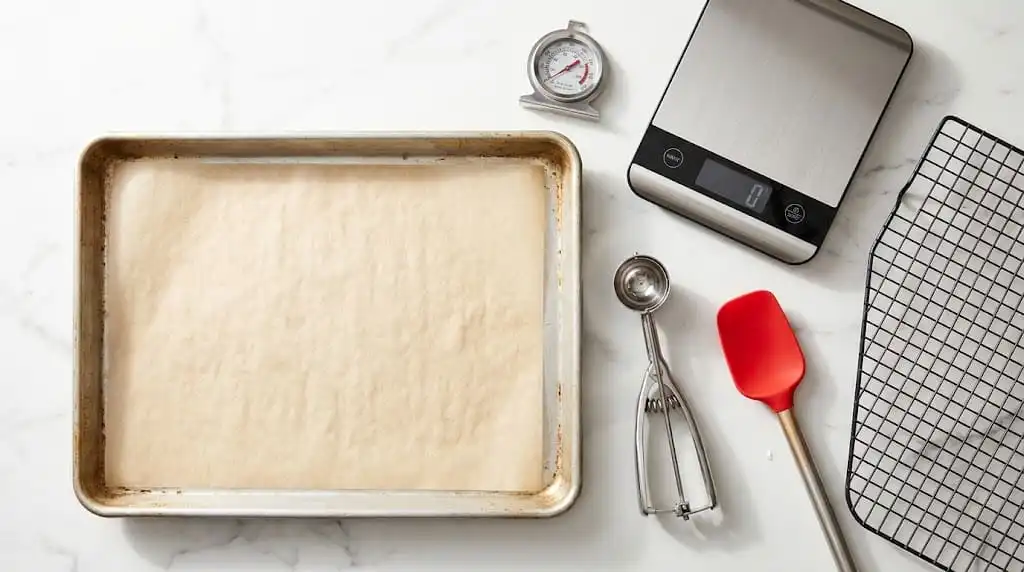
The ideal pan for baking cookies is a heavy-duty, half-sheet pan made of untreated 18-gauge bare aluminum. Aluminum distributes heat quickly and evenly across the entire surface, preventing hot spots.
Avoid thin, dark-coated, or non-stick pans whenever possible. Dark coatings absorb radiant heat rapidly, causing cookie bottoms to burn before the centers can finish setting.
If you only have dark non-stick pans, reduce your oven temperature by 25°F (15°C). You can also double up two thin pans to insulate the bottom heat transfer.
Pan Liners: Parchment Paper vs. Silicone Baking Mats
Parchment paper is the gold standard pan liner for cookies. It creates an even, non-greasy barrier that allows dough to spread naturally while absorbing minor surface grease.
Silicone mats (such as Silpat) are reusable alternatives that provide excellent non-stick release. However, silicone is an insulator that slows heat conduction, often yielding paler bottoms and slightly less spread.
Never bake cookies directly on aluminum foil greased with non-stick cooking spray. Foil transfers heat intensely, causing scorched bottoms and excessive edge grease pooling.
Portioning Tools: Spring-Loaded Cookie Dishers
Uniformity in portion size is essential for even baking across the entire sheet pan. If dough balls vary in mass, smaller portions will burn while larger portions remain raw in the center.
A size #40 disher (holding approximately 1.5 tablespoons or 30 grams of dough) produces standard medium cookies. A size #20 disher (holding 3 tablespoons or 60 grams) is ideal for large, bakery-style cookies.
If you do not own a disher, weigh your dough portions on an inexpensive digital kitchen scale. Alternatively, use standard measuring spoons and roll the dough lightly between cool palms.
Step-by-Step Guide: How to Bake Classic Cookies from Scratch
This master recipe and procedure demonstrates the classic creaming method using a foolproof chewy chocolate chip benchmark. Master these foundational mechanics once, and you can bake virtually any drop cookie style.
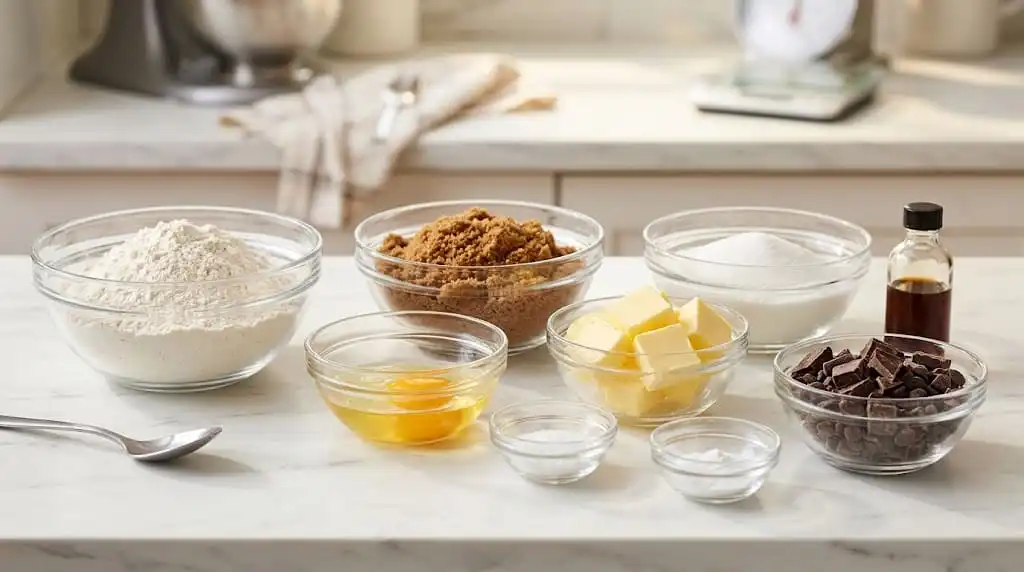
Foundational Formula: Master Chewy Chocolate Chip Cookies
Yield: 16–18 cookies | Prep Time: 15 mins | Chill Time: 60 mins | Bake Time: 10–12 mins
- 280 grams (2 1/4 cups) unbleached all-purpose flour
- 1 teaspoon (5 grams) fine sea salt
- 1 teaspoon (5 grams) baking soda
- 170 grams (3/4 cup or 1.5 sticks) unsalted butter, softened to 65°F (18°C)
- 150 grams (3/4 cup packed) dark brown sugar
- 100 grams (1/2 cup) granulated white sugar
- 1 large whole egg (50g) plus 1 egg yolk (18g), room temperature
- 2 teaspoons (10 ml) pure vanilla extract
- 250 grams (1 1/2 cups) semi-sweet chocolate chunks or chips (60% cacao)
Step 1: Accurate Measurement and Dry Ingredient Preparation
What: Whisk together the all-purpose flour, baking soda, and fine sea salt in a medium bowl until thoroughly combined.
Why: Leavening agents and salt must be evenly distributed throughout the dry mass. Uneven mixing creates localized pockets of bitter baking soda or inconsistent rising.
How: Place a mixing bowl on a digital kitchen scale, tare to zero, and weigh your dry ingredients in grams. If using measuring cups, stir your flour, spoon it lightly into the cup until overflowing, and level it off with a flat knife edge.
Common Mistake: Scooping measuring cups directly into dense flour sacks compresses the grain, adding up to 30% excess flour and causing dry, chalky cookies.
Pro Tip: Sifting is unnecessary for drop cookies unless your baking soda contains hard lumps. A vigorous 15-second whisking aerates the dry mix sufficiently.
Step 2: Temperature Auditing the Wet Ingredients
What: Ensure the butter is at 65°F (18°C) and the eggs are at standard room temperature (68°F–72°F / 20°C–22°C).
Why: Butter at this specific temperature has optimal plasticity, allowing it to trap micro-pockets of air without melting. Cold eggs curdle creamed butter by instantly solidifying the fat emulsions.
How: Press your thumb into the butter block; it should leave a distinct indent without sliding or looking glossy. If butter feels greasy, place it in the refrigerator for 8 minutes to firm up.
Common Mistake: Microwaving cold butter until it liquefies ruins the structural emulsion, leading to thin, oily cookies that spread excessively.
Pro Tip: To bring cold eggs to room temperature rapidly, submerge them whole in a bowl of warm (not hot) tap water for 7 minutes.
Step 3: Creaming Fat and Sugars
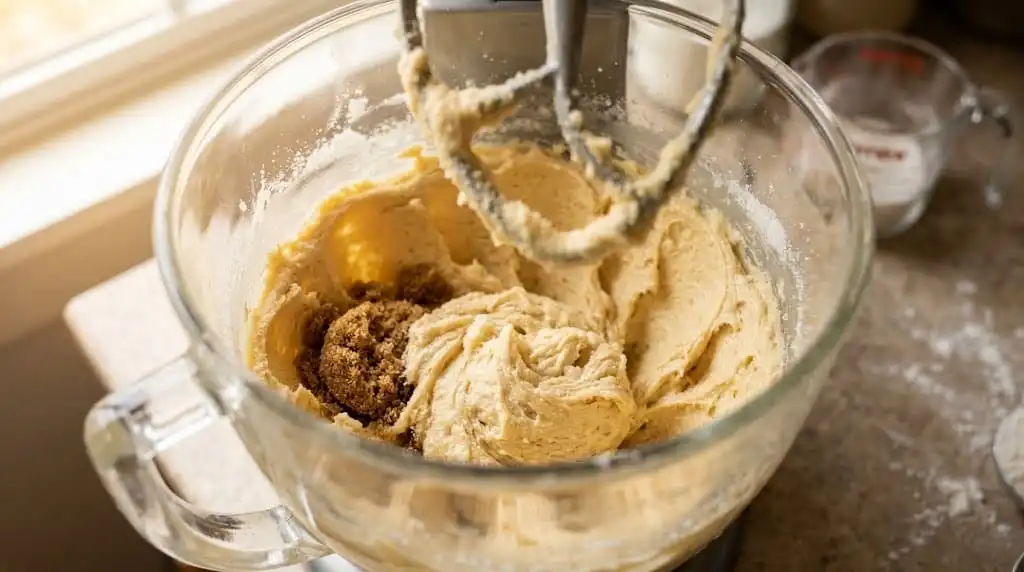
What: Beat the softened butter, dark brown sugar, and granulated sugar together in a stand mixer or with a hand mixer.
Why: The sharp crystalline edges of granulated sugar carve micro-cavities into the malleable fat. These pockets hold the carbon dioxide gases produced later by leaveners.
How: Mix on medium speed for 2 to 3 minutes. The mixture should become homogeneous, creamy, and pale in color, but not light and airy like a sponge cake batter.
Common Mistake: Over-creaming incorporates too much air, which causes cookies to puff dramatically in the oven and then collapse into wrinkled, fragile disks.
Pro Tip: Stop your mixer halfway through and scrape down the bottom and sides of the bowl with a silicone spatula to eliminate unblended butter pockets.
Step 4: Incorporating Liquids and Emulsifying
What: Add the whole egg, extra egg yolk, and pure vanilla extract to the creamed butter-sugar mixture.
Why: Egg yolk lecithin bonds the water phase of the egg white and molasses to the lipid phase of the butter, forming a stable emulsion.
How: Beat on medium-low speed for roughly 45 to 60 seconds until the mixture appears glossy, uniform, and slightly thickened. Scrape the bowl thoroughly after incorporating.
Common Mistake: Dumping cold eggs into melted fat causes the emulsion to break, producing a curdled, separated mixture that leaks grease during baking.
Pro Tip: Add the vanilla directly into the fats; alcohol-based extracts dissolve efficiently in lipids, distributing aromatic compounds evenly throughout the dough.
Step 5: Gentle Dry Ingredient Folding
What: Add the whisked dry ingredients to the wet base and combine gently until only faint streaks of flour remain visible.
Why: Once flour encounters moisture, mechanical friction accelerates gluten development. Minimal agitation keeps the baked crumb delicate and tender.
How: Switch to a broad silicone spatula or set your stand mixer to the lowest stir speed. Pulse the mixer in brief 3-second bursts, stopping the moment 90% of the flour is incorporated.
Common Mistake: Running an electric mixer on medium speed after adding flour overworks gluten, creating tough, rubbery cookies with bread-like textures.
Pro Tip: Reserve the final 10% of flour mixing for when you fold in your chocolate or other mix-ins to prevent over-handling.
Step 6: Folding Mix-Ins
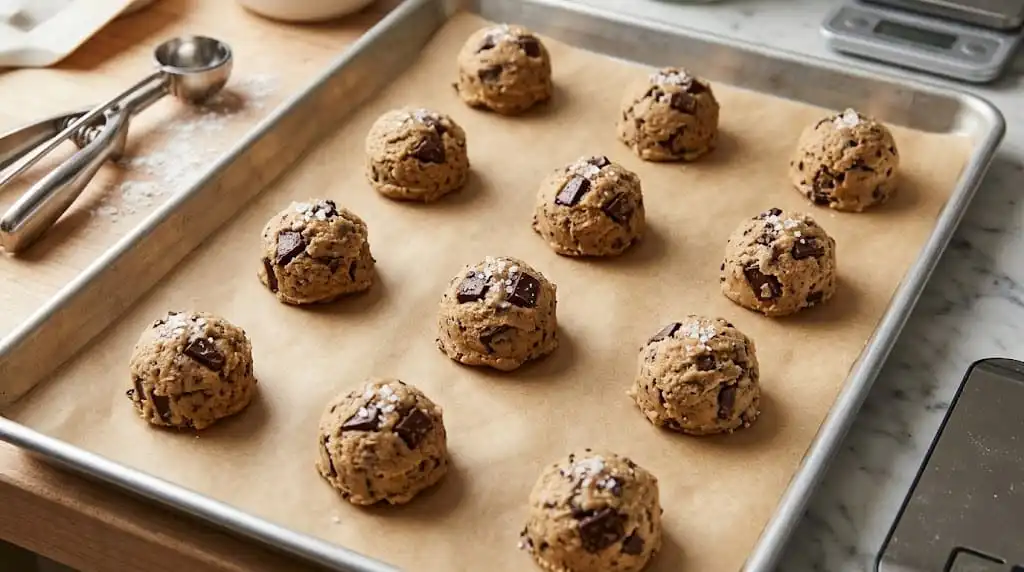
What: Pour the chocolate chunks, nuts, or candies into the dough and fold until evenly distributed.
Why: Even distribution ensures every portion contains a balanced ratio of dough to inclusions, preserving structural integrity.
How: Use a firm cutting and folding motion with a spatula, drawing dough from the bottom up over the top. Limit this step to 8 to 10 total folds.
Common Mistake: Adding warm, freshly toasted mix-ins melts the butter in the dough, destabilizing the chilled structure prematurely.
Pro Tip: Use a combination of chocolate chips and hand-chopped chocolate bars. Chocolate chips hold their shape, while chopped chocolate creates pools and ribbons of melted cocoa.
Step 7: The Critical Dough Chill
What: Cover the mixed dough tightly with plastic wrap and refrigerate at 38°F (3°C) for at least 1 hour, or up to 48 hours.
Why: Chilling solidifies fats so cookies spread slowly in the oven, preserving thickness. It also allows flour enzymes to break down starches into simple sugars, enhancing caramelization.
How: Form the dough into a cohesive disk, wrap it securely to prevent air exposure, and chill. If short on time, scoop the dough into portioned balls first, then chill them on a small tray for 30 minutes.
Common Mistake: Baking warm dough freshly mixed at room temperature leads to rapid spread, greasy edges, and thin, overly flat centers.
Pro Tip: Aging dough for 24 to 36 hours noticeably deepens toffee, caramel, and butterscotch flavor notes due to starch hydrolysis.
Step 8: Portioning and Pan Spacing
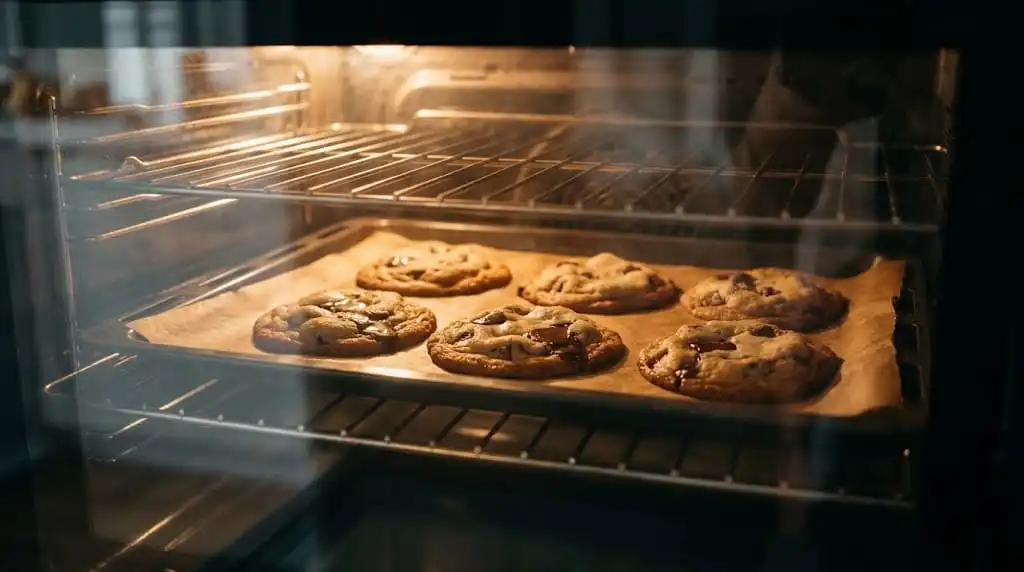
What: Scoop the chilled dough into uniform 55-gram balls and space them evenly across a lined baking sheet.
Why: Sufficient spacing ensures radiant heat circulates cleanly around each cookie, promoting uniform rising and caramelization without overcrowding.
How: Place portions 2.5 to 3 inches (6 to 8 cm) apart, fitting no more than 8 to 10 cookies on a standard 13×18-inch half-sheet pan. Stagger rows in an alternating grid.
Common Mistake: Placing cold dough portions onto a baking sheet that is still hot from a previous batch melts the bottom fats prematurely.
Pro Tip: For taller, bakery-style cookies, pull portioned dough balls apart into two halves with your fingers, invert them so the rough torn surfaces face up, and press them lightly back together.
Step 9: Oven Placement and Baking Cues
What: Bake on the center oven rack at 350°F (177°C) for 10 to 12 minutes, monitoring visual indicators rather than relying solely on timers.
Why: Oven temperatures fluctuate considerably. Visual cues like edge coloration and center firmness are the most reliable indicators of proper doneness.
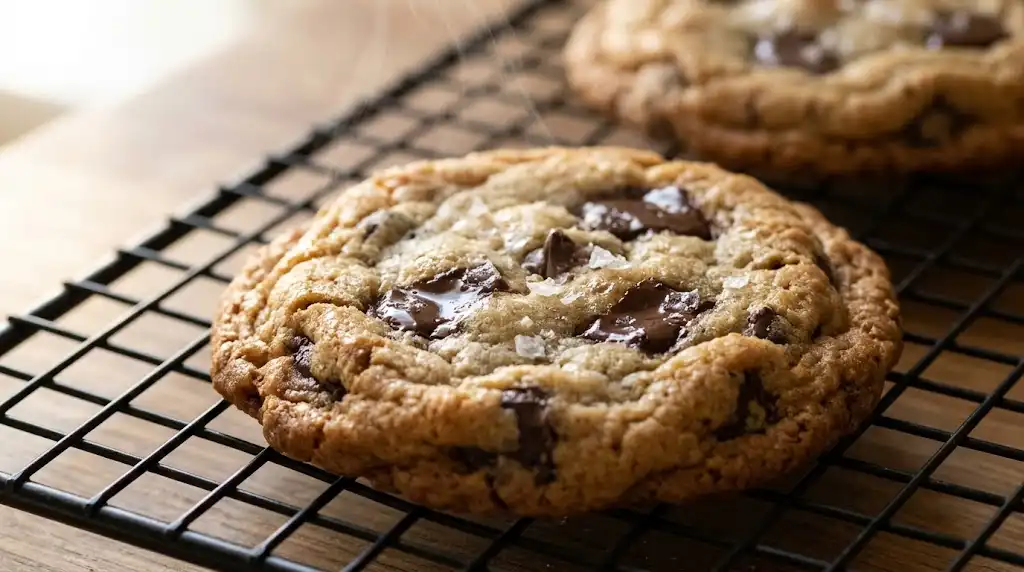
How: Position the rack in the exact center of the oven. Look for edges that are set and golden brown, while the center remains pale, slightly puffed, and matte (not wet or glossy).
Common Mistake: Waiting until the center of the cookie looks firm and browned results in dry, overbaked, brittle cookies once cooled.
Pro Tip: Do not open the oven door repeatedly during the first 8 minutes of baking. Each opening drops the ambient temperature by up to 25°F, disrupting internal steam expansion.
Step 10: Carryover Cooking and Cooling
What: Remove the pan from the oven, let the cookies sit undisturbed for 5 minutes, then move them to a wire cooling rack.
Why: Residual heat retained in the heavy metal pan continues cooking the delicate centers gently off the heat, setting starches without drying them out.
How: Slide a thin metal spatula under each cookie after the 5-minute pan rest. Place them directly onto an elevated wire rack with at least 1 inch of clearance underneath for airflow.
Common Mistake: Leaving cookies on a hot sheet pan indefinitely overcooks their bottoms through conductional carryover heat.
Pro Tip: While cookies are still hot, drop a large circular cookie cutter over each one and swirl it gently in a circle against the pan. This rounds out uneven edges into picture-perfect circles.
Cookie Texture and Baking Sheet Comparison Tables
Use these reference tables to diagnose texture variations and optimize your baking gear.
| Target Texture | Fat Selection | Sugar Profile | Flour Choice | Baking Temp & Time |
|---|---|---|---|---|
| Chewy with Crisp Edges | Melted or Softened Butter (80% fat) | High Brown Sugar (70%), Low White (30%) | All-Purpose or Bread Flour blend | 350°F (177°C) for 10–12 mins |
| Crisp and Crunchy | Clarified Butter or Melted Butter | 100% White Granulated Sugar | Standard All-Purpose Flour | 325°F (163°C) for 14–16 mins |
| Soft and Cake-Like | Vegetable Shortening or Whipped Butter | Balanced White & Brown Sugar | Pastry Flour or AP + Cornstarch | 375°F (190°C) for 8–10 mins |
| Fudgy and Dense | Melted Butter + Extra Egg Yolk | 100% Dark Brown or Muscovado Sugar | Low Flour to Fat Ratio | 350°F (177°C) for 9–11 mins |
| Pan & Liner Type | Heat Transfer Rate | Bottom Crust Impact | Spread Profile | Best Use Case |
|---|---|---|---|---|
| Bare Heavy Aluminum + Parchment | Optimal and Even | Golden brown, crisp, non-greasy | Controlled, predictable spread | All standard drop cookies |
| Dark Coated Non-Stick Pan | Rapid and Intense | High risk of scorching/burning | Fast bottom set, less spread | Requires lower oven temp (-25°F) |
| Silicone Baking Mat (Silpat) | Moderate to Slow | Pale, softer bottom surface | Reduced spread, taller profile | Delicate shortbread, macarons |
| Aluminum Foil (Greased) | Extremely Fast | Dark, fried, oily bottom | Excessive, uncontrolled spread | Emergency only; not recommended |
Advanced Baking Techniques and Edge Cases
Once you understand the basics, professional pastry techniques can elevate standard cookie dough into bakery-quality bakes.
1. Brown Butter Preparation (Beurre Noisette)
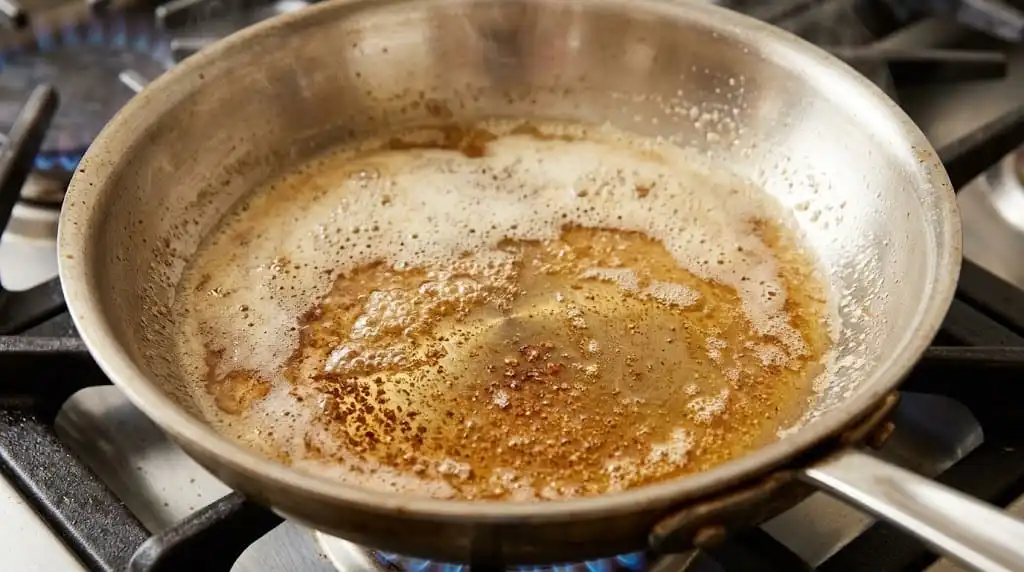
Browning butter cooks off its natural water content and caramelizes the milk solids, creating rich notes of toasted hazelnut, toffee, and butterscotch. Melt unsalted butter in a wide, light-colored stainless steel skillet over medium heat.
Swirl the pan constantly as the butter foams and crackles. Once the bubbling subsides and golden-brown flecks settle at the base, immediately pour the butter into a heatproof bowl to halt cooking.
Browning butter evaporates about 15% to 20% of its water weight. Add 1 tablespoon of milk, heavy cream, or water back to the melted brown butter to restore hydration, or your cookies will bake up dry.
2. The Pan-Banging Ripple Technique
Popularized by professional baker Sarah Kieffer, this technique creates crisp, wavy ridges along the perimeter and a soft, molten center. Bake your cookies at 350°F (177°C) until they puff in the middle, roughly 8 to 9 minutes in.
Lift the baking sheet 4 to 5 inches off the oven rack and drop it firmly onto the grate. The impact collapses the expanded air core, spreading the liquid center outward and creating concentric ripples.
Repeat this step every 90 seconds for an additional 3 to 4 minutes. The result is a wide cookie with contrasting textures—crisp and paper-thin on the outer bands, dense and chewy inside.
3. High-Altitude Adjustments (Above 3,500 Feet / 1,000 Meters)
At high altitudes, lower atmospheric pressure allows baked goods to rise faster, while liquids evaporate more rapidly. Unadjusted cookie dough often spreads into flat, dry puddles before the structural proteins can set.
Reduce leavening agents by 20% to 25% to prevent the air pockets from over-expanding and collapsing. Increase the baking temperature by 15°F to 25°F (8°C to 14°C) to accelerate protein and starch coagulation.
Add 1 to 2 tablespoons of extra liquid (milk or egg white) to compensate for rapid evaporation. Reducing white granulated sugar by 2 tablespoons per cup also limits spread and prevents over-caramelization.
4. Freezing and Long-Term Dough Preservation
Cookie dough freezes exceptionally well, making it easy to bake fresh individual portions on demand. Portion your dough into balls using a scoop and line them up on a parchment-lined baking sheet.
Freeze the dough balls uncovered for 60 to 90 minutes until completely solid. Transfer the frozen portions to a heavy-duty, zip-top freezer bag, press out excess air, and store for up to three months.
Bake directly from frozen without thawing. Keep your standard baking temperature the same, simply extending the bake time by 2 to 3 minutes to account for the frozen core.
Common Cookie Mistakes and How to Fix Them
Diagnose and resolve common baking issues with these targeted troubleshooting steps.
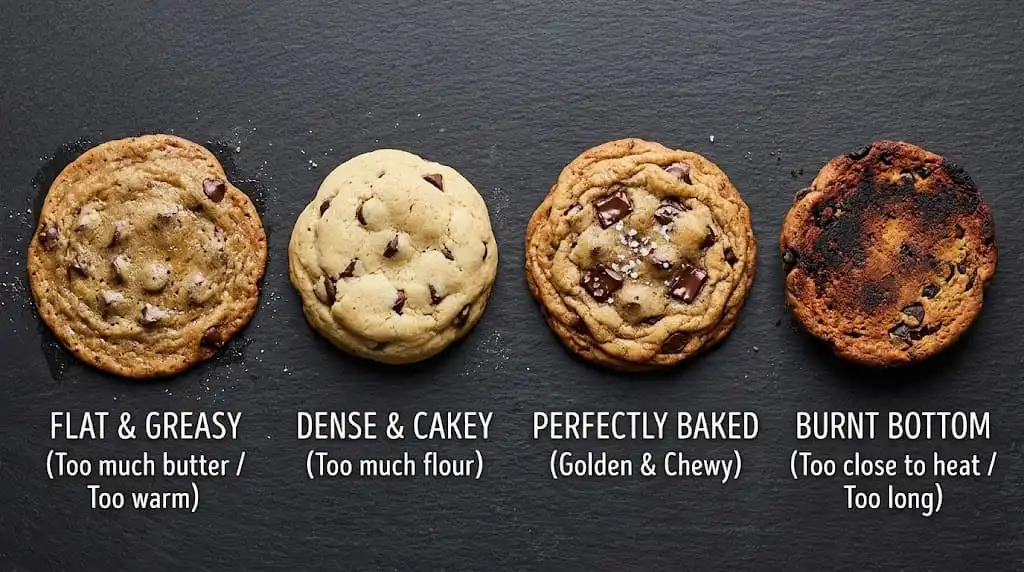
1. Cookies Spread Too Flat into a Greasy Sheet
The Cause: The butter was over-softened, melted, or warm during mixing. This issue can also stem from insufficient flour, warm dough going into the oven, or baking on greased non-stick pans.
The Fix: Weigh your flour using a digital scale to ensure correct ratios. Chill all portioned dough balls for at least 45 minutes before baking, and always line pans with dry parchment paper.
2. Cookies Are Puffy, Dense, and Cake-Like
The Cause: Measuring flour by dipping the cup directly into the bag packs it down, adding excessive dry mass. Using baking powder instead of baking soda or over-whipping eggs also creates a spongy, cake-like structure.
The Fix: Use the spoon-and-level method or a digital scale (120 grams per cup of all-purpose flour). Replace white sugar with brown sugar to promote chewiness and moisture retention.
3. Scorched, Dark Bottoms with Pale, Underbaked Tops
The Cause: Placing baking sheets on the lowest oven rack exposes them to harsh radiant heat from the bottom element. Thin, dark-coated pans and cooking directly on aluminum foil also scorch cookies.
The Fix: Move your oven rack to the exact center position. Switch to thick, light-colored 18-gauge bare aluminum sheets, or stack two thinner baking pans together to insulate bottom heat.
4. Dry, Crumbly, and Brittle Texture
The Cause: Overbaking is the leading cause of dry cookies. Leaving cookies in the oven until the centers feel firm strips out moisture, which continues to escape during cooling.
The Fix: Pull cookies from the oven when the centers are still pale, puffy, and soft. The residual heat on the hot pan will finish cooking the centers off the heat.
Kitchen Best Practices for Repeatable Results
Baking consistency depends on controlling temperature and workflow variables across every single batch.
- Keep an Independent Oven Thermometer: Built-in oven dials are notoriously inaccurate, often drifting 15°F to 40°F away from the actual internal temperature. Hang a dial thermometer directly on your center rack to verify true heat.
- Never Place Dough on a Warm Pan: Scooping cold dough onto a hot sheet pan melts the fat before the cookies ever reach the oven. Always let pans cool to room temperature, or rinse them under cool water and dry thoroughly between batches.
- Bake One Sheet at a Time: Placing multiple pans on different racks blocks heat airflow and creates uneven browning. Bake a single sheet pan on the middle rack for consistent heat circulation.
- Store with a Moisture Source: Store cooled cookies in an airtight glass or plastic container. Add half a slice of fresh sandwich bread to the container; the cookies will absorb moisture from the bread, staying soft for up to a week.
Recommended Tools and Conversions
Quality baking gear does not require a large budget, but using accurate tools eliminates the most common sources of baking failure.
Recommended Equipment
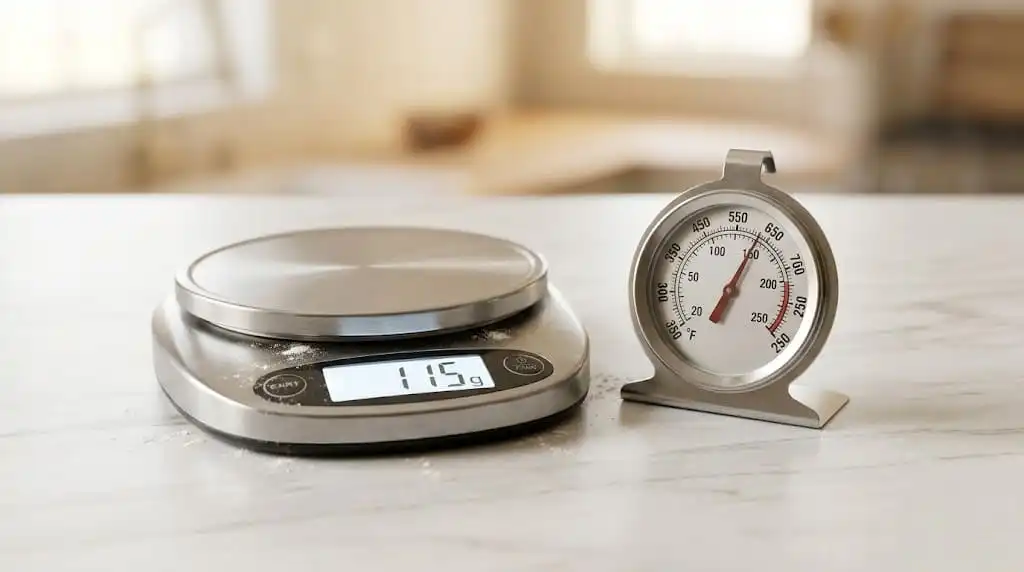
- Digital Kitchen Scale: Look for a scale accurate to 1 gram with a tare function. Weighing ingredients in grams prevents the large volume errors common with measuring cups.
- Half-Sheet Commercial Pans: 13×18-inch natural aluminum sheet pans with reinforced rolled steel rims prevent warping under high heat.
- Bimetallic Dial Oven Thermometer: Stainless steel, high-heat display, hanging clip or base stand.
- Spring-Loaded Disher (Size #40): Delivers consistent 1.5-tablespoon dough portions for even baking.
Quick Baking Conversions
| Ingredient | Volume Measure | Grams (Metric) | Ounces (Imperial) |
|---|---|---|---|
| All-Purpose Flour (unbleached) | 1 cup (spooned & leveled) | 120 g | 4.23 oz |
| Granulated White Sugar | 1 cup | 200 g | 7.05 oz |
| Dark Brown Sugar (packed) | 1 cup | 215 g | 7.58 oz |
| Unsalted Butter | 1 cup (2 sticks) | 227 g | 8.00 oz |
Authority Resources
For further study on food science and culinary standards, consult these trusted resources:
- King Arthur Baking Company: The Baker’s Companion Reference and Certified Flour Metric Guides.
- United States Department of Agriculture (USDA): Safe Handling Instructions for Raw Flour and Shell Eggs.
- McGee, Harold: On Food and Cooking: The Science and Lore of the Kitchen (Foundational food science resource covering fat emulsions and Maillard reactions).
Key Takeaways
- Measure by Weight: Weighing dry ingredients on a digital scale eliminates up to 30% error compared to using measuring cups.
- Watch Your Temperatures: Butter should be 65°F (18°C) for clean creaming, while eggs must be at room temperature to prevent curdled emulsions.
- Chill the Dough: Refrigerating cookie dough for at least 1 hour limits excess spread, hydrates flour, and concentrates flavor.
- Underbake Slightly: Remove cookies when edges are set and golden but centers remain soft. Carryover cooking on the pan completes the process.
- Use Bare Aluminum Pans: Heavy-gauge, light-colored aluminum pans lined with parchment paper ensure even browning without scorching bottom crusts.
Conclusion
Baking exceptional cookies from scratch is an accessible culinary skill grounded in simple food science. Once you understand how butter temperature, flour protein, and sugar types interact, you can reliably control spread, rise, and chewiness.
Set aside measuring cups in favor of a digital scale, keep an eye on dough temperature, and watch for visual doneness cues rather than relying on oven timers. With a little practice, your kitchen will turn out bakery-quality cookies every time.
Frequently Asked Questions
Why did my cookies come out completely flat?
Flat cookies usually occur when butter is too warm or melted during mixing, causing the dough to spread rapidly before its structure sets. This also happens when dough is baked without chilling, when flour is under-measured, or when dough is placed onto a warm baking sheet.
Can I use salted butter instead of unsalted butter?
Yes, but unsalted butter is preferred because salt levels vary widely between commercial butter brands. If using salted butter, reduce the recipe’s added salt by 1/4 teaspoon per stick (113 grams) of butter to keep the overall flavor profile balanced.
Why are my cookies hard and tough instead of chewy?
Tough cookies are caused by over-mixing the dough once flour is added, which overdevelops gluten proteins into an elastic network. Overbaking, using excess flour from dipping measuring cups directly into flour bags, or omitting brown sugar will also yield dry, tough results.
Do I really need to chill cookie dough before baking?
Yes. Chilling solidifies fats so they melt more slowly in the oven, preventing excessive spread and keeping cookies thick and chewy. It also gives flour enzymes time to hydrate and break down starches, developing richer toffee and caramel flavors.
How do I know when cookies are finished baking?
Cookies are finished when the edges are set, lightly browned, and feel dry to the touch, while the center remains pale, puffed, and soft. Never wait until the center looks fully baked; residual heat on the hot pan finishes cooking the interior off the heat.
Can I bake cookies on aluminum foil instead of parchment paper?
Baking on aluminum foil is not recommended because foil transfers heat too quickly, scorching the bottoms of your cookies before the centers can cook through. Parchment paper provides an ideal, non-stick barrier that buffers heat and produces an evenly browned bottom crust.
Why did my cookies puff up like little cakes?
Cakey cookies stem from excess flour, using baking powder instead of baking soda, or incorporating too much air during creaming. Adding whole eggs without enough fat can also produce a spongy texture. Using brown sugar and melted butter creates a denser, chewier bite.
How should I store homemade cookies to keep them soft?
Store cooled cookies at room temperature in an airtight container with a tight-fitting lid. Adding half a slice of plain white sandwich bread to the container keeps them soft; the hygroscopic sugar in the cookies absorbs moisture from the bread without altering their flavor.