The Ultimate Guide to Bakery-Style Chocolate Chunk Cookies: Science, Technique, and Master Recipe
Table of Contents
- Quick Summary: The Golden Rules of Chocolate Chunk Cookies
- Introduction: Why Upgrade to Chocolate Chunks?
- The Science of Chocolate: Chunks vs. Chips
- Ingredient Deep-Dive: Chemistry in the Dough
- The Fat and Sugar Matrix: Achieving Crisp Edges and Chewy Centers
- Temperature Dynamics: Why Dough Hydration and Chilling Matter
- Master Step-by-Step Recipe Guide
- Ingredient Variable Matrix
- Pro Tips and Advanced Baking Techniques
- Common Mistakes and How to Fix Them
- Kitchen Best Practices for Perfect Bakes
- Essential Baker’s Tools
- Recommended Related Guides
- Educational & Science Resources
- Key Takeaways
- Final Thoughts
- Frequently Asked Questions
Quick Summary: How to Bake Perfect Chocolate Chunk Cookies
The secret to exceptional chocolate chunk cookies lies in hand-chopped chocolate, brown butter, and dough rest time. Hand-chopping high-quality bar chocolate creates irregular shards and fine chocolate dust that melts throughout the dough, unlike commercial chocolate chips containing stabilizers.
Browning the butter evaporates excess water while intensifying nutty caramel notes through the Maillard reaction. Chilling the dough for at least 24 hours allows the flour starches to fully hydrate, producing a richer color, deeper butterscotch flavor, and ideal cookie spread.
- Use Chocolate Bars: Chop 60% to 70% dark chocolate bars instead of buying bagged chips.
- Brown Your Butter: Cook unsalted butter until golden brown to add depth and control moisture.
- Chill the Dough: Rest dough for 24 to 48 hours for optimal starch hydration and chewiness.
- Top with Flake Salt: Finish hot cookies with flaky sea salt to balance sweetness.

Introduction: Why Upgrade to Chocolate Chunks?
Baking homemade cookies is a fundamental skill, yet small structural adjustments separate ordinary home bakes from bakery-level results. The classic chocolate chunk cookie represents the pinnacle of texturally complex, highly aromatic baking.
This guide breaks down every variable that impacts cookie structure, flavor, and spread. Whether you are a beginner seeking reliable instructions or an experienced home baker exploring pastry physics, this reference delivers actionable answers.
You will learn the chemistry behind fat-to-sugar ratios, the mechanics of gluten formation, and the exact steps required to bake thick, chewy cookies with crisp edges every time.
The Science of Chocolate: Chunks vs. Chips
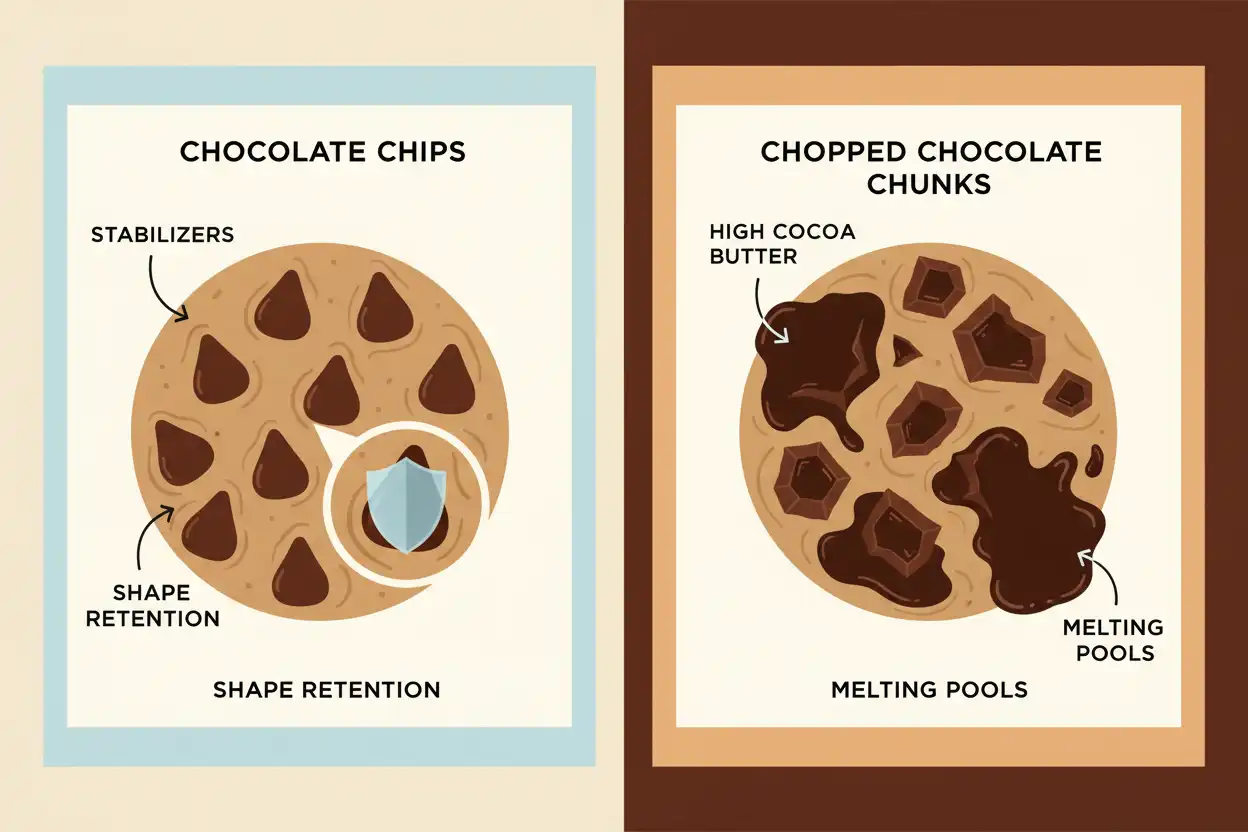
The choice between chocolate chips and hand-chopped chocolate chunks fundamentally changes how heat moves through a cookie during baking. Standard chocolate chips contain added soy lecithin and less cocoa butter, helping them hold their drop shape under high heat.
Hand-chopped chocolate blocks lack these shape-retaining additives and carry higher cocoa butter levels. When exposed to oven heat, chopped chocolate breaks down into luxurious pools that weave between layers of dough.
Chopping a bar by hand also produces “chocolate dust”—microscopic shavings that mix directly into the flour matrix. This creates a subtle cocoa undertone throughout the entire cookie rather than isolated sweet pockets.
Selecting the Right Cocoa Percentage
Choosing the correct chocolate percentage keeps the final cookie from tasting cloying. Semi-sweet chocolate chips typically hover around 40% to 50% sugar and low cocoa solids.
Aim for dark chocolate bars ranging from 60% to 70% cocoa content. This bittersweet profile balances the heavy brown sugar content in rich doughs.
Combining two types of chocolate—such as 70% dark chocolate with a 45% milk chocolate bar—creates layered flavor notes in every bite.
Ingredient Deep-Dive: Chemistry in the Dough
Every ingredient in a cookie recipe serves a structural or chemical purpose. Understanding these roles helps you troubleshoot dry textures, excess spread, or pale bakes.
Flour Dynamics: Gluten and Protein Content
All-purpose flour provides the baseline structure for classic cookies, usually holding a protein content between 10% and 12%. Higher protein levels generate more gluten when mixed with liquids.
Using a combination of all-purpose flour and bread flour (around 12.5% to 14% protein) adds extra chewiness and structural integrity to large cookies. The higher protein traps steam during the initial bake phase, preventing the center from collapsing flat.
Cake flour can be blended in for a softer, cake-like crumb, but pure all-purpose or an all-purpose/bread flour mix remains the ideal standard for chewy chocolate chunk cookies.
The Fat Element: Butter Temperature and Browning
Butter supplies moisture, fat, and flavor while controlling cookie spread. Standard butter contains roughly 80% to 82% milk fat, 16% to 18% water, and 1% to 2% milk solids.
When you melt and brown butter, the water evaporates completely, and the milk solids toast via the Maillard reaction. This process produces rich nut-like flavor compounds without adding excess moisture that can lead to cakey cookies.
Because browning butter removes its liquid water content, you must add back a small amount of liquid (such as an extra egg yolk or a tablespoon of milk) to preserve dough balance.
Sugar Ratios: Brown Sugar vs. White Granulated Sugar
Sugar does far more than provide sweetness; it dictates texture, spread, and moisture retention. Granulated white sugar is non-hygroscopic, promoting dough spread and crisp outer edges as it crystallizes during baking.
Brown sugar contains molasses, making it hygroscopic—meaning it actively absorbs and holds onto moisture. Dark brown sugar contains approximately 6.5% molasses, whereas light brown sugar contains about 3.5%.
A higher proportion of dark brown sugar yields a denser, moister, and chewier cookie with rich caramel notes. A 2:1 ratio of brown sugar to white granulated sugar offers the optimal balance of chewy centers and crisp rims.
Leavening Agents: Baking Soda vs. Baking Powder
Baking soda (pure sodium bicarbonate) requires an acid—like brown sugar or cocoa—to react and release carbon dioxide gas. It raises the pH of the dough, which slows down protein coagulation and allows the cookie to spread before setting, while promoting deep surface browning.
Baking powder contains both sodium bicarbonate and an acidifying agent. It reacts twice: once when mixed with wet ingredients and again when heated in the oven, producing a lighter, airier lift.
Using primarily baking soda in chocolate chunk cookies creates a dense, chewy texture with deep golden-brown color profiles.
The Fat and Sugar Matrix: Achieving Crisp Edges and Chewy Centers
How fat and sugar interact during mixing sets the final foundation for cookie density. Creaming cold or room-temperature butter with sugar beats air pockets into the fat structure, producing a cakey crumb.
Using slightly cooled brown butter mixed with sugars yields a denser dough with minimal trapped air. This method concentrates fat around the flour proteins, limiting gluten formation and guaranteeing a fudgy interior.
Controlling the dough temperature before mixing ensures the sugar partially dissolves into the warm fat without prematurely cooking the eggs when added.
Temperature Dynamics: Why Dough Hydration and Chilling Matter
Baking freshly mixed dough immediately leads to rapid spreading in the oven, thin edges, and pale centers. Chilling cookie dough transforms both texture and flavor profile.
During the chilling period, enzymes in the flour break down complex starches into simple sugars. At the same time, the flour fully absorbs liquid from the eggs, hydrating the gluten proteins evenly.
Chilling also solidifies the butter fat. When cold dough hits a hot oven, the fat takes longer to melt, allowing the outer structure of the cookie to set before the interior flattens out entirely.
For best results, scoop dough into portioned balls and chill in an airtight container for 24 to 48 hours before baking.
Master Step-by-Step Recipe Guide
Follow these precise instructions to prepare, portion, and bake bakery-style chocolate chunk cookies.
Ingredients Required
- Unsalted Butter: 225g (1 cup / 2 sticks)
- Dark Brown Sugar: 220g (1 cup, packed)
- Granulated White Sugar: 100g (1/2 cup)
- Large Eggs: 2 room temperature eggs + 1 egg yolk
- Pure Vanilla Extract or Paste: 2 teaspoons
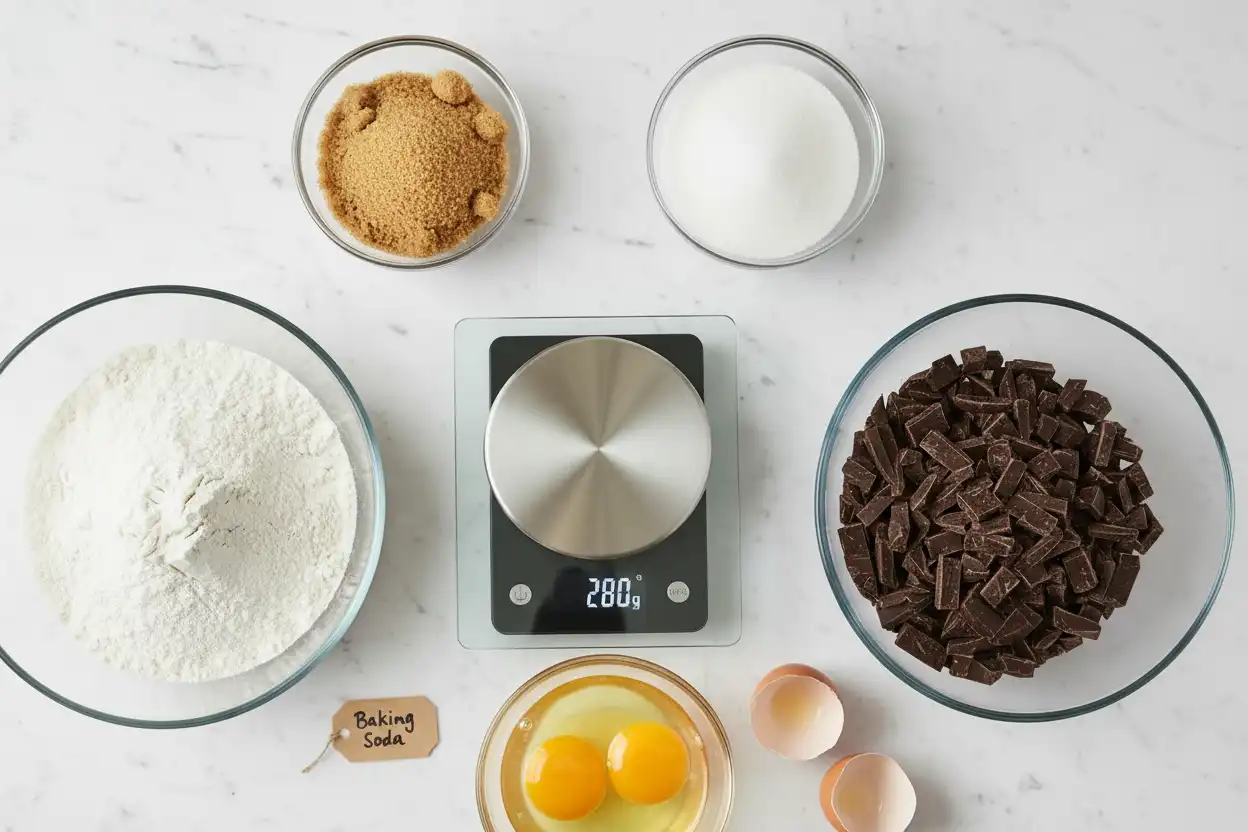
- All-Purpose Flour: 280g (2 1/3 cups, spooned and leveled)
- Bread Flour: 60g (1/2 cup)
- Baking Soda: 1 teaspoon
- Fine Sea Salt: 1 teaspoon
- Dark Chocolate Bar (60-70% Cocoa): 300g (10.5 oz), coarsely hand-chopped
- Flaky Sea Salt: For finishing topping
Step-by-Step Preparation
Step 1: Brown the Butter
Place 225g of unsalted butter in a medium saucepan over medium heat. Melt completely, then allow it to come to a simmer, stirring continuously with a heat-safe spatula.
The butter will foam, sputter, and then begin to quiet down as milk solids sink to the bottom. Once you see golden-brown specks and smell a nutty aroma (roughly 5–7 minutes), remove immediately from heat and pour into a heatproof bowl. Allow it to cool for 15 minutes until warm, not hot.
Pro Tip: Do not discard the toasted brown specks at the bottom of the pan; they hold the concentrated brown butter flavor.
Step 2: Chop the Chocolate
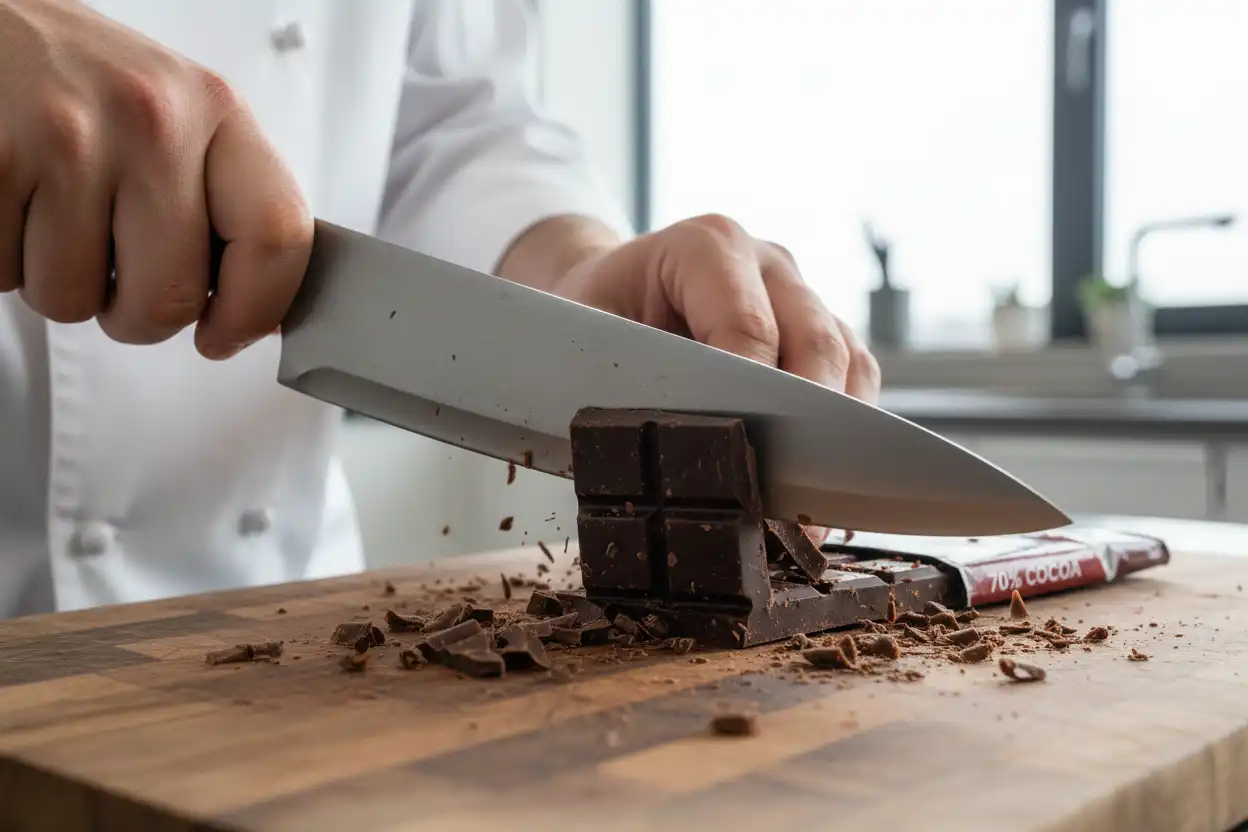
Place your chocolate bars on a sturdy cutting board. Using a large chef’s knife, cut diagonally across the bars to create irregular chunks ranging from fine shavings to 1/2-inch pieces.
Set aside all pieces, including the fine chocolate dust generated on the cutting board.
Step 3: Whisk Dry Ingredients
In a medium bowl, whisk together the all-purpose flour, bread flour, baking soda, and fine sea salt until evenly distributed. Set aside.
Step 4: Emulsify Wet Ingredients and Sugars
Pour the cooled brown butter into a large mixing bowl. Add the dark brown sugar and granulated white sugar, whisking vigorously for 1–2 minutes until fully combined and no dry sugar pockets remain.
Add the eggs, extra egg yolk, and vanilla extract. Whisk firmly for 2 full minutes until the mixture turns glossy, thick, and slightly paler in color. This emulsifies the fat and liquid, creating a smooth glossy surface on baked cookies.
Step 5: Fold Dry Ingredients and Chocolate
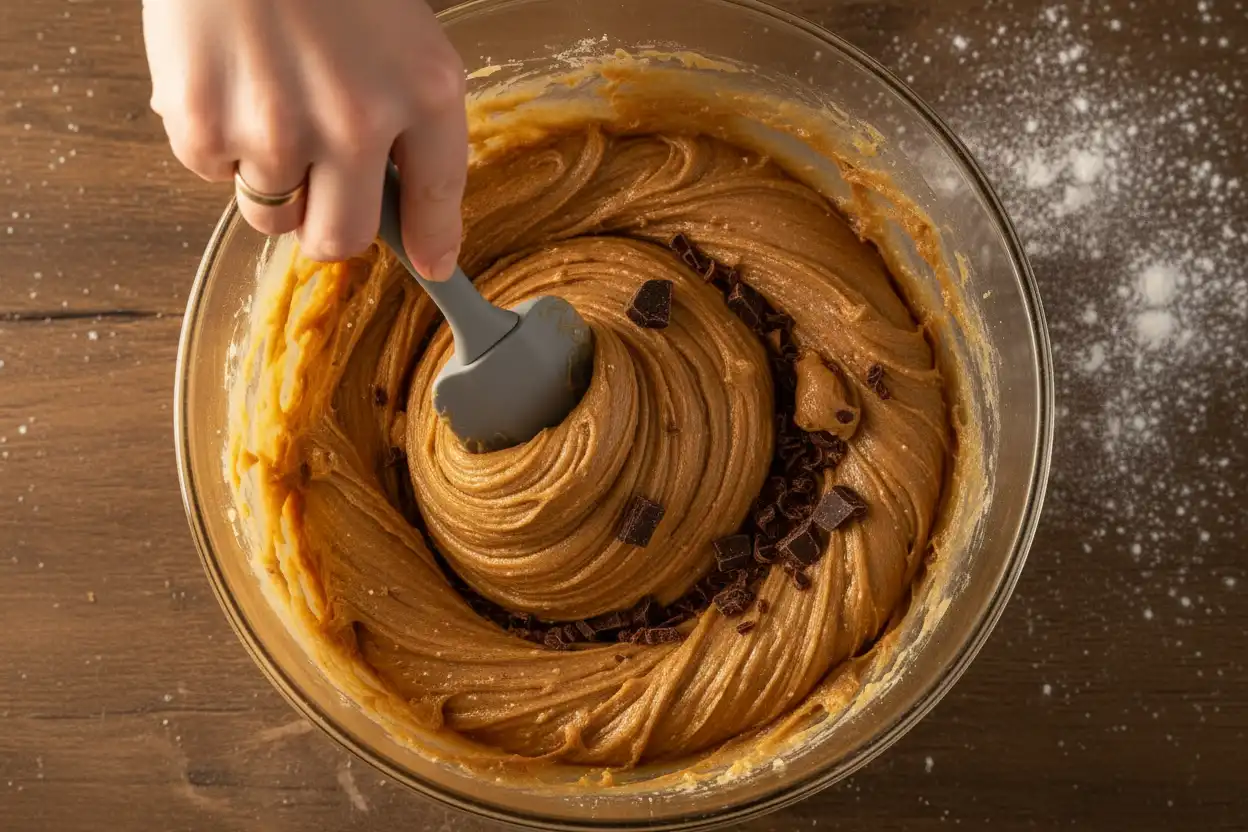
Switch to a rubber spatula. Add the dry ingredient mixture to the wet batter and fold gently just until a few flour streaks remain.
Dump in all the chopped chocolate and accumulated chocolate dust. Fold gently until the chocolate is distributed evenly throughout the dough. Stop mixing immediately once the flour disappears to avoid toughening the gluten.
Step 6: Portion and Chill
Line a baking sheet with parchment paper. Using a large spring-loaded cookie scoop (about 3.5 ounces or 100 grams per ball), portion the dough into tall, rounded mounds.
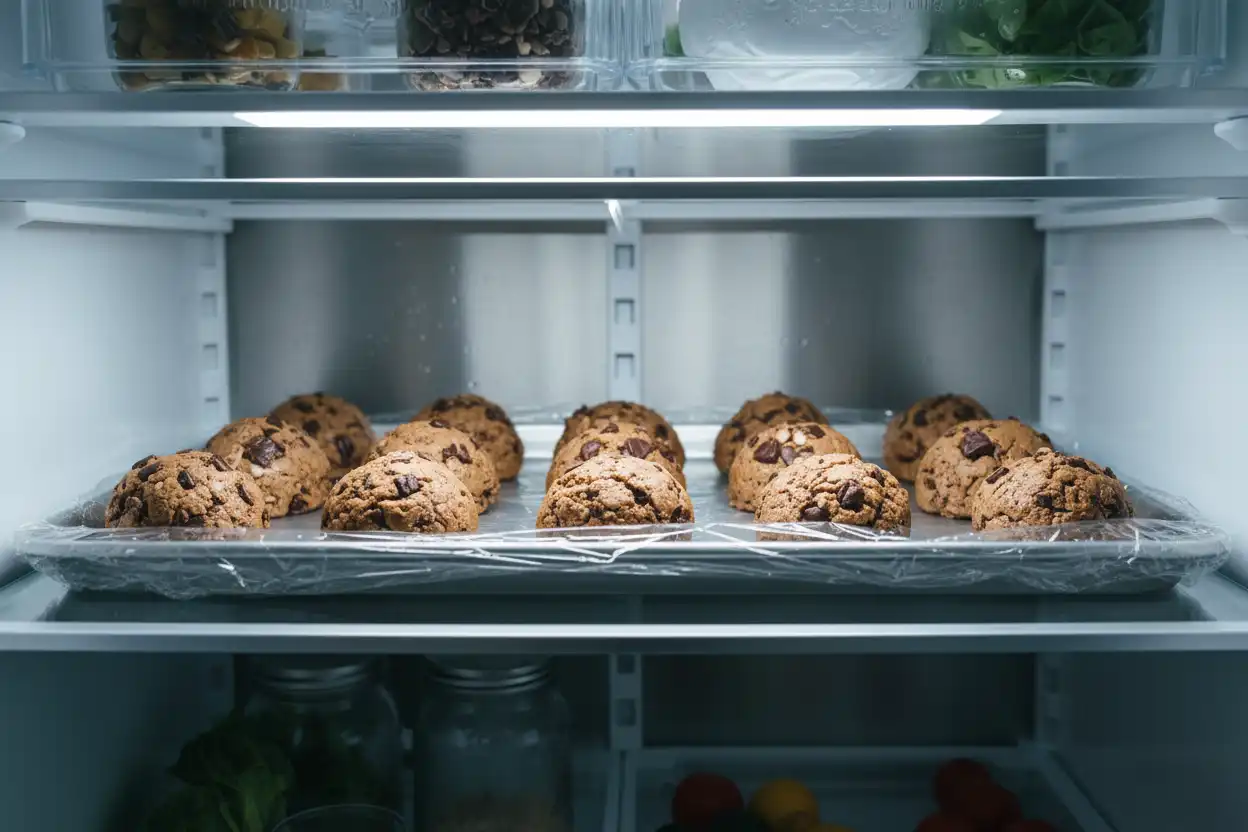
Place dough balls close together on the lined sheet, cover tightly with plastic wrap, and transfer to the refrigerator. Chill for a minimum of 24 hours, or up to 48 hours for maximum flavor depth.
Step 7: Bake
Preheat your oven to 350°F (177°C) with a rack positioned in the middle. Line a heavy half-sheet pan with fresh parchment paper.
Arrange 6 chilled dough balls on the sheet, leaving at least 3 inches of space between each to allow for spread. Keep remaining dough in the fridge between batches.
Bake for 12 to 14 minutes. The edges should be set and golden brown, while the centers remain soft and slightly underbaked.
Step 8: Shape and Finish
Remove the pan from the oven. Immediately bang the pan firmly on the stovetop twice to settle the centers and create rippled outer edges.
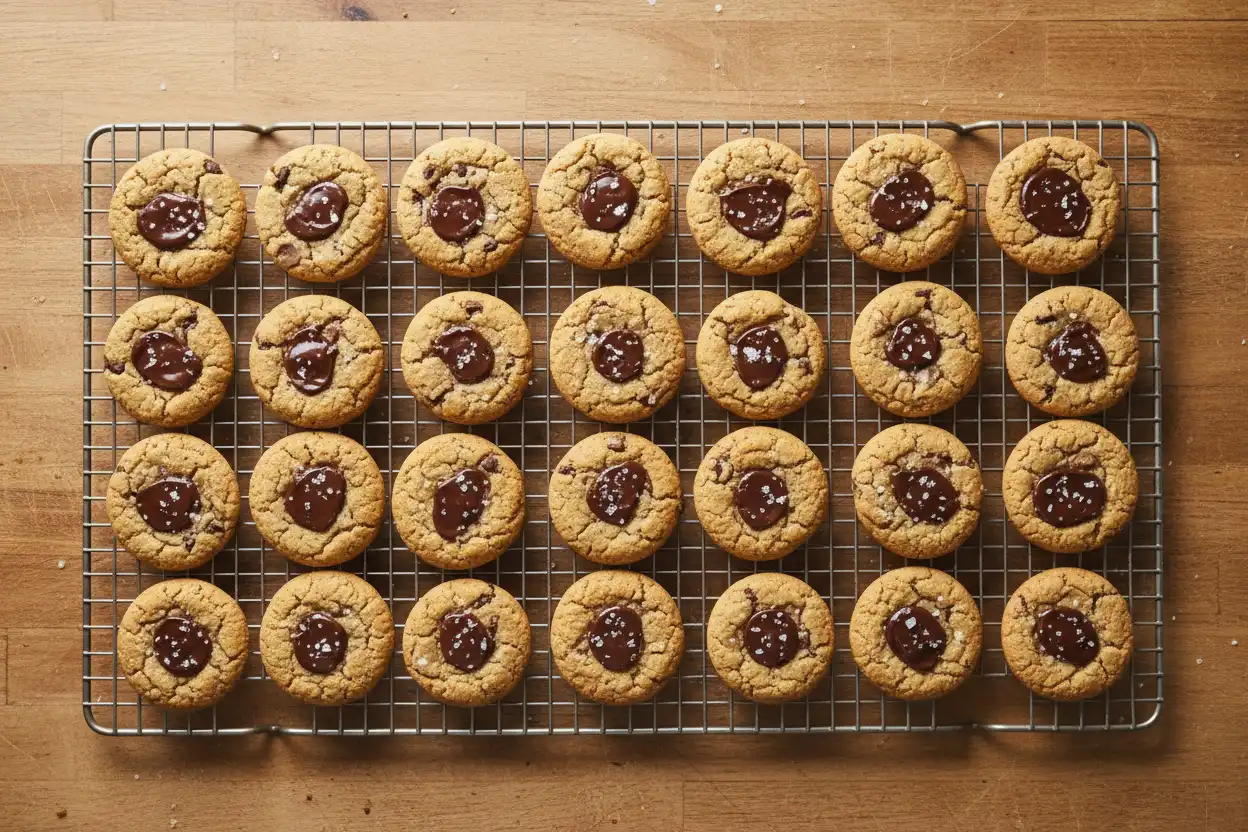
Optionally, place a large round cookie cutter over each hot cookie and swirl it in a circular motion against the pan to shape them into perfect rounds. Sprinkle generously with flaky sea salt.
Allow cookies to cool on the hot baking sheet for 10 minutes before transferring them to a wire rack to cool completely.
Ingredient Variable Matrix
The table below summarizes how different ingredient adjustments alter cookie spread, texture, and final appearance.
| Variable Tested | Primary Textural Impact | Visual Characteristics | Recommended Use Case |
|---|---|---|---|
| 100% Granulated Sugar | Crisp, crunchy, high spread | Pale, wide, thin cross-section | Thin and crispy style cookies |
| 100% Dark Brown Sugar | Dense, chewy, minimal spread | Dark mahogany brown, thick centers | Ultra-fudgy, molasses-forward cookies |
| Softened Creamed Butter | Cakey, light interior structure | Moderate height, rounded surface | Traditional drop cookies |
| Browned Butter (Cooled) | Chewy center, crisp rim, rich mouthfeel | Deep golden color, rippled ring edges | Bakery-style chocolate chunk cookies |
| No Chilling (Baked Fresh) | Soft, prone to greasy spread | Flat, uneven outer border | Quick bakes when time is limited |
| 48-Hour Dough Chill | Highly elastic, chewy, uniform crumb | Uniform golden tone, dramatic chocolate pools | Ultimate masterclass recipe standard |
Pro Tips and Advanced Baking Techniques
Elevate your cookies with these practical pastry chef methods.
The Pan-Banging Method
Developed by baker Sarah Kieffer, pan-banging creates delicate ripples around the perimeter of the cookie while compacting the warm center.
Bang the pan firmly against your oven rack or stovetop halfway through baking and again as soon as the pan comes out of the oven. This releases air pockets, forcing the soft center to settle into a fudgy layer.
High-Altitude Baking Adjustments
Baking at altitudes above 3,000 feet requires minor formula tweaks due to lower atmospheric pressure and faster evaporation rates.
- Increase oven temperature: Raise baking temperature from 350°F to 365°F (177°C to 185°C) to set structure quickly.
- Reduce leavening: Cut baking soda by 1/8 to 1/4 teaspoon to prevent over-expansion and collapsing.
- Increase liquid flour hydration: Add 1 to 2 additional tablespoons of flour to handle extra liquid loss.
Freezing Raw Portioned Dough
After chilling dough balls for 24 hours in the fridge, transfer them to a sealable freezer bag. Freeze for up to three months.
Bake frozen dough balls directly from the freezer at 350°F (177°C), adding 2 to 3 extra minutes to the total baking time.
Common Mistakes and How to Fix Them
Avoid these common pitfalls to maintain consistent baking results.
1. Measuring Flour by Volume (Cup Method)
Scooping flour directly out of a bag with a measuring cup packs down the flour, adding up to 25% extra dry ingredient to your dough. This yields tough, dry, cake-like cookies that will not spread.
The Fix: Always measure ingredients by weight using a digital kitchen scale. If using cups, fluff your flour with a fork, spoon it gently into the measuring cup, and level it off with a flat knife edge.
2. Adding Eggs to Hot Melted Butter
Adding cold eggs directly into hot melted or browned butter cooks the egg proteins prematurely, creating scrambled bits in your wet mix and ruining the emulsion.
The Fix: Let browned butter cool for 15 to 20 minutes until warm to the touch before whisking in sugars and eggs.
3. Overbaking Past the Golden Stage
Cookies continue cooking on the hot metal baking sheet for several minutes after removal from the oven, known as carryover cooking.
The Fix: Pull cookies from the oven when the edges are firm and lightly browned, but the centers still look slightly wet and soft. They will firm up as they cool on the pan.
Kitchen Best Practices for Perfect Bakes
Follow these operational habits every time you bake for consistent quality.
- Use Heavy-Gauge Pans: Thin baking sheets warp under heat and cause hot spots that burn cookie bottoms. Use light-colored aluminum half-sheet pans.
- Line Sheets with Parchment Paper: Silicone mats insulate heat, which can reduce bottom crisping and alter cookie spread. Parchment paper provides clean release and ideal heat transfer.
- Rotate Baking Pans: Rotate your baking sheet 180 degrees halfway through baking to compensate for uneven oven heating.
- Cool Between Batches: Never scoop cold dough onto a warm baking pan. Let pans cool completely to room temperature before loading a fresh batch.
Essential Baker’s Tools
Equipping your kitchen with reliable tools makes baking easier and more accurate.
- Digital Kitchen Scale: Essential for precise flour, sugar, and butter measurements down to the gram.
- Heavy Aluminum Half-Sheet Pans: Light-colored commercial rimmed pans deliver even heat distribution.
- Spring-Loaded Dough Scoop (#16 or #20 Size): Ensures uniform portioning so all cookies bake at the exact same rate.
- Chef’s Knife and Cutting Board: A sharp 8-inch chef’s knife chops chocolate bars effortlessly without squashing the block.
- Wire Cooling Racks: Elevates baked cookies to allow air circulation underneath, preventing soggy bottoms as steam escapes.
Recommended Related Guides
To continue building your baking expertise, explore these related guides:
- Masterclass: How to Brown Butter Without Burning It
- Baking Chemistry: Soda vs. Powder Explained
- Selecting the Best Baking Chocolate: Bittersweet, Semi-Sweet, and Couverture
- Recipe: Chewy Triple Chocolate Fudge Cookies
- How to Store, Freeze, and Bake Frozen Cookie Dough
Educational & Science Resources
For deeper technical studies into food science and baking mechanics, consult these references:
- King Arthur Baking Company: Professional guides on flour protein percentages and gluten development.
- The Culinary Institute of America (CIA): Professional pastry fundamentals and sugar crystallization mechanics.
- Exploratorium Institute for Inquiry: The Science of Cooking and Maillard reaction chemistry.
Key Takeaways
Remember these essential points for your next bake:
- Hand-chopped chocolate bars create superior chocolate pools compared to bagged chocolate chips.
- Browning butter removes excess moisture while adding a rich, nutty brown-butter flavor base.
- A higher ratio of brown sugar to white sugar creates chewy centers and keeps cookies moist.
- Chilling dough for 24 to 48 hours is non-negotiable for ideal starch hydration and spread control.
- Always weigh flour using a digital kitchen scale to avoid dry, cakey cookies.
Final Thoughts
Baking exceptional chocolate chunk cookies combines simple ingredients with precise technique. By understanding how butter temperature, flour protein, sugar ratios, and chocolate types interact, you take full control of your final results.
Chop your chocolate by hand, brown your butter carefully, and give the dough the chill time it needs. Once you experience the texture of a properly rested chocolate chunk cookie fresh off the pan, you will never go back to basic recipes.
Frequently Asked Questions
Can I use chocolate chips instead of chocolate chunks?
Yes, you can substitute chocolate chips in equal weight, but the final texture will differ. Commercial chips contain added stabilizers that prevent them from melting into fluid pools. Chopped chocolate bars melt smoothly throughout the dough, creating better texture and flavor distribution.
Why did my chocolate chunk cookies spread so thin and flat?
Excessive spread usually happens when butter is too hot during mixing, dough is not chilled long enough, or flour is under-measured. Ensure you measure flour by weight using a digital scale and chill portioned dough balls for at least 24 hours before baking.
Why do my cookies turn out cakey instead of chewy?
Cakey cookies occur when too much flour is packed into measuring cups or when dough is over-creamed with excess trapped air. Using a high proportion of granulated white sugar instead of dark brown sugar can also create drier, cake-like crumbs.
How long should I rest cookie dough in the fridge?
Rest dough for at least 24 hours for optimal flavor and texture development. You can extend chilling up to 72 hours. Beyond 72 hours, the flour begins to lose moisture, which can make the outer crust drier when baked.
Can I bake chocolate chunk cookies straight from the freezer?
Yes, portioned dough balls can be baked directly from frozen. Preheat your oven to 350°F (177°C) and add 2 to 3 extra minutes to the total baking time. Do not thaw frozen dough at room temperature before baking.
How do I get those picture-perfect round shapes on my cookies?
As soon as cookies come out of the oven, place a large circular cutter or bowl over each hot cookie. Swirl the cutter in a gentle circular motion against the pan. This pulls loose edges inward, shaping them into smooth, round discs.
How should I store baked chocolate chunk cookies to keep them soft?
Store fully cooled cookies in an airtight container at room temperature for up to 5 days. Place a single slice of fresh white bread inside the container; the cookies will absorb moisture from the bread, keeping them soft for days.