What Makes Homemade Wafers So Good
Crisp, light, and endlessly customizable, wafer cookies are the kind of treat that feel special without being fussy. They can be layered with caramel, filled with strawberry cream, dipped in chocolate, or stacked into elegant little desserts for parties, lunchboxes, and coffee breaks.
The best part is that you do not need professional equipment to make a delicious version at home. With a simple batter, a thin cooking method, and a few reliable filling ideas, you can create cookies that are crunchy, delicate, and full of flavor.
This guide walks you through the process step by step, from making basic wafers to turning them into caramel wafer cookies, wafer cookies strawberry style, and chocolate covered wafer cookies.

Before You Start: Choose Your Favorite Wafer Cookies Style
Traditional wafer cookies are very thin and crisp. Some are made with a wafer iron, while others are baked as thin sheets and cut into shapes. If you have a wafer iron, use it for the most classic texture. If not, you can still make crisp wafer sheets in the oven.
For the easiest home method, you will make a thin batter, spread it very lightly, bake until golden, then layer or coat the cookies once they cool.
You can make wafers in several shapes:
- Small rectangles for layered sandwich cookies
- Squares for lunchbox treats
- Long strips for dipping into coffee or hot chocolate
- Rounds for elegant dessert plates
- Broken shards for topping ice cream
The key is thinness. The thinner the wafer, the crispier the final cookie will be.
Essential Ingredients for Basic Wafer Cookies
Use this as your base recipe before adding fillings or toppings.
For the wafer batter
- 2 large eggs
- 1/2 cup granulated sugar
- 1/4 cup unsalted butter, melted and cooled slightly
- 1/2 cup all-purpose flour
- 1 tablespoon cornstarch
- 1 teaspoon vanilla extract
- 1/8 teaspoon salt
- 2 to 4 tablespoons milk, as needed
Helpful tools
- Mixing bowl
- Whisk
- Baking sheet
- Parchment paper or silicone baking mat
- Offset spatula or the back of a spoon
- Cooling rack
- Sharp knife or pizza cutter
If you own a wafer iron, you can use the same batter and follow your appliance’s instructions for cooking time.
Step 1: Mix a Smooth Batter
Add the eggs and sugar to a mixing bowl. Whisk until the mixture looks slightly pale and glossy. This helps create a lighter wafer.
Pour in the melted butter and vanilla extract, then whisk again until smooth.
In a separate small bowl, stir together the flour, cornstarch, and salt. Add the dry ingredients to the wet ingredients and mix gently. The batter should be smooth, thin, and spreadable.
Add milk one tablespoon at a time until the batter resembles a loose pancake batter. It should not be watery, but it should spread easily into a very thin layer.
Step 2: Spread the Batter Thinly
Preheat your oven to 350°F. Line a baking sheet with parchment paper or a silicone baking mat.
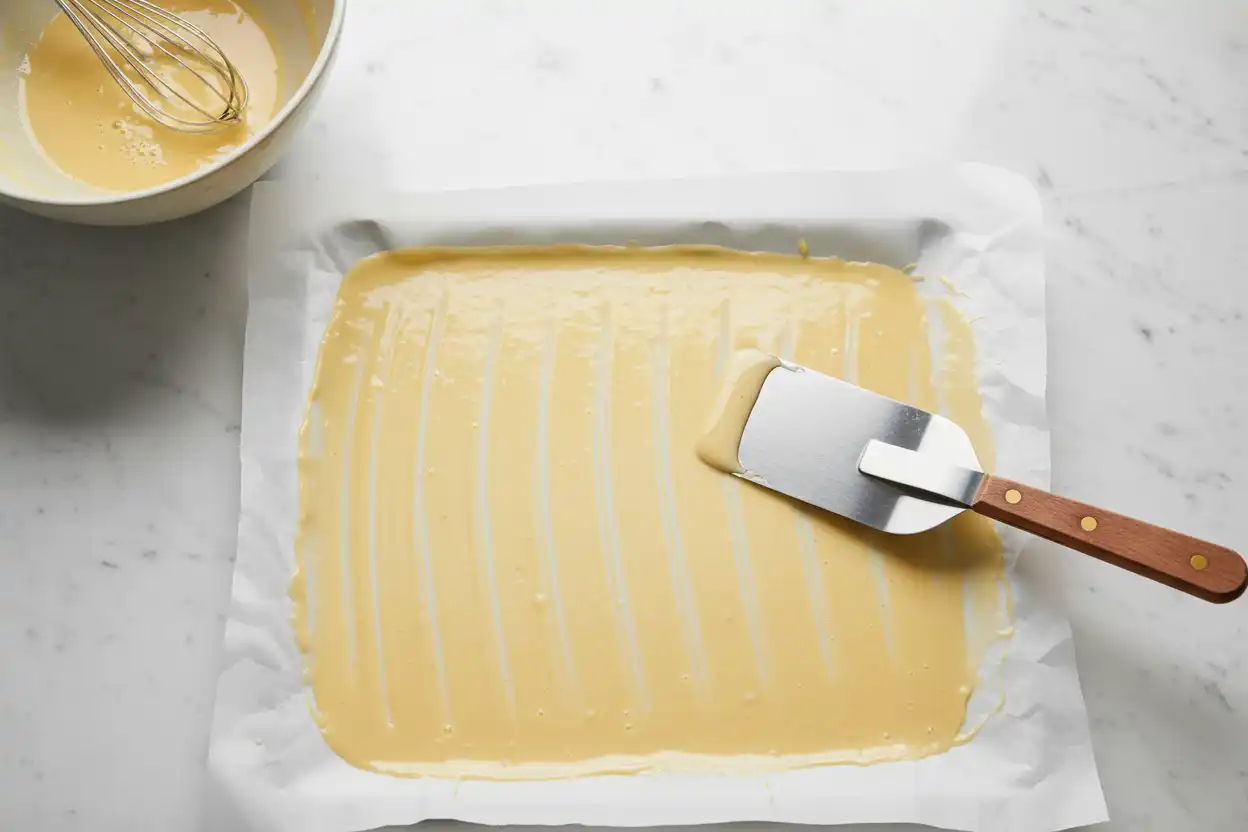
Spoon a small amount of batter onto the sheet. Use an offset spatula or the back of a spoon to spread it as thinly as possible. Aim for an even layer so the wafers bake consistently.
For individual cookies, spread the batter into small rectangles or circles. For layered wafer cookies, spread one large thin sheet and cut it after baking.
Do not worry if the first batch is imperfect. Wafer cookies are easy to improve once you understand how thin the batter should be.
Step 3: Bake Until Lightly Golden
Bake for 6 to 10 minutes, depending on how thinly you spread the batter. Watch closely near the end. The edges should turn golden and the center should look dry.
A pale wafer may stay soft, while an overbaked wafer can taste bitter. Look for a light golden color and a crisp edge.
When the wafers are done, remove the baking sheet from the oven. If you want clean edges, cut the wafer sheet while it is still warm and flexible. A pizza cutter works well for straight lines.
Transfer the pieces to a cooling rack. They will crisp more as they cool.
Step 4: Make a Caramel Filling
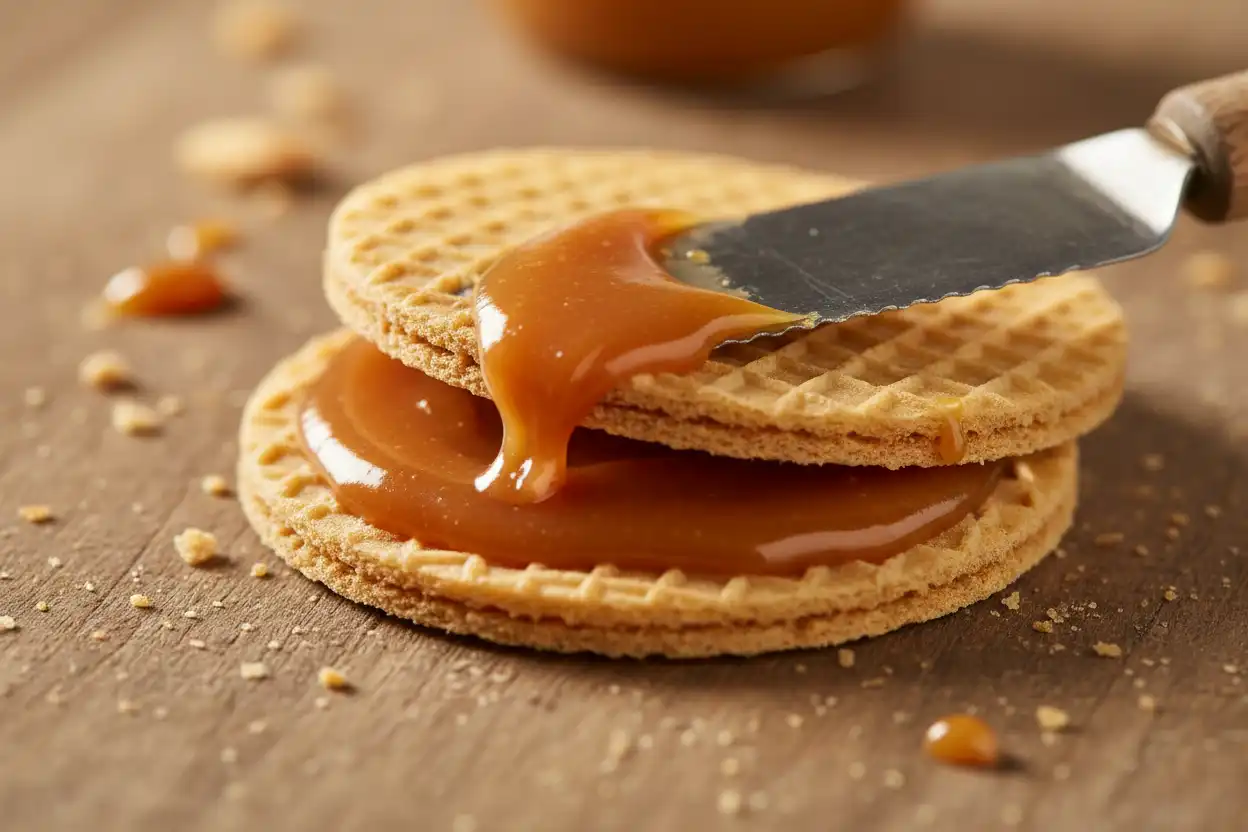
Caramel adds a rich, buttery sweetness that pairs beautifully with crisp wafers. For simple caramel wafer cookies, use a thick caramel filling that will hold the layers together without making them soggy.
Easy caramel filling
- 1 cup soft caramel candies or thick caramel sauce
- 2 tablespoons heavy cream
- 1 tablespoon unsalted butter
- Pinch of salt
Warm the caramel, cream, butter, and salt in a small saucepan over low heat. Stir until smooth. Let it cool for a few minutes so it thickens slightly.
Spread a thin layer of caramel on one wafer piece. Top with another wafer and press gently. Repeat for as many layers as you like.
For best texture, use thin caramel layers. Too much filling can soften the wafers and make them difficult to bite.
Step 5: Make a Strawberry Cream Filling
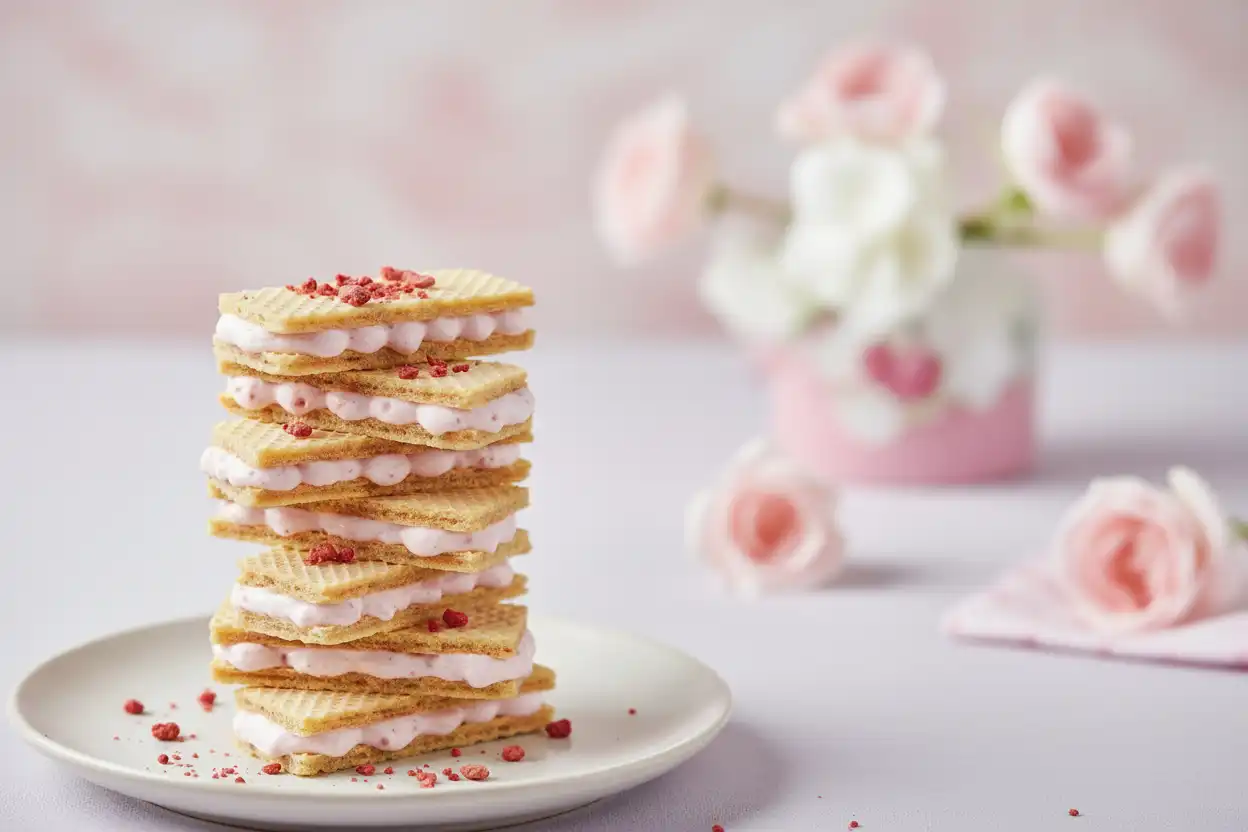
A strawberry filling gives wafer cookies a bright, fruity flavor and a pretty pink color. This version is perfect when you want wafer cookies strawberry flavor without using a filling that is too wet.
Strawberry cream filling
- 1/2 cup unsalted butter, softened
- 1 1/2 cups powdered sugar
- 2 tablespoons freeze-dried strawberry powder
- 1 teaspoon vanilla extract
- 1 to 2 teaspoons milk, if needed
- Pinch of salt
Beat the softened butter until creamy. Add powdered sugar, strawberry powder, vanilla, and salt. Mix until fluffy. If the filling is too thick to spread, add a small amount of milk.
Freeze-dried strawberry powder works better than fresh strawberry puree because it gives strong flavor without adding too much moisture.
Spread the strawberry cream thinly between wafer layers. Chill the assembled cookies for 10 to 15 minutes before slicing if you want neater edges.
Step 6: Make Chocolate Covered Wafer Cookies
Chocolate adds a satisfying snap and makes homemade wafers feel bakery-worthy. To make chocolate covered wafer cookies, assemble your wafer layers first, then dip or coat them once the filling has set.
Chocolate coating
- 8 ounces semisweet, milk, or dark chocolate
- 1 teaspoon coconut oil or vegetable shortening, optional
Melt the chocolate gently using a microwave or double boiler. If using a microwave, heat in short intervals and stir often to prevent scorching.
Add a small amount of coconut oil or shortening if you want a smoother coating. This is optional, but it can help the chocolate dip more evenly.
Dip each layered wafer cookie halfway for a simple look, or coat the entire cookie for a richer treat. Place dipped cookies on parchment paper and let the chocolate set.
For a decorative finish, sprinkle the tops with:
- Crushed freeze-dried strawberries
- Chopped toasted nuts
- Flaky sea salt
- Mini chocolate chips
- Crushed wafer crumbs
Step 7: Let the Cookies Set Properly
Once your wafer cookies are filled or coated, give them time to settle. This helps the layers hold together and makes slicing easier.
For caramel wafer cookies, let them rest at room temperature until the caramel firms slightly. For strawberry cream wafers, chill briefly so the filling sets. For chocolate covered wafer cookies, let the chocolate harden completely before storing.
Avoid stacking freshly dipped cookies before the chocolate has set. If you need to speed up the process, place the cookies in the refrigerator for a short time.
Step 8: Slice Cleanly
Layered wafer cookies look best when they are cut neatly. Use a sharp knife and gentle pressure. If the filling is soft, chill the cookies first.
For tidy pieces:
- Trim uneven edges.
- Cut long layered wafers into bars.
- Wipe the knife between cuts.
- Let chocolate-coated cookies come slightly closer to room temperature before cutting, so the coating does not crack too much.
A few cracks are normal. They are part of the charm of crisp homemade wafers.
Tips for Crisp, Light Wafer Cookies
Great wafer cookies depend on texture. These tips will help you avoid soft, chewy, or uneven results.
Spread the batter evenly
Thick spots will stay soft while thin edges brown quickly. Take your time spreading the batter into a thin, even layer.
Bake in small batches
Small batches are easier to control, especially when you are learning. Wafers can go from pale to overbaked quickly.
Cool completely before filling
Warm wafers can melt buttercream, loosen caramel, and create steam that softens the cookies.
Use low-moisture fillings
Watery fillings make wafers lose their crunch. Thick caramel, buttercream, ganache, and nut spreads are better choices than jam or fresh fruit puree.
Store carefully
Humidity is the enemy of crisp wafers. Keep finished cookies in an airtight container. If you live in a humid area, add a small piece of parchment between layers to reduce sticking.
Flavor Variations to Try
Once you master the basic method, wafer cookies become easy to customize.
Vanilla bean wafers
Add vanilla bean paste to the batter for a stronger vanilla flavor. Pair with white chocolate or strawberry cream.
Mocha wafers
Add a small amount of espresso powder to the batter and fill with chocolate ganache. These are excellent with coffee.
Peanut butter chocolate wafers
Spread a thin layer of peanut butter filling between the wafers, then dip in melted chocolate.
Salted caramel wafers
Make caramel wafer cookies with a pinch of flaky sea salt between layers. The salt balances the sweetness and makes the caramel taste deeper.
Strawberry chocolate wafers
Layer strawberry cream between wafers, then dip half of each cookie in dark chocolate. This combines fruity sweetness with a rich chocolate finish.
Common Mistakes and How to Fix Them
The wafers are soft
They may be underbaked, too thick, or exposed to humidity. Bake the next batch a little longer and spread the batter thinner.
The wafers are too dark
Your oven may be too hot, or the batter may be spread too thin at the edges. Reduce the oven temperature slightly or check the cookies earlier.
The filling makes the cookies soggy
Use less filling and choose a thicker option. Buttercream, thick caramel, and firm ganache work better than loose sauces.
The chocolate coating is streaky
The chocolate may have been overheated or exposed to moisture. Melt it gently and stir often. For a casual homemade cookie, a few streaks are not a problem.
The layers slide apart
The filling may be too warm or too thick. Let caramel cool slightly before spreading, and use a thin, even layer.
How to Store Wafer Cookies
Store plain wafers in an airtight container at room temperature. They are best enjoyed while crisp.
Filled wafer cookies should also be kept airtight. If the filling contains buttercream or chocolate, a cool room is ideal. If your kitchen is warm, refrigerate them briefly, then let them sit at room temperature before serving so the texture improves.
Chocolate covered wafer cookies can be stored with parchment between layers to protect the coating. Keep them away from heat and direct sunlight.
For longer storage, you can freeze assembled wafer cookies, though the texture may be slightly less crisp after thawing. Freeze in a single layer first, then transfer to an airtight container.
Serving Ideas
Homemade wafer cookies are versatile enough for everyday snacks and special occasions. Serve them with:
- Coffee or espresso
- Hot chocolate
- Vanilla ice cream
- Fresh berries
- Dessert boards
- Lunchbox treats
- Party trays
For a simple dessert, crush extra wafers over pudding, mousse, or ice cream. You can also layer broken wafers with whipped cream and fruit for a quick parfait.

Final Tips for Better Homemade Wafers
Start with the basic wafer recipe, then choose one filling or coating to master first. Caramel is rich and classic, strawberry cream is bright and colorful, and chocolate coating makes the cookies feel extra indulgent.
If you want the crispest result, remember the three most important rules: spread the batter thin, let the wafers cool completely, and avoid wet fillings.
With a little practice, you can make wafer cookies that are light, crunchy, and easy to adapt for any occasion. Whether you prefer caramel wafer cookies, fruity strawberry layers, or chocolate covered wafer cookies, the same simple method gives you a delicious homemade treat every time.