The Ultimate Guide to Chewy White Chocolate Chip Cookies
Table of Contents
- Essential Formula for Perfect White Chocolate Chip Cookies
- Why White Chocolate Chip Cookies Require a Unique Approach
- The Food Science of Baking with White Chocolate
- Ingredient Selection and Chemical Roles
- Master Formula: Baker’s Percentages and Measurements
- Step-by-Step Production Method
- Ingredient and Technique Comparison Tables
- High-Impact Flavor Variations and Mix-In Ratios
- Troubleshooting Common Cookie Faults
- Storage, Shelf Life, and Freezing Protocols
- Essential Tools and Kitchen Equipment
- Internal Linking Suggestions
- Authoritative References
- Key Takeaways for Success
- Final Baking Notes
- Frequently Asked Questions
Essential Formula for Perfect White Chocolate Chip Cookies
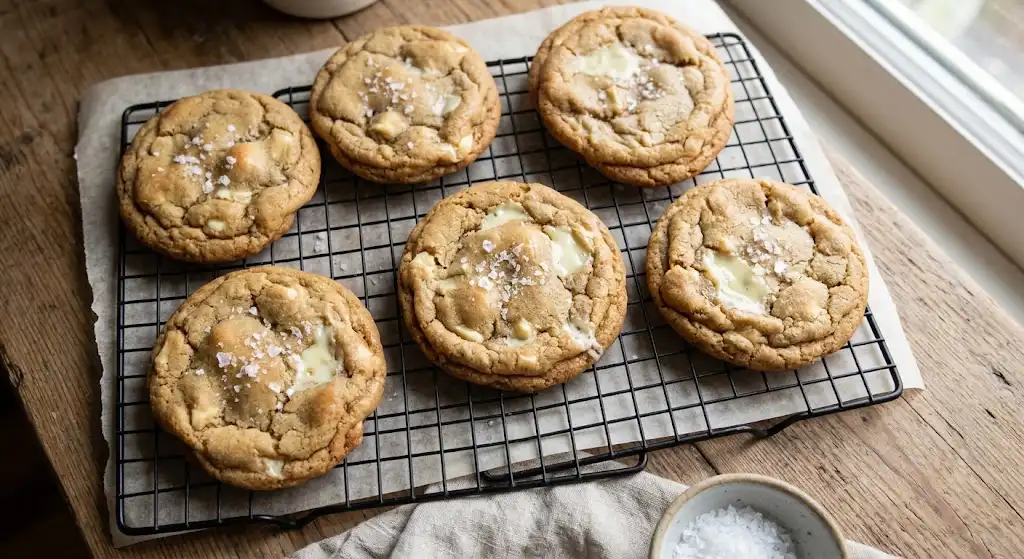
The secret to baking bakery-quality white chocolate chip cookies lies in counterbalancing the high sugar content of white chocolate with dark brown sugar, higher dough acidity, and generous salt. Use melted or browned butter combined with an extra egg yolk to create a dense, chewy interior structure with crisp, caramelized margins.
Bake the portioned dough at 350°F (175°C) for 10 to 12 minutes on light-colored aluminum baking sheets lined with parchment paper. Remove the cookies when the edges turn golden brown while the centers remain soft and slightly underbaked.
Core Execution Rules:
- Use Real White Chocolate: Choose chips or chopped bars containing at least 20% genuine cocoa butter rather than palm oil confectioner’s coatings.
- Control Spread with Chilling: Chill the portioned dough balls for at least 45 minutes to hydrate the starch and solidify the fats.
- Balance the Sweetness: Incorporate fine sea salt into the dough and finish with flaky Maldon salt immediately after baking.
Why White Chocolate Chip Cookies Require a Unique Approach
Most standard chocolate chip cookie recipes fail when you swap semi-sweet chocolate chips for white chocolate. Dark and semi-sweet chocolate varieties contribute bitter cacao solids, natural acidity, and astringency that temper the heavy sugar in standard dough formulas. White chocolate contains no cocoa solids, making it significantly sweeter and far more delicate under direct oven heat.
This guide is designed for home bakers and culinary enthusiasts who want to move past flat, cloying cookies and produce bakery-style results. You will learn the food science behind moisture retention, fat emulsification, and thermal caramelization to achieve a soft, chewy crumb with golden, buttery edges every time.
By following this tested formula, you will understand how small adjustments to flour protein levels, sugar ratios, and resting times completely transform the texture and flavor profile of your finished bake.
The Food Science of Baking with White Chocolate
White chocolate is an emulsion of cocoa butter, sugar, milk solids, and lecithin. Understanding its physical properties is essential to avoid scorched chips and greasy dough.
1. Cocoa Butter vs. Vegetable Fats
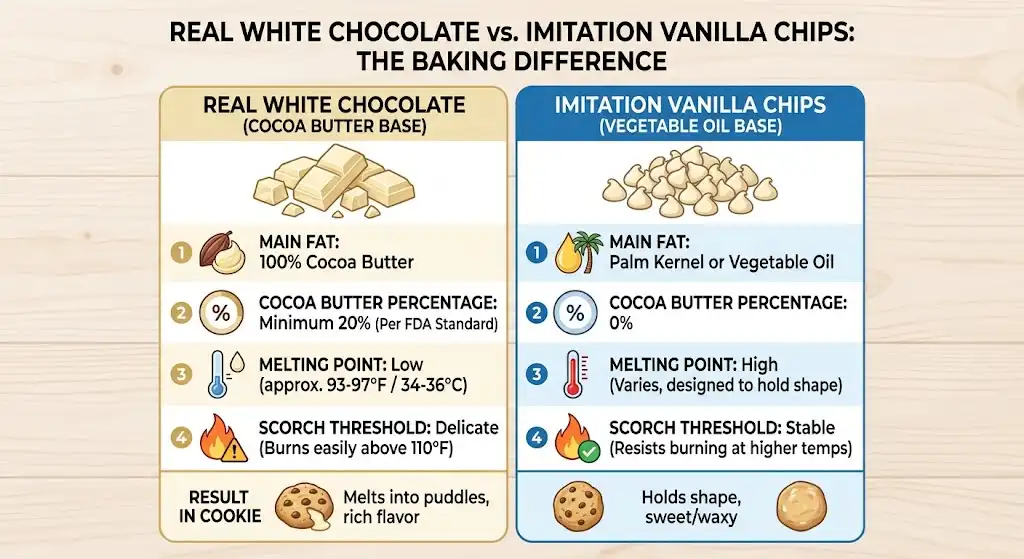
Authentic white chocolate contains pure cocoa butter, which melts at human body temperature (around 93°F to 97°F or 34°C to 36°C). This narrow melting point provides a smooth, melt-in-the-mouth sensation without lingering waxy residue.
Imitation baking chips substitute hydrogenated palm kernel oil for cocoa butter. While palm oil holds its shape better at high temperatures, it lacks rich dairy depth and leaves a greasy coating on the palate. Always inspect the ingredient label for pure cocoa butter.
2. The Low Burning Point of Milk Solids
The milk powders present in white chocolate caramelize and burn quickly. Lactose (milk sugar) undergoes the Maillard reaction at temperatures as low as 230°F (110°C), far lower than the caramelization temperature of pure sucrose (320°F / 160°C).
When exposed to dry heat on the outer surface of a cookie, white chocolate chips can brown rapidly, turn chalky, and develop an unpleasantly bitter taste. Trapping the majority of your chocolate within the dough envelope prevents scorching during the bake.
3. Counterbalancing Sucrose Levels
Because white chocolate contains up to 55% sugar by weight, the surrounding cookie dough requires adjustments to prevent an aggressively sweet flavor. Increasing the proportion of dark brown sugar introduces molasses acids (malic and citric acids), which cut sweetness and supply inverted sugars for moisture retention.
Increasing the salt content from the standard 0.5% up to 1.2% by flour weight provides the necessary electrolyte balance to sharpen the vanilla notes and highlight the dairy richness of the butter.
Ingredient Selection and Chemical Roles
Flour: The Structural Matrix
Using standard all-purpose flour (around 10.5% to 11.5% protein) produces a tender yet stable cookie. For a denser, more elastic chew, replace 25% of the all-purpose flour with high-protein bread flour (12.7% to 13.5% protein).
Adding a small measure of cornstarch (cornflour) interrupts gluten cross-linking. This tenderizes the interior dough, preserving a velvety center while the exterior bakes into a crisp shell.
Sugars: Ratio of Dark Brown to Granulated
Granulated white sugar promotes lateral spread and crispness through rapid moisture evaporation during baking. Dark brown sugar provides hygroscopic moisture, acidity, and rich butterscotch notes.
A ratio of 2:1 dark brown sugar to white granulated sugar provides the ideal balance for white chocolate. This ratio prevents excessive spread while creating a chewy center that stays soft for days.
Fats: Butter Chemistry and Emulsification
Unsalted butter allows exact control over the salt concentration in your recipe. Melting the butter before mixing dissolves the sugars more completely, producing a shiny surface and a denser, fudge-like interior.
Browning half of the butter evaporates its 16% to 18% water content and toasts the dairy proteins into nutty hazelnut-toned compounds (beurre noisette). This adds a roasted complexity that directly cuts through the sweet white chocolate.
Eggs: Structure and Richness
Whole eggs provide water to activate gluten and protein (albumen) to build structure through heat coagulation. Egg yolks provide lecithin, a natural emulsifier that binds water and butterfat into a cohesive matrix.
Using one whole egg plus one additional egg yolk yields a richer dough without introducing excess water that could turn the cookies cakey.
Leavening: Baking Soda Mechanics
Baking soda (sodium bicarbonate) requires an acid to react. The molasses in dark brown sugar supplies this acid, triggering carbon dioxide release that aerates the dough.
Baking soda also raises the dough’s pH level. A higher, more alkaline pH accelerates browning (the Maillard reaction), producing golden rims before the interior overcooks.
Master Formula: Baker’s Percentages and Measurements
Precision is critical in pastry work. While volume measurements (cups) are provided for convenience, using a digital kitchen scale with metric gram weights guarantees consistent results every batch.
| Ingredient | Metric Weight | US Customary | Baker’s % | Primary Function |
|---|---|---|---|---|
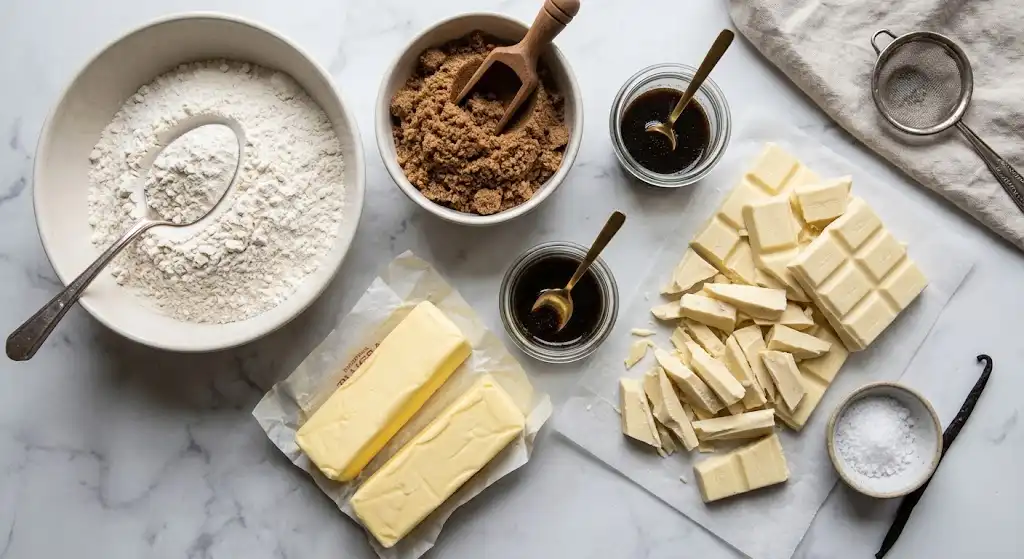
| All-Purpose Flour | 280 g | 2 ¼ cups (spooned & leveled) | 100.0% | Gluten matrix and structural base |
| Cornstarch | 4 g | 1 tsp | 1.4% | Tenderizes crumb; softens texture |
| Baking Soda | 4 g | ¾ tsp | 1.4% | Promotes Maillard browning and lift |
| Fine Sea Salt | 4.5 g | ¾ tsp | 1.6% | Flavor enhancement and sweetness balance |
| Unsalted Butter | 170 g | ¾ cup (1 ½ sticks) | 60.7% | Fat richness, flavor, and spread control |
| Dark Brown Sugar | 165 g | ¾ cup (packed) | 58.9% | Moisture retention, chew, and acidity |
| Granulated White Sugar | 100 g | ½ cup | 35.7% | Edge crispness and surface crackling |
| Large Whole Egg (Room Temp) | 50 g | 1 large egg | 17.8% | Protein structure and liquid volume |
| Large Egg Yolk (Room Temp) | 18 g | 1 large yolk | 6.4% | Lecithin emulsifier and rich texture |
| Pure Vanilla Extract | 10 ml | 2 tsp | 3.6% | Aromatic enhancement |
| Premium White Chocolate (Chopped) | 225 g | 1 ¼ cups | 80.4% | Creamy pockets of sweetness |
| Flaky Sea Salt (Optional) | 2 g | For garnish | — | Textural crunch and surface contrast |
Step-by-Step Production Method
Phase 1: Dry Ingredient Preparation
What: Whisk together the all-purpose flour, cornstarch, baking soda, and fine sea salt in a medium bowl.
Why: Thorough distribution guarantees that the leavening agent and salt are evenly dispersed throughout the dry mix, preventing uneven pockets of soda or unmixed flour pockets.
How: Whisk briskly for 30 seconds. Set aside.
Pro Tip: Sifting the cornstarch with the flour prevents small starch clumps that can create dry white specks in the baked crumb.
Phase 2: Butter Melting and Sugar Integration
What: Melt the unsalted butter in a small saucepan over medium-low heat, or use the microwave in 20-second bursts. Let it cool until warm to the touch (around 105°F / 40°C).
Why: Hot butter will cook the eggs on contact and dissolve the sugar crystals prematurely, resulting in greasy cookies that spread excessively.
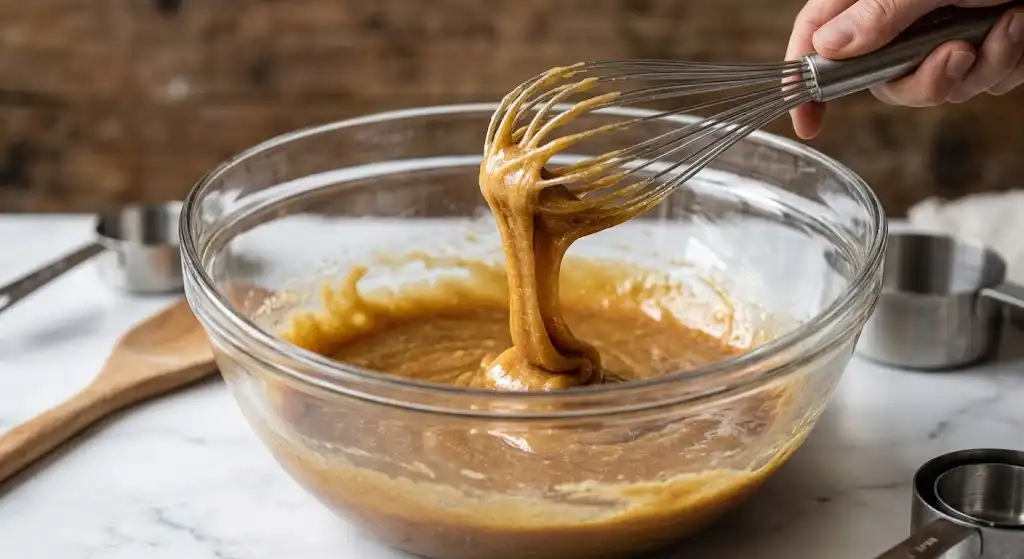
How: Pour the warm butter into a large mixing bowl. Add the dark brown sugar and granulated sugar. Whisk vigorously for 60 to 90 seconds until the mixture looks glossy and uniform.
Common Mistake: Do not whip the butter and sugar with an electric mixer at high speed. Whipping incorporates excess air, turning what should be a dense, chewy cookie into a light, cakey disc.
Phase 3: Wet Emulsion and Aromatic Integration
What: Add the whole egg, extra egg yolk, and pure vanilla extract to the butter-sugar mixture.
Why: The natural lecithin in the egg yolks acts as a bridge between the melted butterfat and the water from the egg white, creating a smooth, stable emulsion.
How: Whisk gently until the batter lightens slightly in color and falls from the whisk in smooth ribbons. This takes about 45 seconds of steady hand whisking.
Phase 4: Combining and Gentle Folding
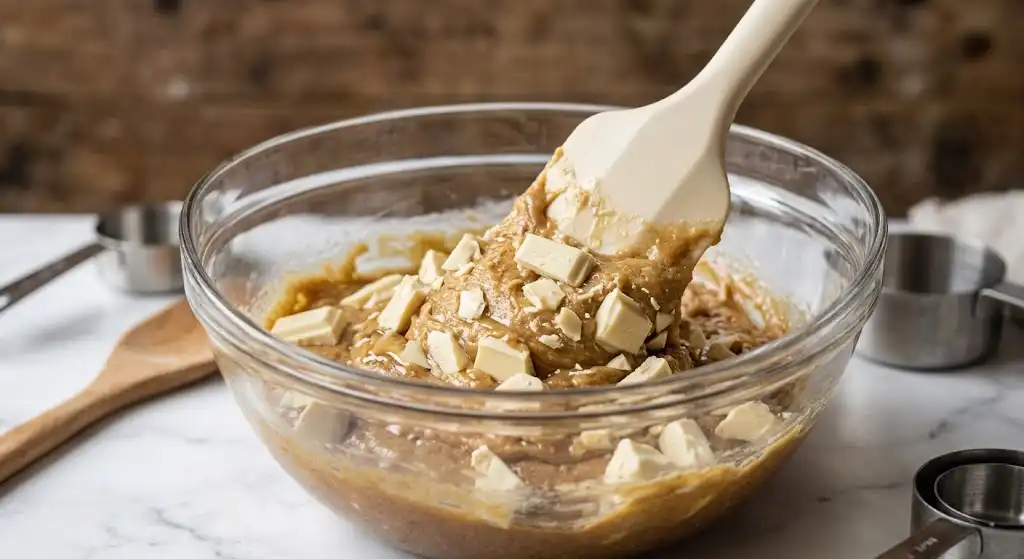
What: Pour the dry ingredient mixture into the wet emulsion. Switch to a wide silicone spatula.
Why: Once flour hydrates in the presence of water, mechanical agitation develops gluten strands. Over-mixing produces a tough, rubbery cookie.
How: Fold the dry ingredients in using circular scraping motions around the sides and up through the center of the bowl. Stop folding when a few faint streaks of flour remain visible.
Phase 5: Incorporating the White Chocolate
What: Add the chopped white chocolate or baking chips to the bowl.
Why: Using chopped chocolate bars produces both large melting pockets and tiny chocolate shards that disperse throughout every bite.
How: Fold 4 to 5 times until the chocolate is evenly distributed and the last dry streaks vanish. Do not overwork the dough.
Phase 6: Portioning and Dough Chilling
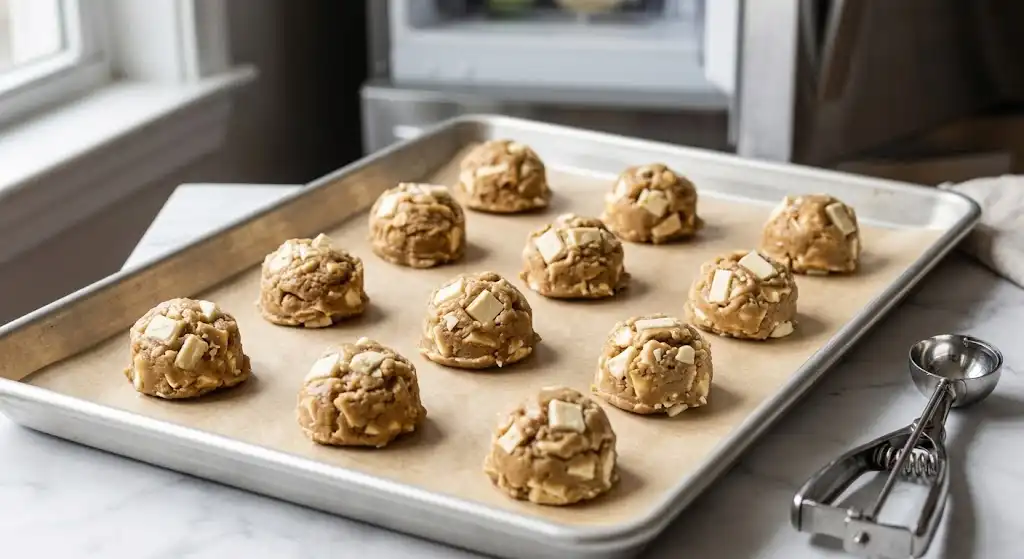
What: Portion the dough into uniform 55-gram balls (about 2 generous tablespoons, or a #24 cookie scoop).
Why: Chilling solidifies the butterfat, which slows the rate of spread in the oven. It also allows the flour proteins and starches to fully hydrate, concentrating flavors and improving chewiness.
How: Place the dough balls on a tray lined with parchment paper. Cover loosely with plastic wrap and refrigerate for a minimum of 45 minutes, or up to 48 hours for maximum flavor depth.
Pro Tip: Break each dough ball in half with your hands and press the two halves back together with the rough, torn edges facing upward. This technique exposes textured pockets of chocolate on top during the bake.
Phase 7: Thermal Baking Phase
What: Bake in a preheated oven at 350°F (175°C) on the center rack.
Why: Proper oven heat sets the cookie perimeter through Maillard browning while leaving the internal core undercooked enough to preserve a soft, chewy texture.
How: Arrange dough balls 2.5 inches (6 cm) apart on a light-colored aluminum baking sheet lined with parchment paper. Bake for 10 to 12 minutes. Remove the pan the moment the edges turn deep golden and the centers look set but slightly glossy.
Common Mistake: Do not wait for the center of the cookie to turn brown in the oven. Residual carryover heat on the hot pan will continue cooking the interior after removal.
Phase 8: The Cookie “Scoot” and Cooling
What: Reshape the hot cookies and cool them properly.
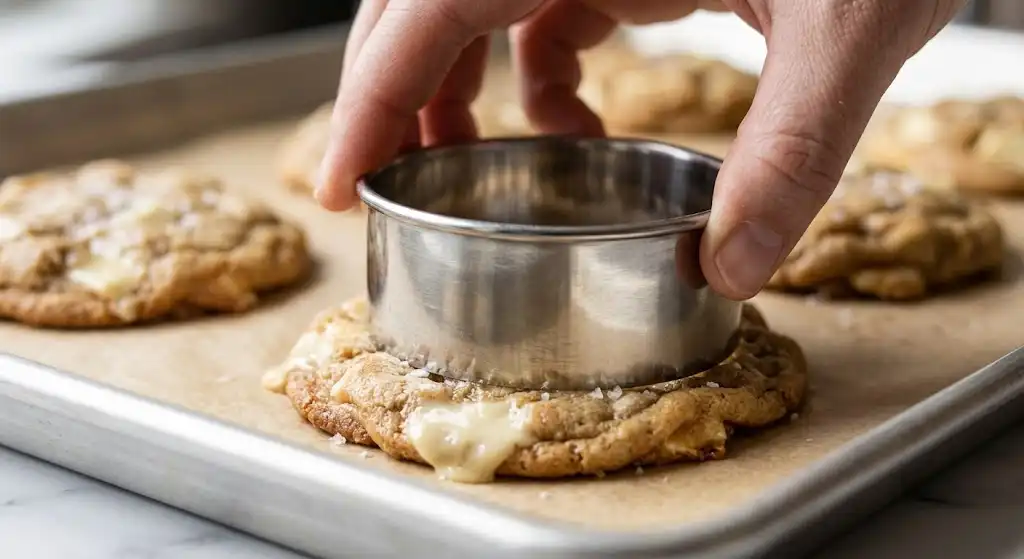
Why: Freshly baked cookies are soft and pliable for the first 90 seconds out of the oven. Swirling them corrects uneven spread and compresses the edges for a denser ring.
How: Immediately place a round cookie cutter or inverted mug (slightly larger than the cookie) over each hot cookie. Swirl the cutter in a gentle circular motion against the baking sheet for 5 seconds to nudge the edges into a round shape. Sprinkle with flaky sea salt and rest on the pan for 10 minutes before transferring to a wire rack.
Ingredient and Technique Comparison Tables
To customize your cookies, review how different ingredients and preparation methods directly affect the final bake.
Table 1: White Chocolate Formats and Baking Results
| Chocolate Type | Fat Source | Melting Behavior | Flavor Profile | Best Use Case |
|---|---|---|---|---|
| Couverture / Bar (Chopped) | Pure Cocoa Butter (>31%) | Melts into rich, fluid puddles | Complex, rich dairy notes | Bakery-style artisan cookies |
| Standard White Baking Chips | Cocoa Butter + Stabilizers | Holds firm dome shape | Sweet, classic vanilla notes | Uniform, traditional cookies |
| Confectionery “Vanilla” Drops | Palm Kernel / Vegetable Oil | Resists melting; stays firm | Very sweet, synthetic vanilla | High-heat bakes; budget baking |
| Caramelized “Blonde” Chocolate | Roasted Cocoa Butter & Milk | Melts smoothly into pockets | Toffee, shortbread, dulce de leche | Gourmet, sophisticated variations |
Table 2: Dough Chilling Time vs. Finished Cookie Attributes
| Chilling Duration | Spread Rate | Center Texture | Edge Crispness | Flavor Development |
|---|---|---|---|---|
| 0 Minutes (Bake Immediately) | Extensive (Thin) | Soft, slightly greasy | Thin, brittle | Simple, one-dimensional sweet |
| 45 to 60 Minutes | Moderate (Balanced) | Chewy, dense | Golden, crisp | Rich butter and vanilla notes |
| 24 Hours | Controlled (Thick) | Fudgy, highly chewy | Sturdy, caramelized | Pronounced toffee and butterscotch |
| 48 Hours | Minimal (Very Thick) | Dense, concentrated | Crisp, deep gold | Complex, deeply caramelized |
Table 3: Baking Pan Material and Liner Performance
| Pan & Liner Setup | Heat Transfer Rate | Bottom Crust Result | Risk of Scorched Chocolate |
|---|---|---|---|
| Light Aluminum + Parchment Paper | Even, moderate conductivity | Uniform light golden brown | Very low risk |
| Dark / Non-Stick Pan + Parchment | Rapid, aggressive radiant heat | Dark, prone to overbaking | Moderate to high risk |
| Light Aluminum + Silicone Mat (Silpat) | Insulated, slower heat transfer | Soft, pale, less crisp | Extremely low risk |
| Bare Greased Aluminum Sheet | Direct, rapid conduction | Greasy, uneven spread | High risk of burning base |
High-Impact Flavor Variations and Mix-In Ratios
Because white chocolate has a mellow, sweet profile, it pairs exceptionally well with tart, bitter, nutty, and savory ingredients. Maintain a total mix-in volume of 225 g to 280 g (around 1 ¼ to 1 ½ cups) to keep the dough stable.
1. Classic White Chocolate Macadamia Nut
Fold in 115 g (¾ cup) of coarsely chopped, roasted and salted macadamia nuts alongside 150 g of chopped white chocolate. The buttery richness and crunch of macadamias balance the sweet cocoa butter.
2. Spiced Cranberry Orange Zest
Add the freshly grated zest of one medium navel orange to the butter and sugar mixture. Fold in 90 g (½ cup) of tart dried cranberries along with 160 g of white chocolate chips. The citric acid cuts through the richness and adds bright aroma.
3. Brown Butter and Toasted Pecan
Brown the entire 170 g of unsalted butter in a saucepan until the milk solids turn deep amber. Let it cool back to room temperature. Fold in 100 g (¾ cup) of toasted, chopped pecans and finish with a heavy sprinkle of flaky Maldon sea salt.
4. Ceremonial Matcha Green Tea
Sift 10 g (1 ½ tablespoons) of culinary or ceremonial grade matcha powder directly into the dry flour blend. The grassy bitterness and natural tannins of green tea offset the sweet white chocolate, creating an earthy contrast and an attractive green crumb.
5. Freeze-Dried Raspberry Chunk
Gently fold in 30 g (¾ cup) of lightly crushed freeze-dried raspberries at the very end of dough preparation. Freeze-dried berries provide concentrated tartness and a striking ruby color without introducing water that could thin the dough.
Troubleshooting Common Cookie Faults

Problem: Cookies Spread Excessively Flat and Thin
Root Causes: The butter was added while still hot, the dough was not chilled before baking, or the flour was measured inaccurately (under-measured via scooped cups rather than weighed).
Correction: Let melted butter cool until warm to the touch (around 105°F / 40°C) before combining with sugars. Weigh flour with a digital scale and chill the portioned dough balls for at least 45 minutes before baking.
Problem: Cookies Turn Out Puffy, Dry, and Cake-Like
Root Causes: Too much flour was added, the butter and sugar were over-whipped, or the recipe relied solely on whole eggs with no extra yolk.
Correction: Aerate and spoon your flour into the measuring cup before leveling, or weigh it accurately. Mix the dough by hand with a spatula rather than an electric mixer once dry ingredients are added. Use the recommended extra egg yolk for moisture.
Problem: The White Chocolate Chips Discolored and Scorched
Root Causes: The oven ran too hot, dark baking pans absorbed excessive radiant heat, or chopped chocolate was left exposed directly against the hot metal pan surface.
Correction: Hang an independent oven thermometer on your center rack to verify true baking temperature. Use light-colored aluminum baking pans and tuck visible surface chocolate chips into the dough before baking.
Problem: The Cookie Flavor is Cloyingly Sweet
Root Causes: Low-grade confectioner’s drops were used instead of real cocoa butter chocolate, or the dough lacked sufficient salt and brown sugar acidity.
Correction: Upgrade to white chocolate containing at least 20% cocoa butter. Increase the fine sea salt to ¾ teaspoon and use dark brown sugar instead of light brown sugar.
Storage, Shelf Life, and Freezing Protocols
Room Temperature Storage
Store fully cooled cookies in an airtight glass container or metal tin at room temperature for up to 5 days. Place a single sheet of wax or parchment paper between layers to prevent sticking.
Moisture Preservation Tip: Place half a slice of plain sandwich bread inside the container. The cookies will absorb humidity from the bread, staying soft and chewy for up to a week without turning stale.
Freezing Portiond Unbaked Dough (The Best Make-Ahead Method)
Portion the dough into individual balls using a cookie scoop and arrange them on a parchment-lined tray. Freeze for 60 minutes until rock solid, then transfer the dough balls into a heavy-duty zip-top freezer bag, squeezing out excess air.
Store frozen dough for up to 3 months. When ready to enjoy, bake directly from frozen at 335°F (168°C) for 12 to 14 minutes. Lowering the oven temperature by 15°F ensures the frozen interior warms and bakes through before the exterior over-browns.
Freezing Baked Cookies
Wrap cooled cookies individually in plastic film, then stack them inside an airtight freezer-safe container for up to 2 months. Thaw at room temperature for 30 minutes, or warm them on a baking sheet in a 300°F (150°C) oven for 4 minutes to restore edge crispness.
Essential Tools and Kitchen Equipment
- Digital Kitchen Gram Scale: Essential for measuring flour, sugars, and butterfat with exact precision.
- Heavy-Gauge Half-Sheet Pans: Light-colored natural aluminum sheets reflect radiant heat, ensuring uniform bottom browning without hot spots.
- Spring-Loaded Portion Scoop (#24 or #20): Guarantees uniform dough portion sizes for identical bake times across the sheet.
- Oven Dial Thermometer: Built-in oven thermostats are notoriously inaccurate. A hanging dial thermometer guarantees an accurate 350°F (175°C) environment.
- Unbleached Parchment Paper Sheets: Prevents sticking, insulates delicate cocoa butter, and ensures easy cleanup.
- Wide Round Cookie Cutter (3.5 to 4 inches): Used for the pan-scoot technique to reshape cookies immediately after baking.
Internal Linking Suggestions
- Anchor Text: “chewy brown butter chocolate chip cookies” — Link to your flagship brown butter chocolate chip cookie recipe.
- Anchor Text: “baking science fundamentals” — Link to an educational guide covering flour protein types and sugar crystallization.
- Anchor Text: “how to brown butter” — Link to a dedicated photo and video tutorial on making beurre noisette.
- Anchor Text: “white chocolate macadamia nut cookies” — Link to your dedicated specialty nut variation post.
- Anchor Text: “proper cookie storage techniques” — Link to an article exploring shelf-life extension and freezing baked goods.
- Anchor Text: “freezing cookie dough guide” — Link to an instructional post on flash-freezing sweet doughs.
- Anchor Text: “matcha white chocolate cookies” — Link to your tea-infused baking recipe archive.
Authoritative References
- U.S. Food and Drug Administration (FDA): 21 CFR § 163.124 – White Chocolate Standard of Identity. Outlines legal requirements for real cocoa butter (minimum 20%) and dairy solids.
- King Arthur Baking Company: Master Ingredient Weight & Measurement Reference Chart. Professional volume-to-gram conversion standards.
- USDA FoodData Central: Cocoa Butter and Lipid Profile Analysis. Scientific nutrient data on saturated fatty acid melting curves.
Key Takeaways for Success
- Choose Real Cocoa Butter: Check ingredient lists to verify pure cocoa butter content rather than palm oil.
- Use Melted Butter: Melted butter creates a dense, chewy texture; do not whip air into your dough.
- Balance the Sweetness: Dark brown sugar and a total salt level of 1.6% (by flour weight) keep the cookie well-balanced.
- Chill the Dough: A minimum 45-minute chill solidifies the butterfat and hydrates the flour starches.
- Pull Them Early: Remove the pan when the rims are golden but the centers look pale and slightly underdone.
- Finish with Sea Salt: A light dusting of flaky salt immediately after baking highlights the dairy and vanilla notes.
Final Baking Notes
Baking exceptional white chocolate chip cookies comes down to balancing moisture, controlling fat temperatures, and managing the delicate sugars in cocoa butter. Once you master this base formula, experiment with nutty and tart mix-ins like roasted macadamias or freeze-dried raspberries.
Set up your kitchen scale, preheat your oven with a thermometer in place, and enjoy baking a batch of truly extraordinary cookies.
Frequently Asked Questions
Why did my white chocolate chip cookies turn out flat and greasy?
Cookies spread too thin and turn greasy when the butter is too hot during mixing, when the dough is not chilled, or when flour is under-measured. Ensure melted butter cools to warm room temperature before combining with sugar. Always weigh your flour on a digital scale and chill portioned dough for at least 45 minutes.
Can I use white chocolate bars instead of white chocolate chips?
Yes, high-quality white chocolate bars containing at least 20% cocoa butter work wonderfully. Chopping a bar creates irregular chunks and fine chocolate dust. This results in rich, melted chocolate pockets and subtle sweetness throughout the entire cookie.
Why did my white chocolate chips turn brown and dry in the oven?
White chocolate contains delicate milk powders and sugars that scorch at low temperatures (around 230°F / 110°C). If baking chips sit directly exposed on top of the dough under high heat, they dry out and brown. Gently press chocolate pieces into the dough body before baking to protect them from direct heat.
How do I keep my white chocolate chip cookies soft for days?
To maintain a soft texture, use dark brown sugar and an extra egg yolk in the dough. Dark brown sugar attracts ambient moisture, while the extra yolk provides emulsifying fats. Store fully cooled cookies in an airtight container with half a slice of plain sandwich bread to preserve humidity.
Can I reduce the sugar in this recipe without ruining the texture?
Sugar provides structural moisture and controls cookie spread alongside sweetness. You can reduce granulated sugar by up to 20% without major structural issues. However, reducing it further will produce a cakey, dry cookie that browns poorly and dries out quickly.
Can I freeze unbaked white chocolate chip cookie dough?
Yes. Portion the dough into balls and flash-freeze them on a parchment-lined tray for one hour. Transfer the frozen dough balls into an airtight freezer bag and store for up to 3 months. Bake straight from the freezer at 335°F (168°C) for 12 to 14 minutes without thawing.
Why do you recommend cornstarch in this cookie dough?
Cornstarch tenderizes the dough by breaking up wheat gluten development. This structural change ensures the center of the cookie remains soft, dense, and chewy rather than tough or excessively crisp after cooling.
What is the pan-scoot method and why is it useful?
The pan-scoot method involves placing a round cookie cutter or mug over a freshly baked cookie and swirling it in circles for 5 seconds. This shapes the hot, pliable edges into a neat circle while compacting the outer perimeter for a denser, chewier rim.