How to Bake a Cookie in a Frying Pan: The Definitive Stovetop Guide
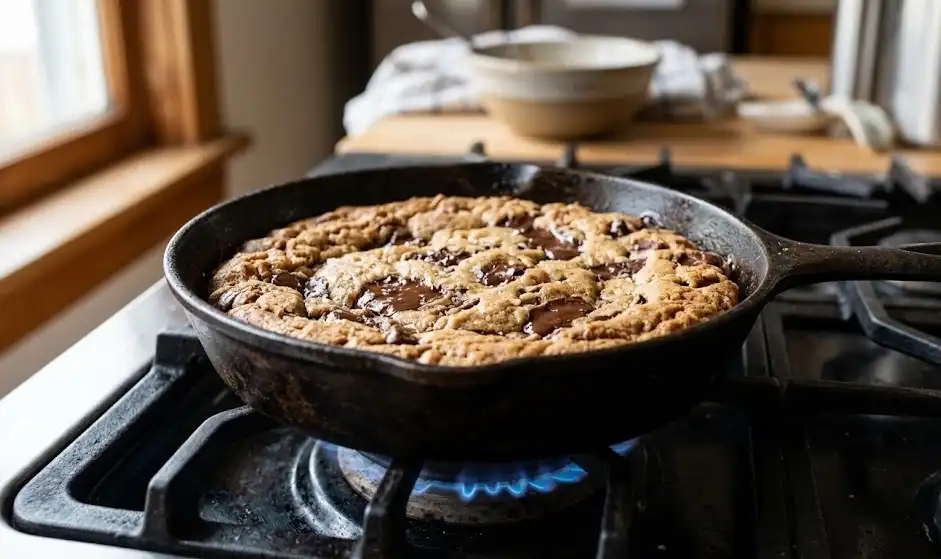
Table of Contents
- Quick Answer: The Stovetop Method
- The Physics of Frying Pan Baking
- Best Frying Pans for Stovetop Cookies
- Dough Formulation for Stovetop Heat
- Giant Skillet Cookie vs. Mini Stovetop Cookies
- Master Stovetop Chocolate Chip Cookie Recipe
- Step-by-Step Cooking Instructions
- Heat Control and Flame Diffusers
- Pan Material and Technique Comparison
- Flavor Variations and Adaptations
- Common Mistakes and Fixes
- Pro Baker Tips for Stovetop Success
- Recommended Tools and Equipment
- Related Baking Guides
- Authoritative References
- Key Takeaways
- Frequently Asked Questions
Featured Answer: Can You Bake a Cookie in a Frying Pan?
Yes, you can make a tender, chewy cookie in a frying pan on any standard stovetop. The technique requires a heavy-bottomed pan, a tight-fitting lid to trap ambient heat, and an ultra-low heat setting to prevent burning the bottom before the center cooks.
A single giant cookie in an 8-inch skillet takes 14 to 18 minutes on the lowest burner setting. Small individual drop cookies take 8 to 12 minutes under a covered lid.
Core Rule: Never use medium or high heat. Stovetop baking relies on slow conductive heat from the base and trapped steam convection from the covered lid.
Introduction: Stovetop Baking Without an Oven
Baking does not require an expensive convection oven. Whether you live in a dorm, an RV, an apartment with a broken appliance, or simply want to avoid heating up your kitchen in the summer, a frying pan provides a reliable alternative.
Cooking dough directly over a burner introduces distinct thermodynamic challenges. Direct flame transfers heat through conduction far faster than ambient oven air transfers heat through convection.
This guide explains how to control temperature gradients, modify dough formulas, and manage trapped moisture. You will produce cookies with crisp edges and soft centers using standard kitchen cookware.
The Physics of Frying Pan Baking
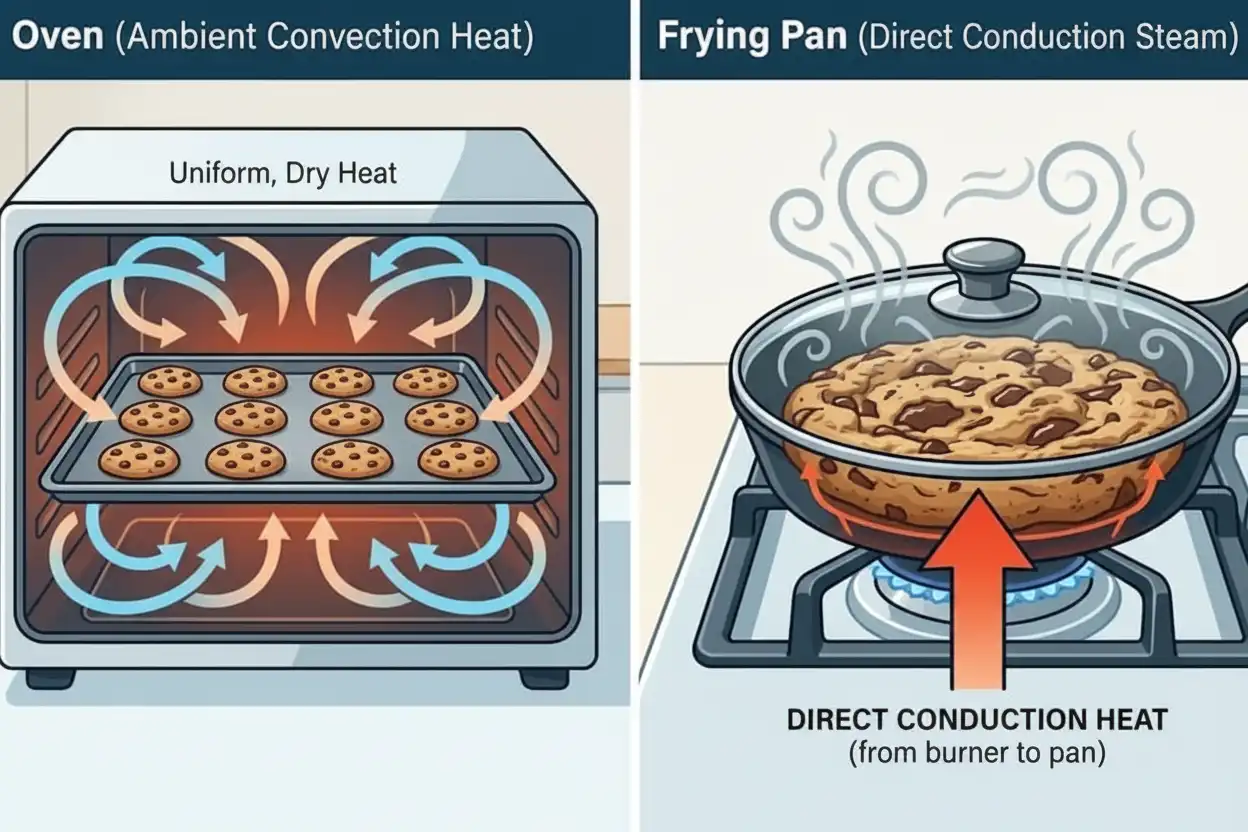
Understanding how heat transfers through a frying pan allows you to adjust your technique for any burner type. Traditional ovens heat food through three combined methods: radiation from heating elements, convection through circulating air, and conduction from the baking sheet.
A frying pan on a stovetop operates almost exclusively through direct conduction. Heat moves directly from the burner into the bottom of the cookware and then into the bottom crust of the cookie dough.
The Temperature Gradient Problem
Because the heat source sits directly beneath the pan, the bottom surface experiences temperatures above 300°F (149°C), while the exposed top surface stays at room temperature. If left uncovered, the bottom of the dough burns completely black before the butter inside the top layer melts.
To fix this imbalance, you must place a lid on the pan. The lid captures moisture evaporating from the butter and eggs, creating a localized pocket of pressurized steam that cooks the top of the dough through condensation and trapped radiant heat.
Managing Steam and Moisture
While trapped steam cooks the top of the cookie, excessive condensation creates a soggy, pale crust. Water drops falling from the lid back onto the cookie will dissolve sugar crystals and create a gummy texture.
Using a domed glass lid lets condensation slide down the edges of the pan instead of dripping onto the center. Venting the lid during the final two minutes allows excess moisture to escape so the top crust sets firmly.
Best Frying Pans for Stovetop Cookies
The material of your frying pan dictates heat distribution and thermal retention. Thin cookware causes hotspots that burn sugar instantly, while thick-walled pans spread energy evenly across the entire surface.
1. Cast Iron Skillets (Top Recommendation)
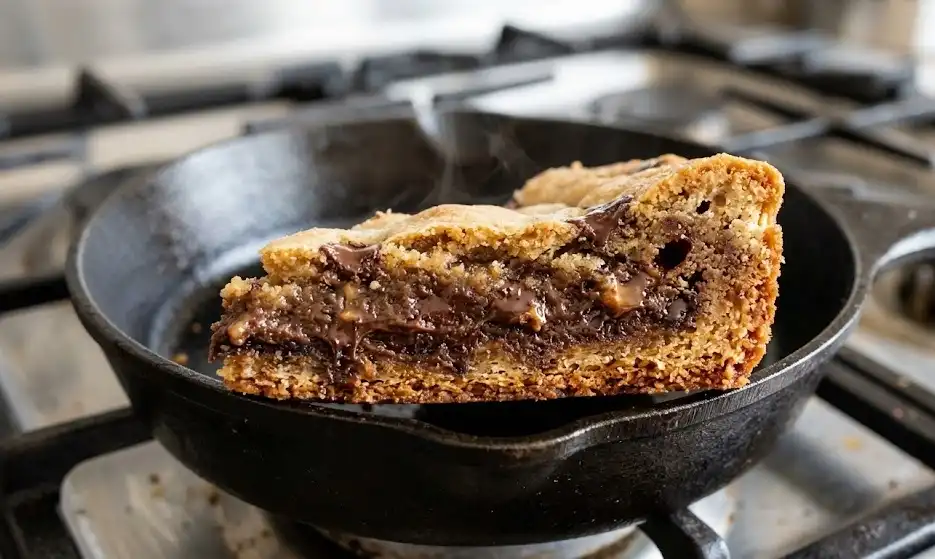
Cast iron is the premier choice for stovetop baking. Its high density and mass allow it to absorb large amounts of heat and radiate it evenly across the cooking surface.
Cast iron retains heat efficiently, creating a deeply caramelized, crispy bottom crust similar to a bakery-style skillet cookie. Ensure your cast iron is well-seasoned or lined with parchment paper to prevent sticking.
2. Heavy-Gauge Nonstick Pans
Hard-anodized aluminum or thick ceramic nonstick pans offer exceptional release properties. They are ideal for beginners worried about cookies sticking to the bottom.
Nonstick pans conduct heat faster than cast iron, meaning they heat up and cool down rapidly. Use the lowest possible flame setting to avoid scorching delicate butter and sugar mixtures.
3. Multi-Clad Stainless Steel
Tri-ply or 5-ply stainless steel pans feature an aluminum core sandwiched between steel layers. They distribute heat evenly across the base and up the sides of the pan.
Because stainless steel lacks nonstick properties, you must grease the surface generously and line the bottom with a circle of unbleached parchment paper.
4. Pans to Avoid
Avoid thin, stamped aluminum pans and single-ply camping pans. These materials create severe hot spots directly above the burner ring, burning the center of the cookie within three minutes.
Dough Formulation for Stovetop Heat
Standard cookie dough recipes can work in a pan, but slight formula modifications guarantee better texture and prevent premature burning.
Sugar Ratios and Caramelization
White granulated sugar melts and caramelizes quickly, which increases the risk of scorching over direct burner heat. Brown sugar contains molasses, which adds hygroscopic moisture and helps the dough stay soft under lower temperatures.
A 2:1 ratio of light brown sugar to white granulated sugar provides the best balance of structural stability, rich flavor, and thermal protection against scorching.
Fat Emulsification: Melted vs. Creamed Butter
Creaming softened butter with sugar incorporates microscopic air pockets that help cookies rise in convection ovens. In a covered frying pan, these air pockets can expand too quickly, causing the cookie to turn spongy and cake-like.
Using melted, cooled butter yields a denser, chewier interior with a fudgy consistency. Melted butter also spreads more evenly across the pan base to establish direct contact with the cooking surface.
Leavening Agents: Baking Powder vs. Baking Soda
Baking soda requires heat and acid to activate and encourages surface browning through the Maillard reaction. Excess baking soda will cause the bottom of your stovetop cookie to turn dark brown before it finishes baking.
Use a small amount of baking powder alongside a minimal pinch of baking soda. This combination provides gentle vertical lift from steam activation without accelerating bottom browning.
Giant Skillet Cookie vs. Mini Stovetop Cookies
You can use a frying pan to make either one large deep-dish cookie or multiple individual drop cookies. Each approach requires a different cooking strategy.
Method A: The Giant Deep-Dish Skillet Cookie
This method fills the entire base of an 8-inch or 10-inch skillet with dough pressed to a uniform thickness of 0.5 to 0.75 inches. It produces a soft, molten center with crisp, chewy outer edges.
Giant skillet cookies cook over low heat for 14 to 18 minutes. They are served warm directly from the pan, often topped with vanilla ice cream.
Method B: Individual Batch Cookies (Drop Cookies)
Small portions of dough (1.5 tablespoons each) are spaced across the pan surface with at least 1.5 inches of clearance between them. They cook faster, taking 8 to 11 minutes total.
Individual cookies require careful flame management because exposed areas of the pan can overheat. You must also flip them gently during the last two minutes if you prefer a crisp top surface.
Master Stovetop Chocolate Chip Cookie Recipe
This formula is balanced specifically for stovetop thermal dynamics in an 8-inch cast-iron or heavy nonstick frying pan.
Ingredients by Weight and Volume
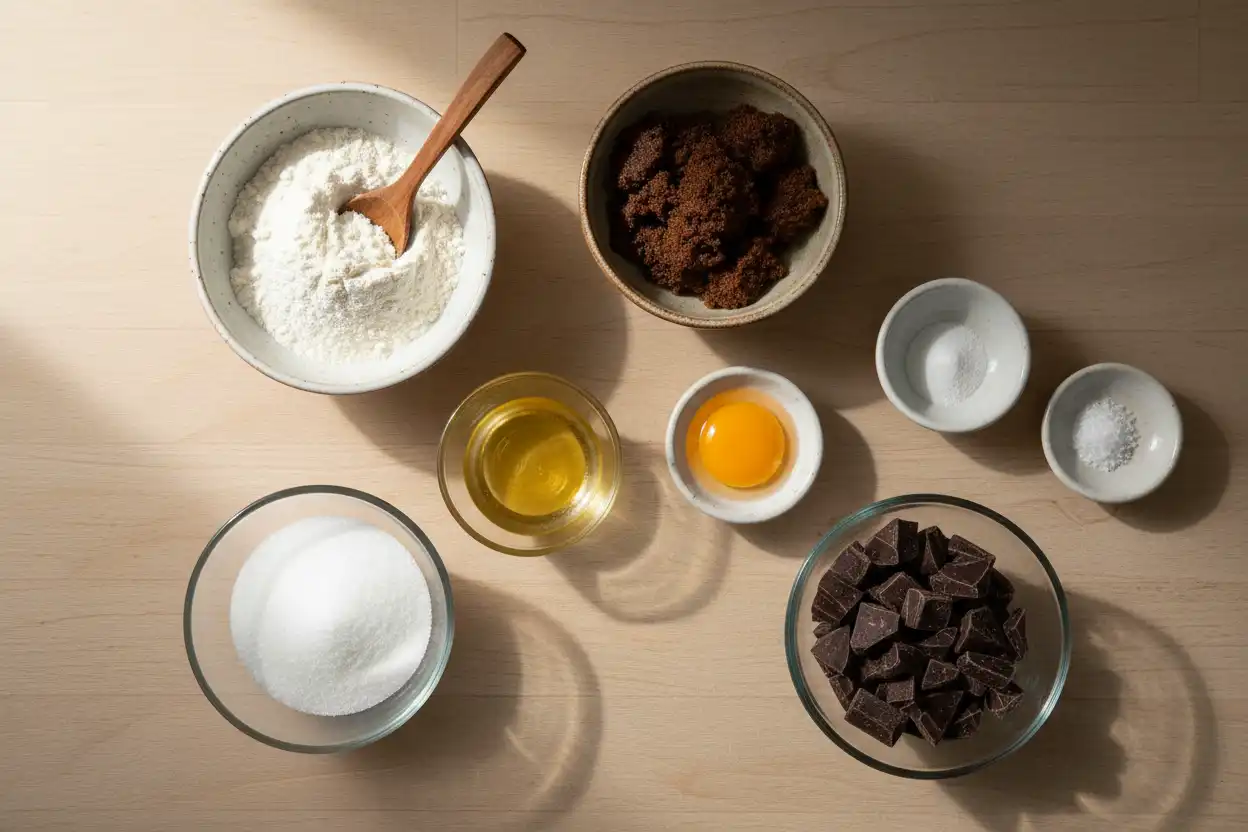
- All-Purpose Flour: 120 grams (1 cup, spooned and leveled)
- Unsalted Butter (Melted & Cooled): 70 grams (5 tablespoons)
- Light Brown Sugar: 65 grams (1/3 cup, packed)
- Granulated White Sugar: 30 grams (2 tablespoons)
- Large Egg Yolk: 1 yolk (at room temperature)
- Vanilla Extract: 5 ml (1 teaspoon)
- Baking Powder: 1 gram (1/4 teaspoon)
- Baking Soda: 0.5 gram (1/8 teaspoon)
- Fine Sea Salt: 1.5 grams (1/4 teaspoon)
- Semisweet or Dark Chocolate Chips/Chunks: 85 grams (1/2 cup)
Step-by-Step Cooking Instructions
Step 1: Mix the Wet Ingredients
What: Whisk melted butter, brown sugar, and granulated sugar in a medium bowl until glossy and smooth. Add the egg yolk and vanilla extract, whisking for 60 seconds until slightly pale.
Why: Dissolving the sugars into the fat and egg yolk creates an emulsion that traps moisture and produces a shiny top crust.
Pro Tip: Ensure the melted butter cools to lukewarm before adding the egg yolk to avoid scrambling the egg.
Step 2: Fold in Dry Ingredients and Chocolate
What: Sift the flour, baking powder, baking soda, and salt directly into the wet mixture. Stir with a silicone spatula until a few dry streaks remain, then fold in the chocolate chunks.
Why: Overworking the dough develops gluten strands, turning your cookie tough and bread-like instead of tender and chewy.
Common Mistake: Adding chocolate while the dough is warm will melt the chips prematurely and streak the dough.
Step 3: Prepare the Frying Pan
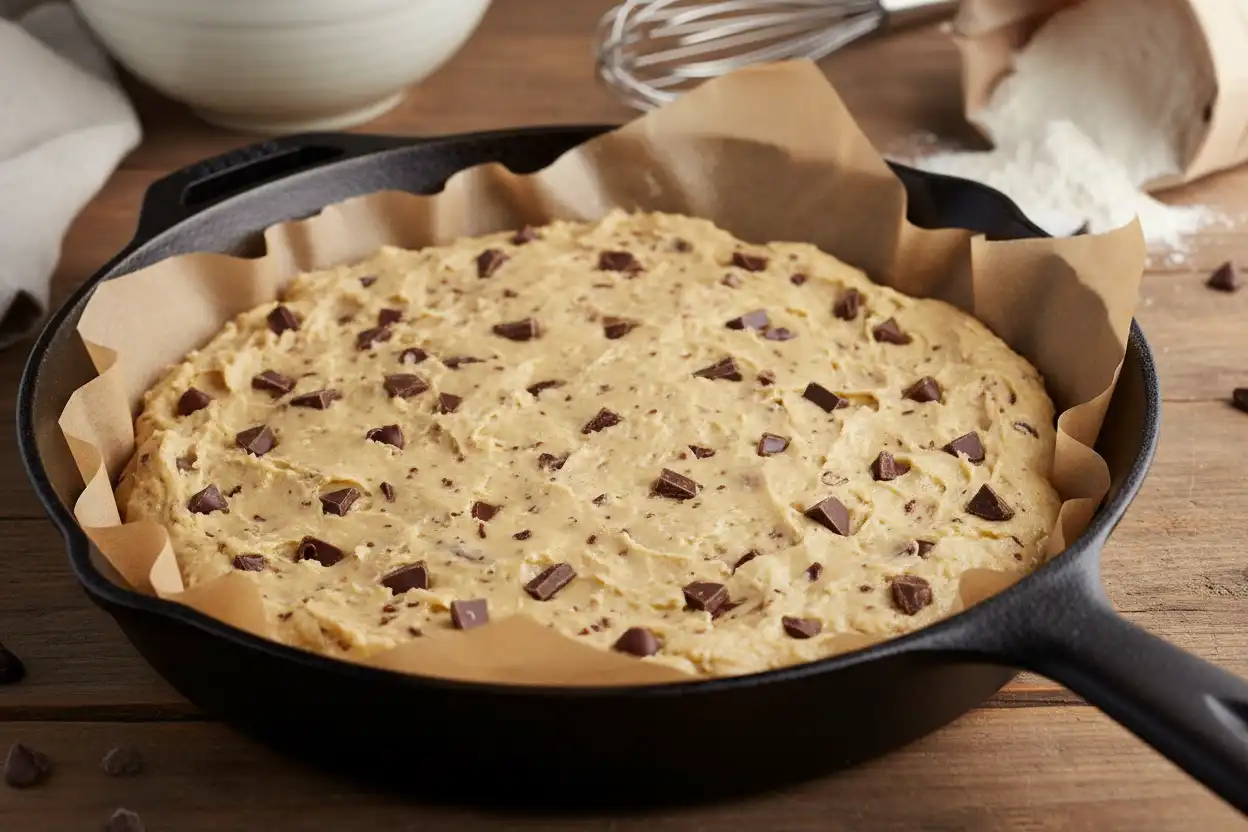
What: Lightly coat the bottom and sides of an 8-inch skillet with butter or neutral oil. Cut a circle of parchment paper to fit the base, place it in the pan, and press the dough evenly across the surface.
Why: The parchment paper acts as a thermal buffer, reducing direct heat transfer and guaranteeing a clean release without sticking.
Pro Tip: Keep the dough slightly thinner in the center and thicker at the edges to promote even cooking across the pan.
Step 4: Heat Calibration and Initial Cook
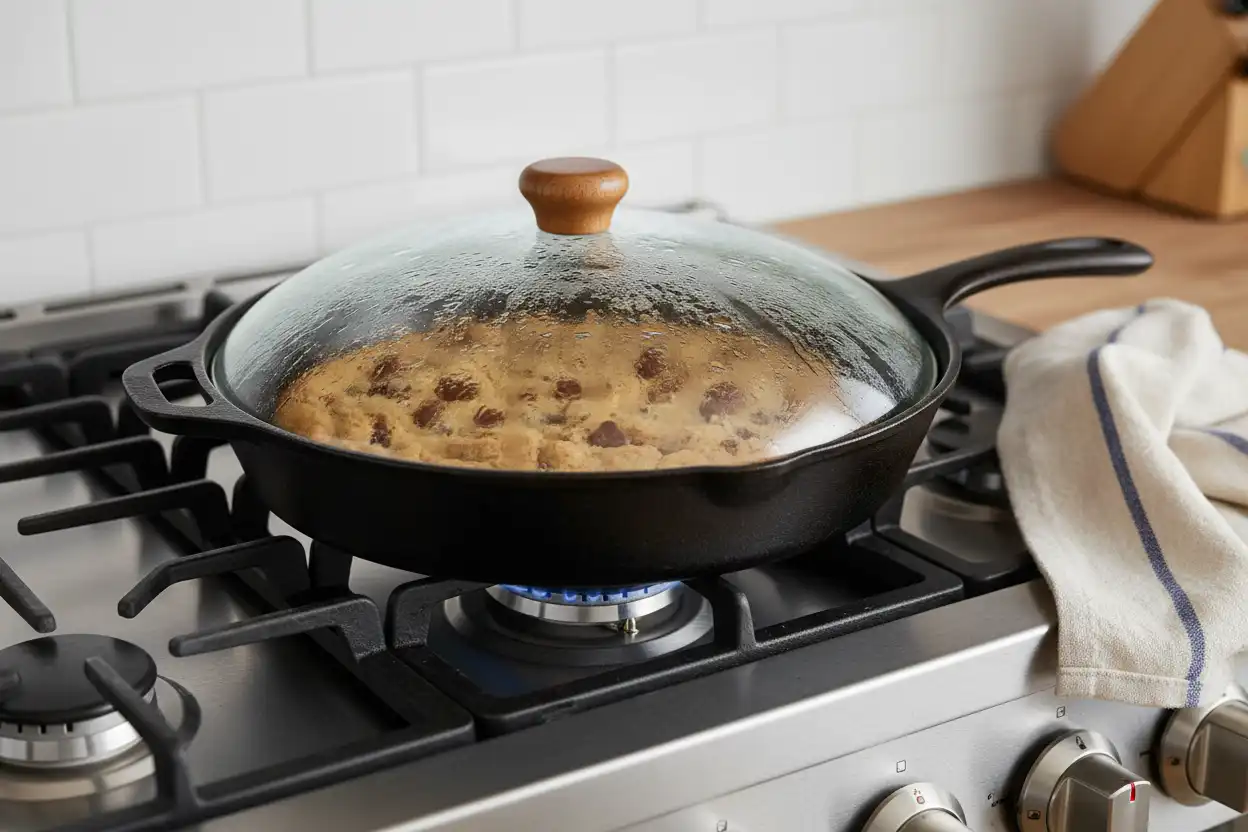
What: Place the covered pan onto the smallest burner on your stove. Turn the heat to the absolute lowest setting possible and set a timer for 12 minutes.
Why: Low conductive energy allows heat to travel upward through the dough before the bottom layer chars.
Common Mistake: Lifting the lid repeatedly during the first 10 minutes releases the trapped heat needed to bake the top.
Step 5: The Check and Lid Venting
What: At the 12-minute mark, lift the lid quickly. The edges should look set, matte, and lightly golden, while the center remains slightly soft and puffy.
Why: Venting the lid slightly for the remaining 3 to 5 minutes allows trapped steam to escape, letting the top surface firm up.
Pro Tip: If the bottom is browning too quickly while the top remains raw, turn off the burner entirely and leave the pan covered for 5 minutes of residual heat baking.
Step 6: Carryover Cooking and Resting
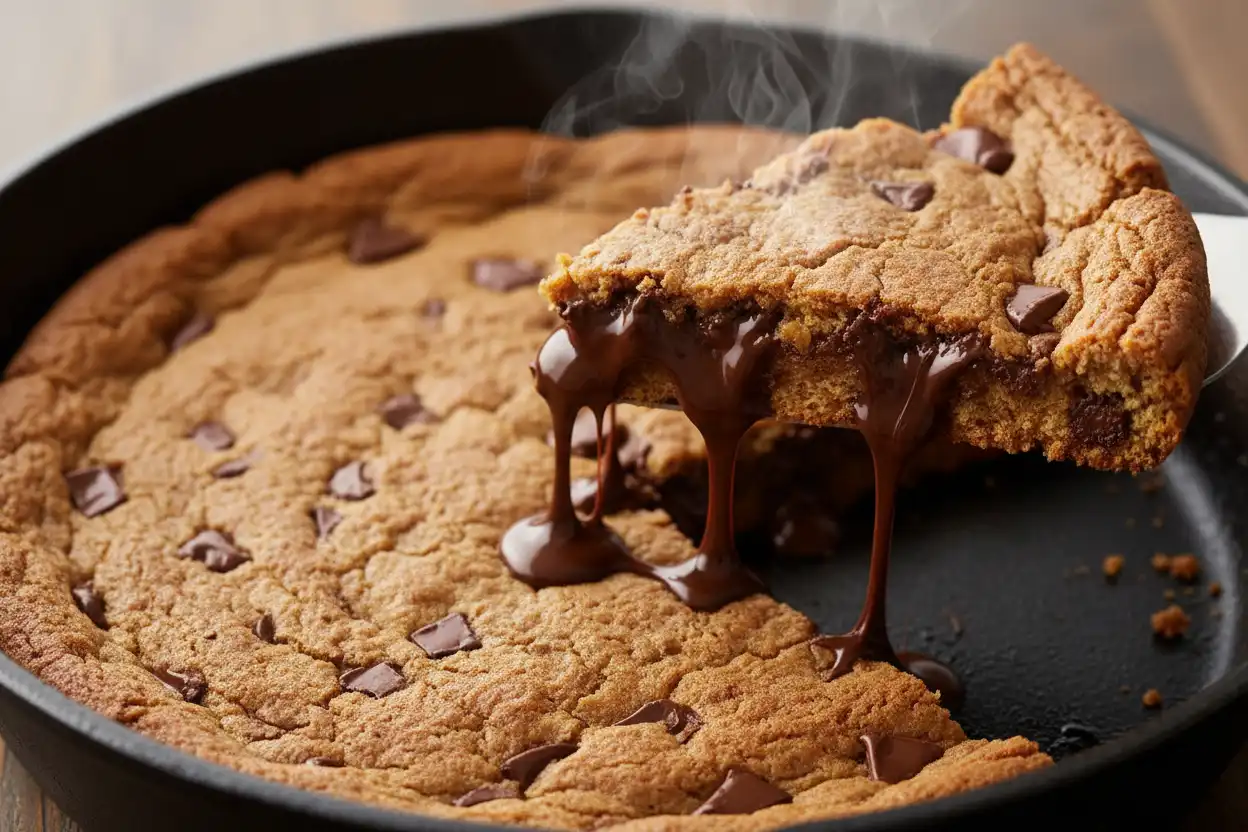
What: Remove the pan from the heat source and place it on a heatproof trivet. Let the cookie rest undisturbed in the hot pan for 10 minutes before slicing or serving.
Why: Residual heat stored in the heavy pan continues cooking the center of the cookie (carryover cooking) without burning the base.
Common Mistake: Slicing into the cookie immediately will cause the molten center to collapse into a liquid pool.
Heat Control and Flame Diffusers
Managing heat is the single most critical factor when baking on a stovetop. Standard residential burners output far more direct thermal energy than necessary for baking dough.
Using a Heat Diffuser (Flame Tamer)
A heat diffuser is a flat metal plate placed between the burner flame and the bottom of your pan. It redistributes concentrated flames into a broad, gentle bed of indirect heat.
If you do not own a commercial heat diffuser, you can create a DIY version. Fold a 24-inch sheet of heavy-duty aluminum foil into a thick 1-inch wide ring, shape it into a circle on your burner grate, and set your pan on top.
Managing Different Stovetop Types
- Gas Burners: Use the smallest burner available. Adjust the flame dial until it is as low as possible without blowing out.
- Electric Coil Stoves: Set the dial to 1 or 2 (Low). Allow the coil to stabilize at temperature for 3 minutes before placing the pan down.
- Glass-Top Induction Cooktops: Set the power level to 2 or 3 (out of 10). Induction heats the pan base rapidly, so stay at lower power settings to prevent scorching.
Pan Material and Technique Comparison
Select the best equipment and method based on your available cookware and preferred cookie style.
| Cookware Type | Heat Retention | Cook Time (Giant) | Parchment Required? | Resulting Texture |
|---|---|---|---|---|
| Cast Iron Skillet | Very High | 14–16 minutes | Recommended | Ultra-crispy crust, soft fudgy center |
| Heavy Nonstick Pan | Moderate | 12–15 minutes | Optional | Even golden base, uniform chewiness |
| Clad Stainless Steel | Moderate to High | 13–16 minutes | Essential | Crisp exterior, tender crumb |
| Carbon Steel Skillet | High | 12–14 minutes | Recommended | Deep caramelization, chewy core |
Flavor Variations and Adaptations
You can adapt this basic stovetop formula to create different flavors with small ingredient swaps.
1. Double Chocolate Fudge Skillet
Replace 20 grams (3 tablespoons) of all-purpose flour with unsweetened Dutch-process cocoa powder. Increase the granulated sugar by 1 tablespoon to balance the bitterness of the cocoa, and fold in white chocolate chips along with dark chocolate chunks.
2. Brown Butter Pecan Skillet Cookie
Brown the butter in a separate saucepan over medium heat until nutty and amber-colored. Chill the brown butter until it returns to a soft paste, then proceed with the recipe, folding in 1/2 cup of toasted chopped pecans.
3. Oatmeal Cinnamon Raisin
Reduce all-purpose flour to 80 grams (2/3 cup) and add 50 grams (1/2 cup) of rolled oats. Add 1/2 teaspoon of ground cinnamon and swap chocolate chips for seedless raisins soaked in warm water for 10 minutes.
4. Vegan Stovetop Cookie
Replace the dairy butter with melted refined coconut oil or vegan block butter. Substitute the egg yolk with 1 tablespoon of unsweetened applesauce or 1 tablespoon of aquafaba (chickpea liquid).
Common Mistakes and Fixes
Avoid these common pitfalls to achieve consistent, bakery-quality results on your stovetop.
1. The Bottom Burns While the Top Remains Raw
Cause: The heat setting is too high, or the pan is too thin to distribute heat evenly.
Solution: Lower the burner to its minimum output, place a heat diffuser underneath the pan, and line the base with parchment paper to buffer direct heat.
2. The Top of the Cookie Is Wet and Gummy
Cause: Water condensed on the underside of the lid and dripped back down onto the dough during cooking.
Solution: Use a domed glass lid so water runs down the perimeter, or wrap a clean kitchen towel tightly around the lid interior to catch steam droplets.
3. The Cookie Sticks Permanently to the Pan
Cause: Lack of lubrication, worn pan seasoning, or skipping the parchment paper base.
Solution: Always cut a round sheet of parchment paper to line the bottom of stainless steel or cast iron pans before pressing in the dough.
4. The Cookie Is Tough and Dense
Cause: Overmixing the flour into the wet ingredients, which overdevelops gluten.
Solution: Fold the dry ingredients gently using a silicone spatula just until no dry flour remains visible.
Pro Baker Tips for Stovetop Success
Use these professional techniques to elevate your stovetop cookies.
Chill the Dough Briefly Before Pressing
Letting the prepared dough rest in the refrigerator for 20 minutes solidifies the butter fats and hydrates the flour proteins. This step prevents the cookie from spreading too quickly and promotes a chewy, uniform crumb.
Use a Toothpick to Test Doneness
Insert a wooden toothpick into the dough halfway between the edge and the center. It should emerge clean or with a few moist crumbs attached. The very center should still feel slightly soft to the touch.
Finish with Flaky Sea Salt
Sprinkle Maldon or flaky sea salt over the warm cookie immediately after removing the lid. The salt crystals cut through the sweetness of melted chocolate and enhance the caramelized notes of the bottom crust.
Recommended Tools and Equipment
- 8-inch Cast-Iron Skillet: Provides heavy thermal mass and balanced radiant heat.
- Domed Glass Lid: Allows visual monitoring without lifting the lid and losing steam heat.
- Cast Iron Heat Diffuser: Bridges wide burner flames to eliminate localized hot spots.
- Parchment Paper Rounds: Pre-cut circles create a clean nonstick surface and prevent charring.
- Digital Kitchen Scale: Ensures accurate flour and sugar ratios by weight for consistent moisture levels.
Related Baking Guides
- Easy Microwave Mug Cakes in Under 5 Minutes
- 15 No-Bake Desserts for Hot Summer Days
- How to Clean and Season Cast Iron Cookware
- Essential Baking Substitutions for Eggs, Butter, and Sugar
- Dorm Room Cooking: Complete Guide to Small-Space Meals
Authoritative References
- King Arthur Baking: Detailed guides on the chemistry of sugar ratios, gluten formation, and starch gelatinization.
- USDA Food Safety and Inspection Service: Proper egg cooking temperatures (160°F / 71°C) to ensure food safety in baked goods.
- Serious Eats (Culinary Science): Thermal conductivity principles of cast iron, stainless steel, and aluminum cookware.
Key Takeaways
- Stovetop cookie baking relies on bottom conduction balanced by top steam convection.
- Always cook on the absolute lowest burner flame with a covered lid.
- A round of parchment paper on the pan bottom prevents sticking and buffers direct heat.
- A 2:1 brown-to-white sugar ratio keeps the dough soft and minimizes burning.
- Allow 10 minutes of carryover cooking off the heat before slicing.
Final Thoughts
Baking a cookie in a frying pan provides warm, freshly baked desserts without an oven. Once you master low heat settings and lid moisture control, you can produce consistent, bakery-quality results on any stovetop.
Prepare a batch of dough, heat your skillet gently, and enjoy a warm, chewy cookie straight from the pan in under twenty minutes.
Frequently Asked Questions
Can you bake cookies in a frying pan without a lid?
No, you need a lid to bake a cookie properly in a frying pan. Without a lid, the top of the dough stays cool and raw while the bottom burns from direct heat. A lid traps steam and heat, cooking the top surface evenly.
How do you prevent the bottom of the cookie from burning?
To prevent burning, set your burner to its lowest setting, line the pan with parchment paper, and use a heavy pan like cast iron. You can also place a heat diffuser between the burner and pan to distribute heat evenly across the base.
Do you need to flip a cookie when making it in a frying pan?
You do not need to flip a giant skillet cookie if you use a tight-fitting lid to trap heat. For individual drop cookies, a gentle flip during the final two minutes adds extra crispness, but it is optional if the top is fully set.
Can I use store-bought refrigerated cookie dough in a frying pan?
Yes, store-bought refrigerated dough works well in a frying pan. Press the dough into an even 1/2-inch layer across a greased, lined skillet. Cover and cook on low heat for 12 to 15 minutes until edges are set.
Can I make a frying pan cookie on an induction stove?
Yes, you can make a frying pan cookie on an induction cooktop using an induction-compatible pan. Set the power level to low (setting 2 or 3). Induction heats the pan quickly, so watch the base closely to prevent over-browning.
How do I know when the stovetop cookie is done?
The cookie is done when the edges look golden and firm, while the center is slightly puffed and soft. A toothpick inserted halfway between the edge and center should come out clean. The cookie will finish setting as it cools.
Can I use regular aluminum foil instead of parchment paper?
Yes, you can line the pan with aluminum foil if you grease the foil surface with butter or nonstick cooking spray. Unbleached parchment paper is preferred because it provides better nonstick release and thermal insulation.
How should I store leftover skillet cookies?
Store leftover skillet cookie slices in an airtight container at room temperature for up to 4 days. Reheat individual slices in a dry skillet over low heat for 2 minutes to restore the crispy bottom crust.