The Ultimate Cut Out Sugar Cookie Recipe: Sharp Edges, Soft Centers, and Zero Spread
The No-Spread Cut Out Cookie Formula
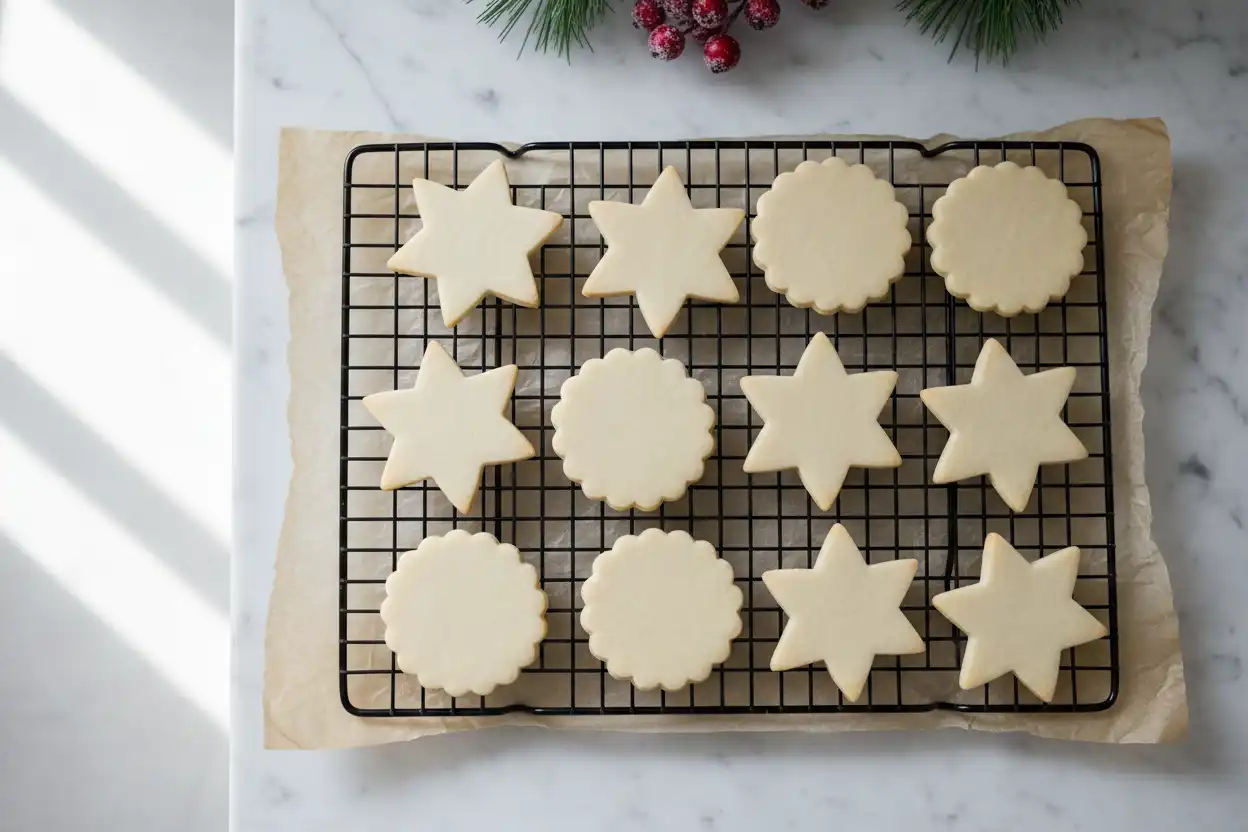
This reliable cut out sugar cookie recipe yields flat, smooth cookies with razor-sharp edges that hold intricate cutter shapes perfectly during baking. The dough requires no leaveners and utilizes cold-sheet rolling so your cutouts never distort or puff out of shape.
Expect a delicate, buttery crumb that remains soft in the center while staying sturdy enough to handle heavy royal icing or rich buttercream. Preparation takes 20 minutes, chilling requires 1 hour, and baking finishes in just 10 to 12 minutes.
- Yield: 24 to 30 medium (3-inch) cookies
- Texture: Crisp outer rim with a soft, melt-in-your-mouth bite
- Structure: Perfectly flat surface designed specifically for decorating
Decorated sugar cookies are the cornerstone of holiday traditions, birthdays, and celebrations. Yet, many bakers struggle with cookies that puff into indistinguishable blobs, stick stubbornly to rolling pins, or turn rock-hard once cooled.
This guide solves every structural and textural issue home bakers face. Whether you are baking your first batch of holiday stars or managing a weekend decorating project with children, this recipe guarantees clean edges, balanced sweetness, and dependable results every single time.
Why This Cut Out Sugar Cookie Recipe Works
Most standard drop cookie recipes rely on chemical leaveners and high moisture levels to create lift and chewiness. That same formula spells disaster for cut out cookies because steam and carbon dioxide force the dough to expand outward.
This recipe balances butter, flour, and sugar to establish structural integrity without sacrificing tenderness. By eliminating baking powder and controlling dough hydration, the dough maintains the exact dimensions of your cookie cutter from pan to cooling rack.
Additionally, this method rolls the dough between sheets of parchment paper before chilling. This professional technique eliminates the need for excess flour on your work surface, ensuring your cookies stay tender rather than dry and crumbly.
The Science of No-Spread Cookie Dough
Successful cookie baking relies on precise food chemistry. Understanding how fats, proteins, and sugars interact helps you control your bake with absolute confidence.
Fat Emulsification and Aeration
Traditional drop cookies instruct you to cream butter and sugar until light and fluffy. That process incorporates microscopic air pockets that expand during baking to create a light, porous cake structure.
For cut out cookies, excessive aeration causes spreading and surface blistering. You want to cream the butter and sugar only until combined and smooth, generally under two minutes. This keeps the fat evenly dispersed without whipping excess air into the matrix.
Gluten Development and Moisture Balance
Flour contains proteins that form gluten when mixed with liquid. Gluten gives baked goods structure, but too much mechanical mixing produces a tough, rubbery cookie that shrinks in the oven.
Using an all-purpose flour with a moderate protein content (around 10% to 11.5%) provides enough structural support to hold sharp corners without becoming tough. Minimal mixing after introducing the flour prevents gluten networks from over-tightening.
The Thermal Mechanics of Butter
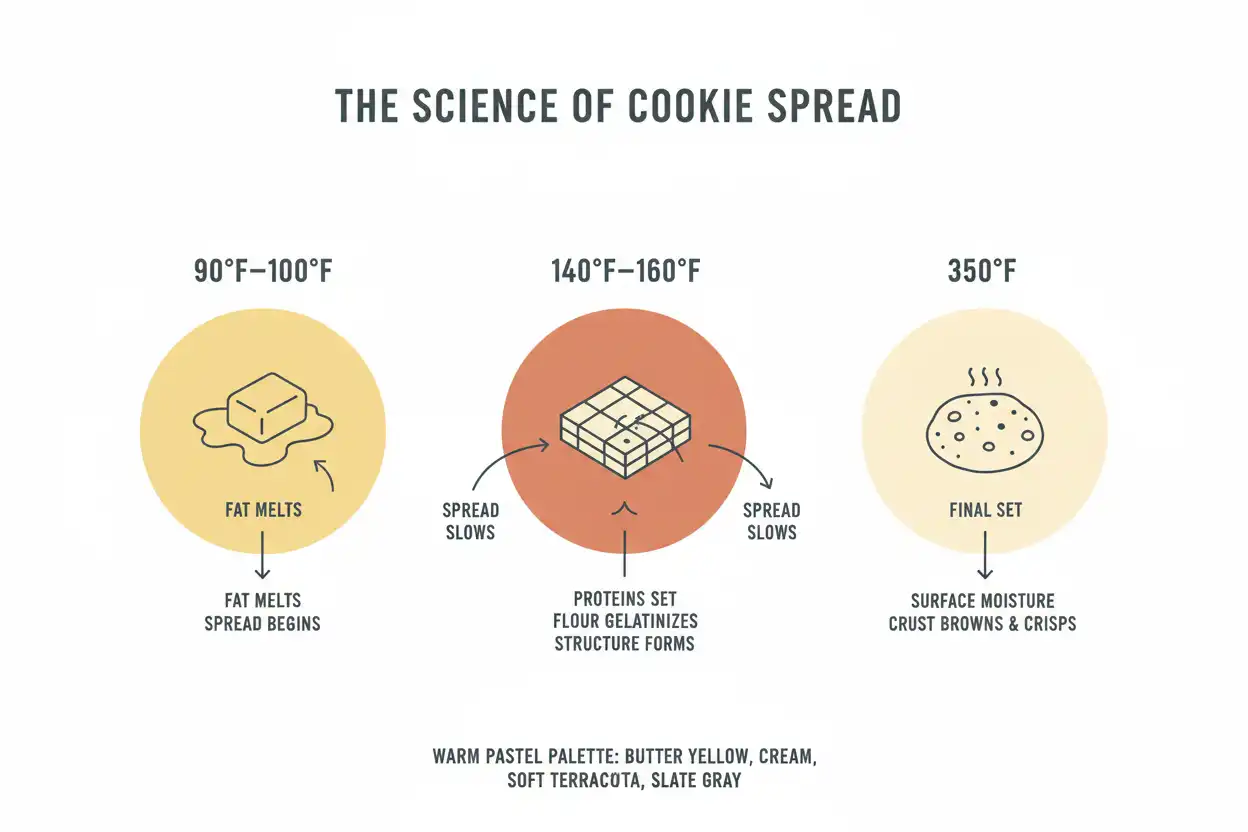
Butter melts between 92°F and 98°F (33°C to 37°C). If warm dough enters the oven, the butterfat liquefies and flows before the flour’s starch gelatinizes and egg proteins set.
Chilling your cut dough shapes until firm ensures the butter stays solid long enough for the exterior structure to set in the hot oven. This thermal delay is the single most important factor in preventing your shapes from spreading.
Key Ingredients and Exact Measurements
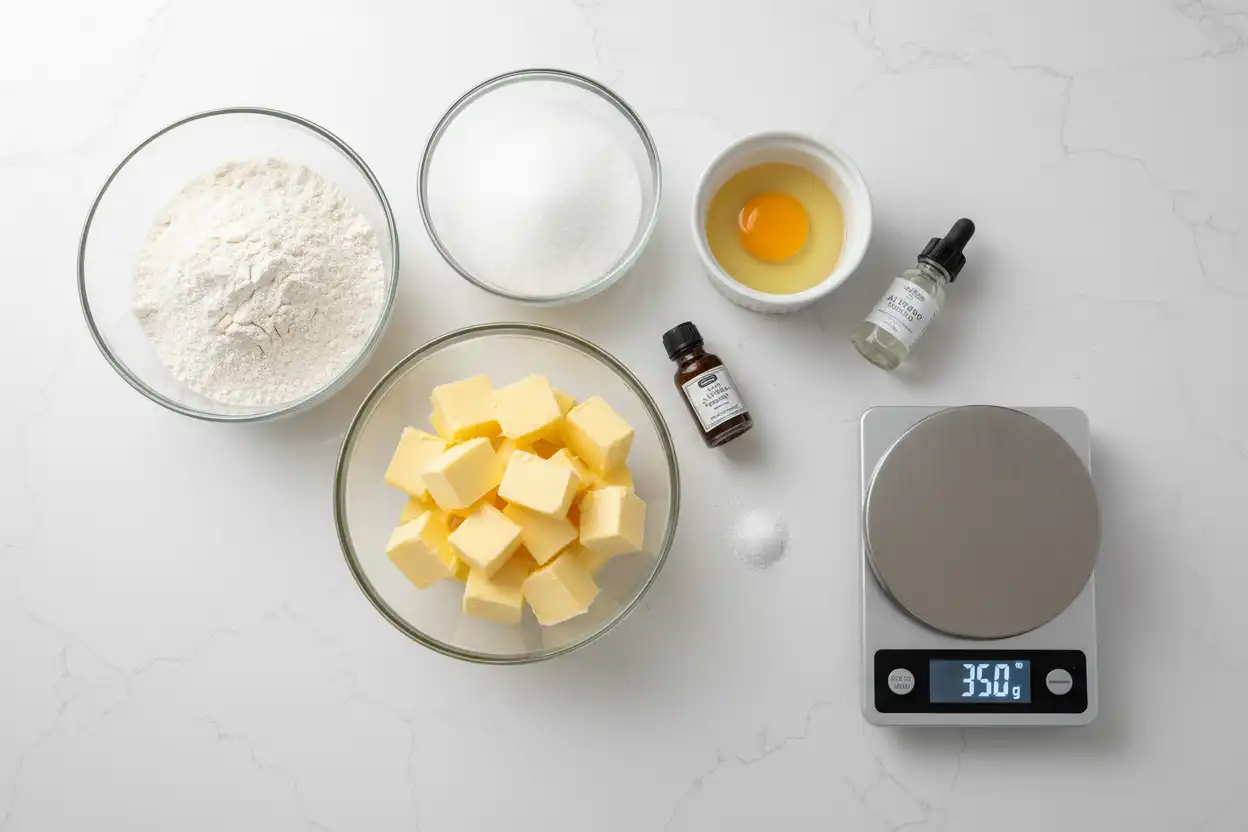
Baking is an exact discipline. Using a digital kitchen scale guarantees consistent results batch after batch, though volume measurements are provided for convenience.
- Unsalted Butter (1 cup / 226g): Use high-quality butter softened to cool room temperature (about 65°F / 18°C). The butter should yield slightly to firm finger pressure without feeling greasy.
- Granulated Sugar (1 cup / 200g): Pure white cane sugar provides clean sweetness and melts smoothly into the butter matrix. Avoid powdered sugar here, as its cornstarch content alters the moisture profile.
- Large Egg (1 whole / 50g without shell): The egg provides emulsifiers through lecithin in the yolk and subtle structure through albumen in the white. Ensure your egg is at room temperature so it binds smoothly with the butter.
- Pure Vanilla Extract (1.5 teaspoons / 7.5ml): High-quality real vanilla elevates the simple, buttery base.
- Pure Almond Extract (0.5 teaspoon / 2.5ml): The secret bakery ingredient that provides depth and a classic bakery aroma. You may substitute with lemon zest or clear vanilla if preferred.
- All-Purpose Flour (3 cups / 360g): Spoon and level into measuring cups, or weigh directly. Avoid self-rising flour or bread flour.
- Fine Sea Salt (0.75 teaspoon / 4.5g): Balances the sugar and brings out the aromatic notes of the dairy fat. Reduce to 0.5 teaspoon if using salted butter.
Step-by-Step Instructions
Follow these progressive stages to mix, handle, cut, and bake your dough with professional precision.
Step 1: Blend the Butter and Sugar
Place the softened butter and granulated sugar into a large mixing bowl or the bowl of a stand mixer fitted with the paddle attachment. Mix on medium-low speed for 90 to 120 seconds.
The mixture should be completely uniform and pale, but not light and airy. Scrape down the sides and bottom of the bowl with a flexible silicone spatula halfway through mixing.
Pro Tip: If your butter is too cold, cut it into small cubes and let it sit on the counter for 10 minutes. Never microwave butter for this recipe; melted pockets will compromise dough density.
Step 2: Add Wet Ingredients and Emulsify
Add the room-temperature egg, pure vanilla extract, and almond extract to the creamed butter. Beat on medium speed for approximately 60 seconds until the liquid incorporates fully.
The mixture should look smooth and creamy. If it appears slightly curdled, your egg was likely too cold; continue mixing for an extra 20 seconds until the emulsion stabilizes.
Step 3: Sift and Add Dry Ingredients
Whisk together the all-purpose flour and fine sea salt in a separate medium bowl. Add half of the flour mixture to the wet base and mix on the lowest speed just until the dry pockets disappear.
Add the remaining flour mixture. Mix on low speed until the dough begins pulling away from the sides of the bowl and clumps around the paddle. Stop mixing immediately once no dry flour remains visible.
The finished dough should feel soft, pliable, and smooth like clay. It should not stick aggressively to your dry fingers.
Step 4: Roll the Dough Before Chilling
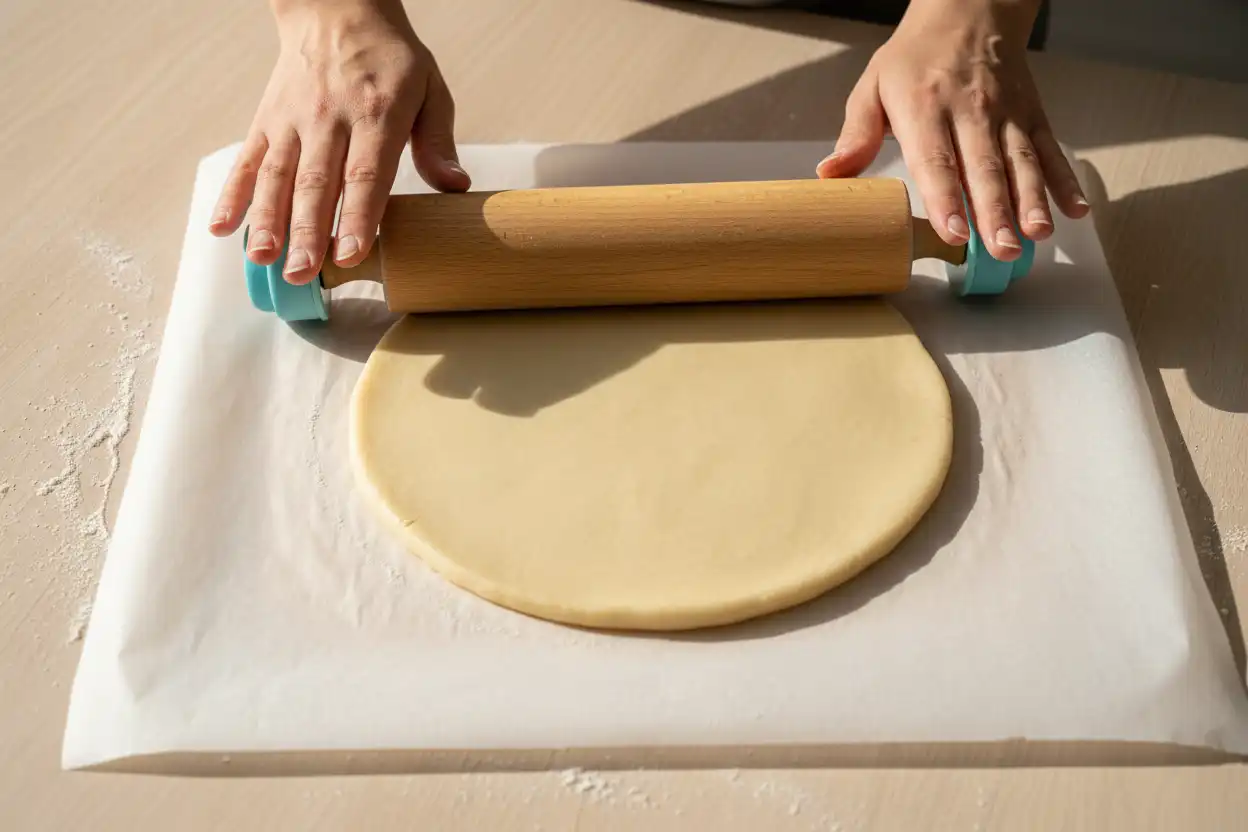
Divide the finished dough into two equal portions. Place one portion directly onto a large sheet of ungreased parchment paper.
Place a second sheet of parchment paper over the dough. Using an adjustable rolling pin fitted with 1/4-inch (6mm) guide rings, roll the dough outward from the center into an even sheet.
Repeat this rolling process with the second half of the dough. Stack the two flat dough sheets (still sandwiched between parchment) onto a flat baking sheet.
Common Mistake: Most bakers chill dough as a dense ball, which requires heavy pounding and extra flouring later. Rolling warm dough between parchment eliminates surface flour entirely and ensures a completely uniform thickness.
Step 5: Chill to Solidify the Butterfat
Place the baking sheet holding the rolled dough slabs into the refrigerator. Chill for at least 1 hour, or freeze for 25 minutes if you are short on time.
The dough is ready when it is completely rigid and does not bend when lifted by the edge. Cold dough cuts cleanly without snagging or warping delicate details.
Step 6: Cut Your Shapes
Preheat your oven to 350°F (177°C). Line two heavy aluminum baking sheets with unbleached parchment paper or silicone baking mats.
Peel the top layer of parchment paper off one dough slab, then lightly lay it back down. Flip the entire slab over and peel away the other piece of parchment completely.
Press your cookie cutters straight down into the cold dough with firm, even pressure. Do not twist the cutter, as twisting distorts the outer edge and weakens the shape.
Lift the cut shapes using a thin metal offset spatula and transfer them to the prepared baking sheets. Space the cookies approximately 1 to 1.5 inches apart.
Gather the dough scraps, press them firmly back together, roll them flat between parchment, and return to the refrigerator for 15 minutes before re-cutting.
Step 7: Bake to a Pale Finish
Place one baking sheet at a time on the center rack of your preheated oven. Bake at 350°F (177°C) for 10 to 12 minutes for standard 3-inch cookies.
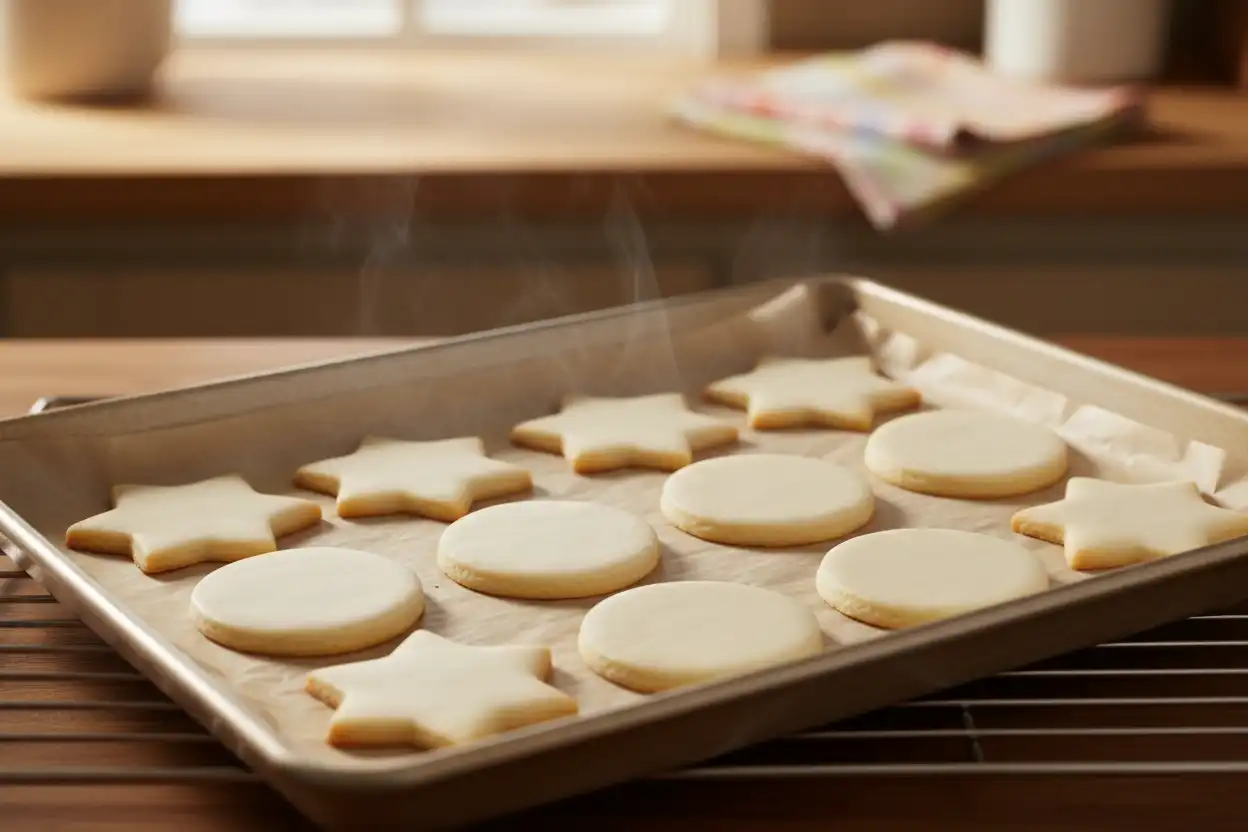
The cookies are done when the surfaces appear dry and matte, and the undersides show faint, pale golden coloration. The top edges should not take on significant brown color.
If you prefer a crisper, crunchier cookie, extend the bake time to 13 or 14 minutes until the edges turn light golden brown.
Step 8: Cool and Set the Crumb
Remove the baking sheet from the oven and let the cookies rest on the hot pan for 5 minutes. The cookies are very delicate while hot; this brief rest allows the starch structure to firm up.
Transfer the cookies carefully to a wire cooling rack using a wide spatula. Let them cool completely to room temperature (about 45 to 60 minutes) before applying icing or stacking.
Cut Out Cookie Styles Comparison
Different occasions call for specific cookie textures and properties. The following table illustrates how this recipe compares to other popular cut out dough styles.
| Cookie Style | Primary Fat Ratio | Edge Definition | Crumb Texture | Best Application |
|---|---|---|---|---|
| This Recipe (No-Spread Cut Out) | 1 part butter : 1.6 parts flour | Sharp, exact corners | Soft center, crisp perimeter | Intricate royal icing designs, detailed cutters |
| Traditional Shortbread | 1 part butter : 1.2 parts flour (no egg) | Moderate (crumbles easily) | Sandy, crumbly, rich | Simple rounds, dipped shortbreads |
| Drop Sugar Cookie | 1 part butter : 1.3 parts flour + leavener | Rounded, irregular edges | Chewy, soft, slightly puffy | Cinnamon sugar coating, quick weeknight treats |
| Bakery Soft-Bite (Sour Cream Base) | Butter + sour cream / cream cheese | Soft, rounded edges | Cake-like, pillowy | Thick buttercream swirls, large holiday rounds |
Preparing the Canvas: Royal Icing vs. Buttercream
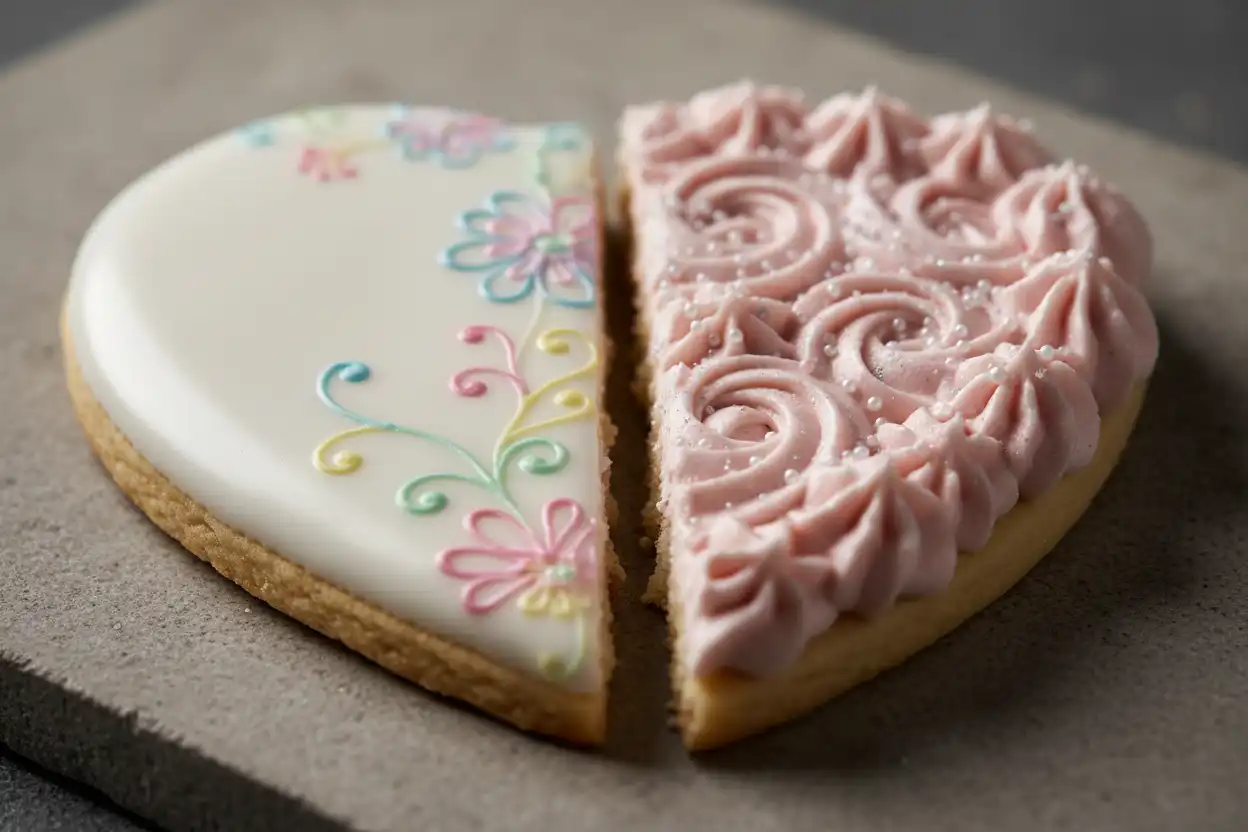
The flat surface of this cut out sugar cookie accommodates diverse decorating mediums. Selecting the right topping depends on your event, timeline, and preferred sweetness level.
Option 1: Traditional Royal Icing
Royal icing dries to a hard, porcelain-smooth finish. This quality makes it the industry standard for stackable gift boxes, intricate line work, and multi-colored holiday flood art.
Make royal icing by whipping 4 cups (480g) of sifted confectioners’ sugar with 3 tablespoons of meringue powder and 1/3 cup of warm water. Tint with concentrated gel food coloring to avoid thinning the icing.
Allow royal icing to cure undisturbed for 8 to 12 hours at room temperature until completely solid before stacking or packing cookies into cellophane bags.
Option 2: American Buttercream
American buttercream provides a rich, creamy mouthfeel and familiar home-baked flavor. It pairs well with casual family bakes, kids’ parties, and cookies meant for immediate eating.
Beat 1 cup of unsalted butter with 3.5 cups of confectioners’ sugar, 2 tablespoons of heavy cream, and 1 teaspoon of vanilla extract. Pipe through decorative star tips or spread with an offset spatula.
Buttercream develops a delicate outer crust after 30 minutes, but it remains soft underneath. Do not stack buttercream-topped cookies unless separated by firm structural dividers.
Expert Techniques and Edge Cases
Elevate your cut out cookies from ordinary home treats to bakery display quality with these advanced execution strategies.
Flour Alternatives and Rolling Mediums
Never throw raw flour across your cutting board when working with this dough. Reincorporating extra flour into cut scraps makes subsequent rollouts tough, dry, and pale.
If your dough becomes sticky during warm summer months, dust your surface lightly with powdered sugar instead of flour. Confectioners’ sugar dissolves during baking without building dry starch layers.
Handling High-Humidity Environments
Flour absorbs ambient moisture like a sponge on humid or rainy days. If the dough feels noticeably wet or slack during mixing, add 2 tablespoons (15g) of additional all-purpose flour.
Keep your rolled dough sheets inside the refrigerator right up until the exact moment of cutting. Cold dough resists humidity-induced softening and retains crisp cutter details.
High-Altitude Adjustments
Baking at elevations above 3,500 feet requires minor formula tweaks due to lower atmospheric pressure and faster moisture evaporation.
Increase your oven temperature by 15°F to 20°F (to 365°F or 370°F) to set the edges before the interior dries out. Add an extra 2 tablespoons of flour and 1 teaspoon of water or milk to balance accelerated evaporation.
Flavor Infusions and Variations
While classic vanilla and almond extracts offer timeless taste, this balanced base accepts aromatic variations seamlessly without compromising structural performance.
- Citrus Zest: Rub 1 tablespoon of freshly grated lemon, orange, or lime zest into the granulated sugar with your fingertips before creaming. The citrus oils infuse directly into the sugar crystals.
- Warm Bakery Spices: Whisk 1 teaspoon of ground cinnamon, 1/4 teaspoon of ground nutmeg, and 1/4 teaspoon of ground cardamom into the dry flour mixture.
- Earl Grey or Espresso: Grind 1 tablespoon of whole Earl Grey tea leaves or espresso beans to a fine dust and blend into the dry ingredients.
Tips for Baking with Children
Baking cut out cookies creates memorable family moments, but sticky dough and delicate shapes can cause frustration for younger children.
Prepare the dough ahead of time and keep it chilled in flat sheets. Kids can focus on stamping out shapes and decorating without waiting through measuring and chilling steps.
Choose sturdy, medium-sized cutters with wide, comfortable rims rather than intricate metal cutters with narrow projections like thin star points or reindeer antlers. Simple circles, trees, and hearts lift easily from the board without tearing.

Troubleshooting Common Mistakes
If your cookies are not turning out as planned, review these common issues to correct your technique.
Why Did My Cookies Spread and Lose Their Shape?
Cookies spread when the butter melts before the dough structure solidifies. This issue happens if the dough enters the oven warm, or if you whipped too much air into the butter during creaming.
To fix this, pop your cut cookie shapes into the freezer on their baking sheets for 10 minutes right before sliding them into the oven. The rapid cold-to-hot transition locks your cut edges in place.
Why Are My Cookies Tough and Dry?
Tough cookies indicate excessive gluten formation or moisture loss. This problem occurs when you overmix the flour or gather and roll scrap dough four or five times.
Always mix on the lowest speed just until the flour is incorporated. When rerolling scraps, combine them gently into a single disc rather than kneading them like bread dough.
Why Are My Cookies Browner on the Bottom Than the Top?
Uneven browning stems from dark, thin baking sheets or improper rack placement. Dark metal absorbs and radiates heat quickly, scorching cookie bottoms before the tops finish setting.
Use heavy-gauge, light-colored aluminum half-sheet pans. If you only own dark pans, line them with silicone baking mats or double-stack your pans to buffer bottom heat transfer.
Why Did the Dough Crack While Rolling?
Dough cracks if you attempt to roll it while it is too cold. Cold butterfat is brittle and snaps under the mechanical pressure of a heavy rolling pin.
Roll the dough immediately after mixing while it is still pliable at room temperature, then chill the rolled sheets. If rolling already-chilled dough, let it rest on the counter for 5 to 7 minutes to regain slight elasticity.
Make-Ahead, Freezing, and Storage Guidelines
Plan your holiday baking schedule with confidence using these tested preservation timelines.
Storing Baked, Undecorated Cookies
Place fully cooled cookies in an airtight plastic container or metal tin. Layer parchment paper or wax paper between rows to prevent scratching.
Store at cool room temperature away from direct sunlight for up to 7 days. Do not refrigerate baked cookies, as the cold environment speeds up starch retrogradation and causes them to dry out.
Freezing Cut Cookie Dough
You can freeze raw cut shapes on a parchment-lined baking sheet until rock-hard (about 1 hour). Once frozen, transfer the raw cutouts into an airtight freezer container with parchment sheets between layers.
Freeze for up to 3 months. Bake straight from the freezer on a lined sheet pan, adding an extra 1 to 2 minutes to the total baking time.
Freezing Fully Decorated Cookies
Royal icing-decorated cookies freeze well once the icing cures completely for 24 hours. Place cookies in an airtight, rigid container separated by parchment sheets.
To thaw, remove the container from the freezer and leave it closed on your kitchen counter for 3 to 4 hours. Do not open the container while it comes to room temperature; moisture in the air will condense on the cold container instead of bleeding your royal icing colors.
Essential Equipment and Resources
Having the right tools ensures consistent, frustration-free baking.
- Digital Kitchen Scale: Provides gram-level accuracy that eliminates variations caused by packed measuring cups.
- Adjustable Rolling Pin with Guide Rings: Uses removable side discs (1/4-inch or 6mm) to produce an even sheet of dough without thick edges and thin centers.
- Heavy-Gauge Aluminum Half-Sheet Pans: Light-colored aluminum distributes heat evenly, preventing premature browning on cookie bottoms.
- Unbleached Parchment Paper Sheets: Pre-cut sheets lie completely flat, protecting your pans and simplifying dough transfers.
- Thin Metal Offset Spatula: Slips under delicate, cold raw cutouts to transfer shapes without tearing fragile corners.
- Sturdy Stainless Steel Cookie Cutters: Clean, sharp edges cut straight through cold dough without compressing borders.
Related Baking Guides
Explore these companion guides to expand your holiday cookie skills:
- How to Make Foolproof Royal Icing for Cookie Decorating
- The Ultimate Guide to Freezing Cookie Dough and Baked Treats
- Soft and Spiced Gingerbread Cut Out Cookie Recipe
- Essential Baking Substitutions for Butter, Eggs, and Flour
- How to Plan and Pack Bakery-Worthy Holiday Cookie Boxes
Authoritative References
For further reading on ingredient chemistry and home baking food safety, consult these reliable resources:
- United States Department of Agriculture (USDA): Guidelines on handling raw flour and safe egg storage temperatures.
- King Arthur Baking Company: Certified weight charts for all-purpose flours and leavener mechanics.
- Food and Drug Administration (FDA): Best practices for food-safe colors and royal icing shelf stability.
Key Takeaways for Success
- Skip the baking powder: Omitting leaveners keeps your dough flat, smooth, and free of puffing.
- Do not over-cream: Mix butter and sugar just until combined to avoid whipping excess air into the dough.
- Roll before chilling: Rolling fresh dough between parchment paper sheets eliminates extra flour and saves physical effort.
- Keep it cold: Cut shapes while the dough is firm, and chill shapes again right before baking to lock in sharp outlines.
- Pull early: Remove cookies when the tops look matte and dry; pale cookies remain tender and soft once cooled.
Armed with this reliable cut out sugar cookie recipe, you are ready to create decorated cookies with sharp edges and soft centers. Gather your favorite cutters, prepare your baking sheets, and enjoy the rewarding process of baking cookies that taste just as good as they look.
Frequently Asked Questions
Can I use salted butter in this cut out sugar cookie recipe?
Yes, you can substitute salted butter for unsalted butter. Simply reduce the added fine sea salt in the recipe from 3/4 teaspoon down to 1/2 teaspoon. This adjustment keeps the total salt level balanced while maintaining the richness of the dairy fat.
Why did my cut out sugar cookies spread in the oven?
Cut out cookies spread when the butter in the dough gets too warm before baking. Excess creaming of the butter and sugar can also whip in too much air. Chill your cut shapes on their baking sheet for 10 minutes in the freezer right before sliding them into the oven to lock edges in place.
How thick should I roll sugar cookie dough for cutouts?
Roll your sugar cookie dough to an even thickness of 1/4 inch (6mm). Rolling dough thinner than 1/4 inch produces brittle, easily burned cookies that break under heavy frosting. Rolling thicker than 1/4 inch can cause shapes to round slightly along the upper rim during baking.
Can I make this sugar cookie dough ahead of time?
Yes, this dough stores well ahead of time. Rolled dough sheets tightly wrapped in plastic stay fresh in the refrigerator for up to 4 days. You can also freeze the rolled sheets or raw cutouts in an airtight container for up to 3 months before baking.
Why do I roll the cookie dough between parchment sheets?
Rolling dough between two sheets of parchment paper allows you to roll it out immediately while the dough is soft and pliable. This professional method eliminates the need to dust your countertop with flour, keeping your cookies tender and preventing tough, dry dough from repeated rollings.
How long do decorated sugar cookies stay fresh?
Undecorated cookies and cookies decorated with royal icing remain fresh at room temperature for up to 7 to 10 days in an airtight container. Cookies topped with buttercream should be enjoyed within 3 to 4 days or refrigerated if kept longer to protect the dairy topping.
Do I need to grease my baking sheets for cut out cookies?
No, never grease your baking sheets with cooking spray or butter for cut out sugar cookies. Adding extra fat causes the cookie bottoms to slide and spread during baking. Always line your baking pans with dry, unbleached parchment paper or a silicone baking mat.
Can I omit the almond extract if someone has a nut allergy?
Yes, almond extract is optional and can be omitted without changing the recipe’s texture or structure. Replace the almond extract with an equal amount of pure vanilla extract, or substitute with lemon extract, orange zest, or clear vanilla flavoring to suit your preferences.