Authentic German Springerle Cookie Recipe: The Complete Master Guide
Table of Contents
- Featured Overview: The Golden Rules of Springerle
- Introduction: Understanding the Historic Art of Springerle
- The Food Science: Foot Formation and Surface Chemistry
- Essential Tools: Molds, Rollers, and Dough Rails
- Ingredient Anatomy: Selecting the Right Components
- Step-by-Step Master Recipe and Method
- Ingredient and Method Comparison Chart
- The Critical Drying and Baking Stages
- The Curing Window: Aging for Texture and Flavor
- Troubleshooting Common Springerle Failures
- Pro Baker Tips for Flawless Relief Work
- Kitchen Best Practices and Environmental Control
- Authentic Regional Flavor Variations
- Recommended Sourcing and Supplies
- Related Baking Guides
- Historical and Technical References
- Key Takeaways
- Final Thoughts
- Frequently Asked Questions
Featured Snippet: The Essence of Perfect Springerle
A classic Springerle cookie is an embossed German anise biscuit celebrated for its crisp relief top, cake-like interior, and distinct lower pedestal known as the “foot” (Füßchen). Achieving this balance requires beating room-temperature eggs and powdered sugar for a full 15 to 20 minutes to establish an airy mechanical emulsion. The formed dough must then dry undisturbed for 12 to 24 hours before baking.
During the prolonged drying phase, the top layer hardens into a rigid shell that locks the pressed image in place. When baked at a gentle 300°F (150°C), traditional baker’s ammonia (ammonium bicarbonate) releases gas that cannot breach the dried surface, forcing the cookie to expand solely from the base upward.
Fresh Springerle cookies emerge from the oven hard and brittle. They require an essential curing period of two to four weeks in a sealed container, where they absorb ambient moisture and transform into tender, melt-in-the-mouth confections.
Introduction: Understanding the Historic Art of Springerle
Originating in the Swabian region of southwestern Germany during the fourteenth century, Springerle are among Europe’s oldest continuously prepared picture cookies. The name translates roughly to “little jumping horse,” likely referencing an early carving motif or the vigorous upward leap the dough takes in the oven. For centuries, households have commissioned carved pearwood molds (Model) to commemorate weddings, religious milestones, and seasonal holidays.
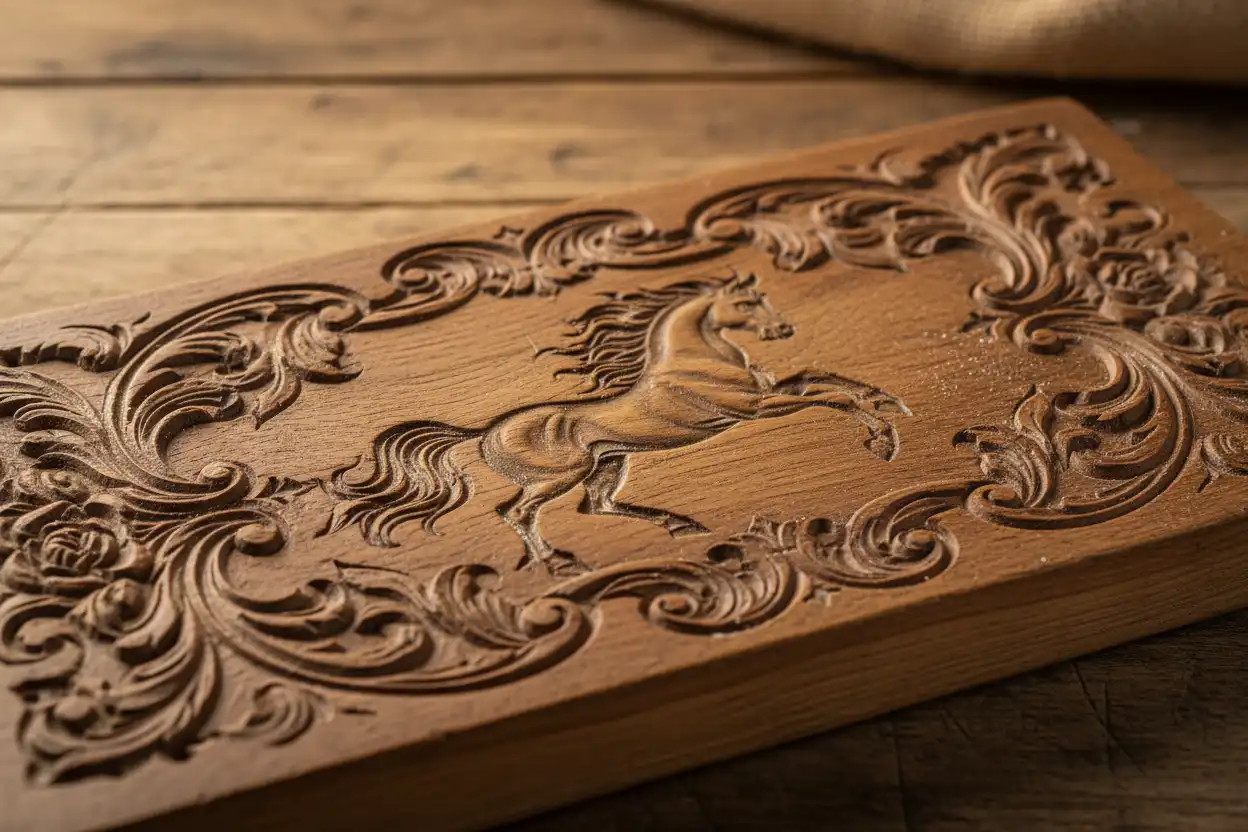
Unlike standard rolled sugar cookies, Springerle rely on centuries-old physical techniques rather than commercial leavening agents or fats like butter and shortening. The absence of shortening yields an exceptionally clean canvas for the aromatic anise seed oil. This lack of fat also produces an extraordinarily durable dough capable of capturing microscopic carvings.
This master guide is built for both first-time holiday bakers seeking historical accuracy and seasoned pastry artisans looking to eliminate inconsistencies. You will master the physics of the drying crust, the precise chemical reactions of historic leaveners, and the exact steps required to produce razor-sharp relief prints with balanced pedestals every time.
The Food Science: Foot Formation and Surface Chemistry
Understanding the balance between egg protein coagulation, sugar crystallization, and leavening gas physics is the key to mastering Springerle. If you skip any phase of the process, the intricate relief can bubble away into an indistinct lump.
The Mechanism of the “Foot” (Füßchen)
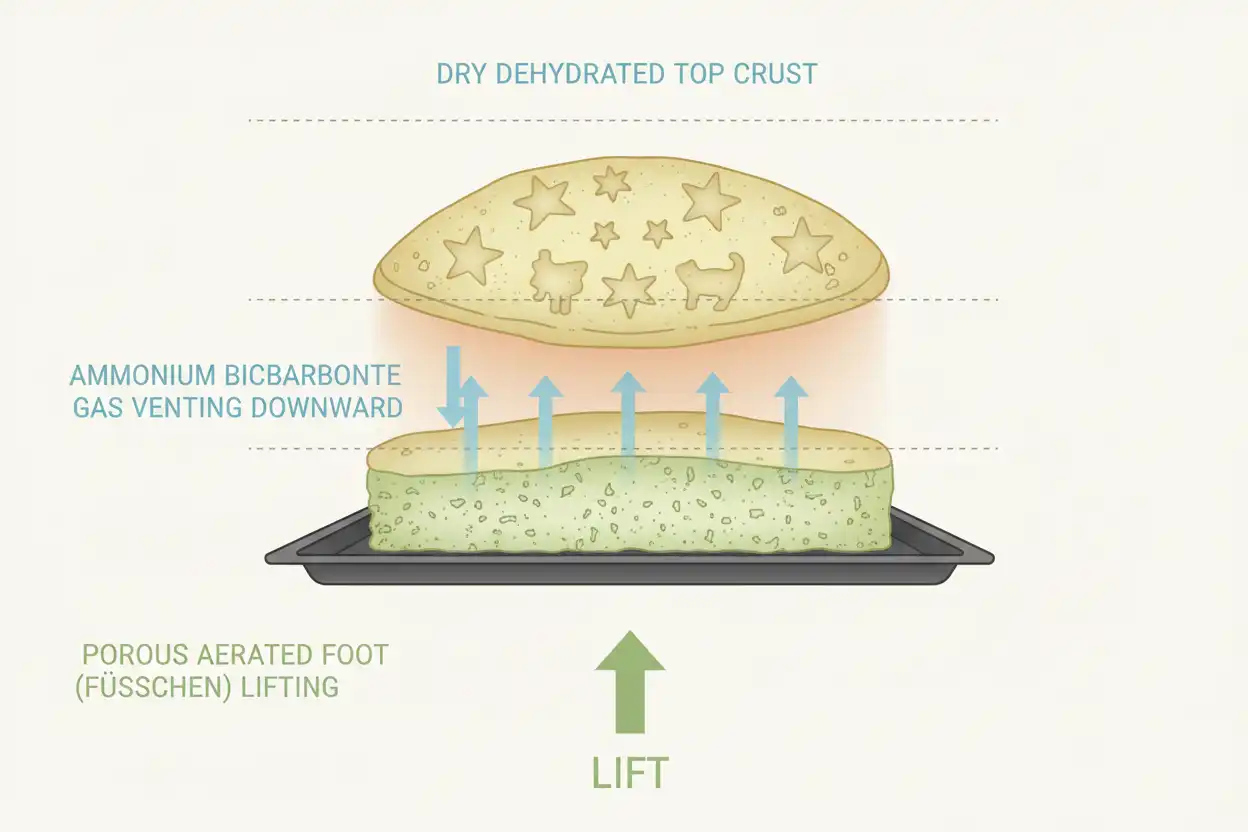
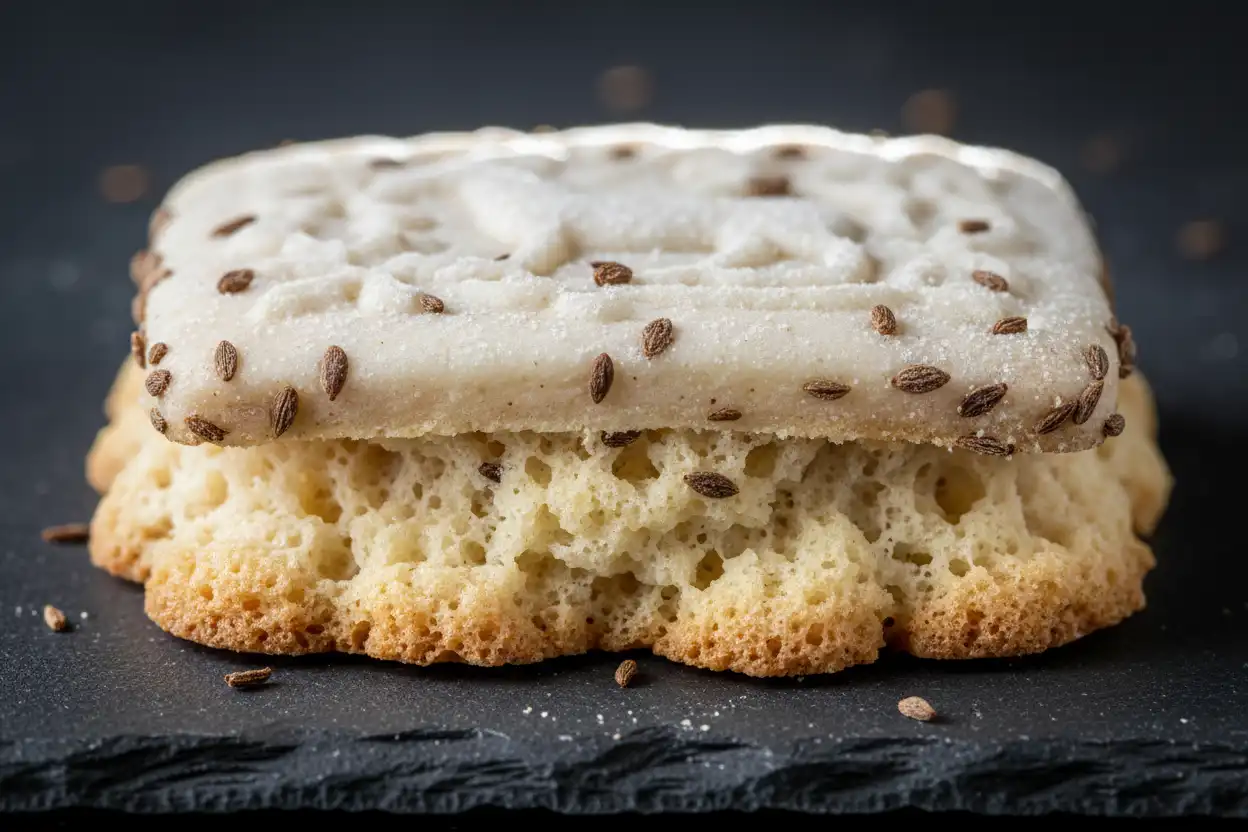
The defining visual marker of an authentic Springerle is its crisp division into two distinct zones: a stark white, unbrowned embossed plaque resting atop an aerated base. This base is formed through directional thermal expansion.
When the molded dough sits on baking sheets for 12 to 24 hours, surface moisture evaporates into the surrounding room. This drying phase dehydrates the top two millimeters of dough, creating a stable, chalk-like barrier of crystallized sugar and denatured egg proteins.
When placed in a low-temperature oven, heat penetrates from the baking sheet upward into the moist base of the cookie. The leavener decomposes into gas, which expands rapidly. Because the hardened top shell cannot stretch, the trapped steam and gases escape downward, lifting the entire top straight up to construct the porous foot.
Why Baker’s Ammonia (Hirschhornsalz) Outperforms Baking Powder
Traditional German recipes call exclusively for ammonium bicarbonate (baker’s ammonia) rather than modern double-acting baking powder. This choice is grounded in food chemistry:
- Zero Residual Moisture: Baker’s ammonia decomposes completely into ammonia gas, carbon dioxide gas, and water vapor at temperatures above 140°F (60°C). It leaves behind no salt residues or chemical byproducts to attract moisture.
- Crust Hardness: The rapid vaporization of ammonium bicarbonate produces a distinct, snap-like crispness across the cookie’s outer perimeter that baking powder cannot replicate.
- Surface Color: Baking powder leaves alkaline sodium residues that accelerate the Maillard reaction, resulting in unwanted golden-brown tops. Baker’s ammonia leaves no such residue, preserving the clean white appearance of the finished cookie.
Baker’s ammonia should be reserved strictly for low-moisture baked goods like crackers and Springerle. In dense, moist cakes, the ammonia gas cannot fully escape, leaving behind an unpleasant medicinal taste.
Essential Tools: Molds, Rollers, and Dough Rails
Precision tools directly dictate the clarity of your embossed impressions. While improvised rolling techniques are possible, traditional equipment prevents uneven thicknesses and sticking.
1. Springerle Molds and Rolling Pins
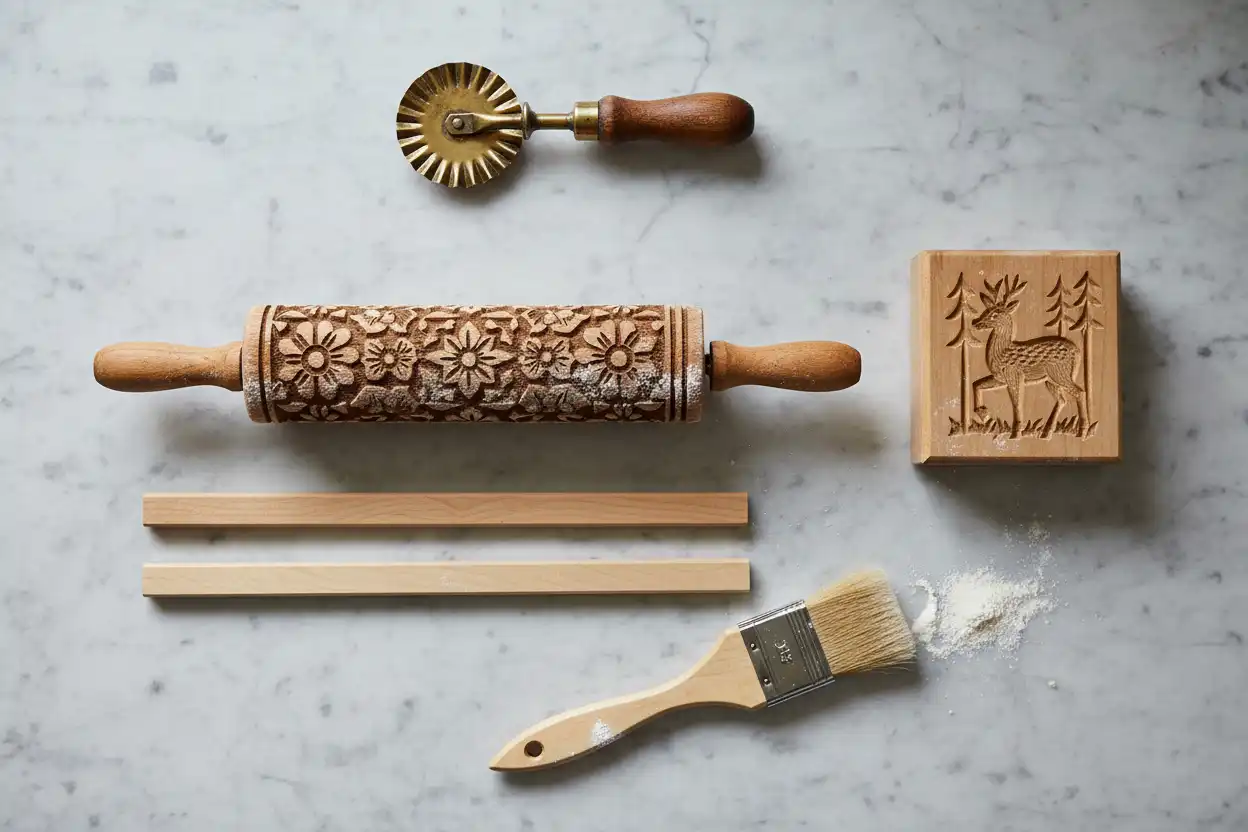
Bakers can choose between single-image press boards and carved rolling pins. Single flat press molds—historically carved from pearwood, boxwood, or cast in modern food-grade epoxy resin—allow you to apply direct, concentrated downward pressure. They produce deeper, crisper reliefs than rolling pins.
Embossed rolling pins carve continuous scenes or repeating panels across an entire sheet of dough in one pass. While faster for large batches, rolling pins demand consistent, heavy upper-body pressure to achieve uniform depth from edge to edge.
2. Dough Thickness Spacers (Dough Rails)
Uneven dough thickness creates uneven baking, causing thinner cookies to overbake and thicker ones to blow out their surface designs. Wooden or silicone dough rails measuring exactly 3/8-inch (approx. 9mm to 10mm) guarantee an even base across your entire work surface.
3. Pastry Wheels and Cutters
A classic fluted brass pastry wheel (Teigrädchen) gives Springerle their traditional scalloped borders. If you prefer crisp, modern borders, a simple heavy-gauge chef’s knife or a sharp pizza wheel cut cleanly through the firm dough without dragging or tearing.
4. Natural Bristle Brushes
Keep two separate dry, natural-bristle pastry brushes on hand. Use the first brush to sweep confectioners’ sugar or flour into deep mold crevices. Use the second to gently brush excess flour off the raw dough before it enters the drying phase.
Ingredient Anatomy: Selecting the Right Components
Springerle rely on four core ingredients: eggs, sugar, flour, and anise. Because the ingredient list is so concise, the grade and handling of each element make an outsized impact on the final cookie.
Eggs: The Emulsion Foundation
Eggs supply the fat, water, and structural proteins that hold the dough together. Use large eggs brought fully to room temperature (around 68°F to 72°F / 20°C to 22°C).
Cold eggs straight from the refrigerator cannot hold the microscopic air cells generated during extended beating. Separating the whites from the yolks is unnecessary; whole eggs beaten thoroughly create the ideal balance of elasticity and lift.
Powdered Sugar vs. Granulated Sugar
Traditional European bakers use finely milled powdered sugar (confectioners’ sugar) rather than granulated sugar. Powdered sugar dissolves instantly into the beaten eggs, producing a silky batter that cures into an ultra-smooth, porcelain-like crust.
If you use granulated sugar, choose extra-fine baker’s sugar and increase your mechanical whipping time. Undissolved sugar crystals attract atmospheric moisture during the drying phase, leaving tiny pits and melting the fine lines of your relief.
Flour Selection: Protein Percentages
Low-to-moderate protein flours produce the tenderest cookies. A standard unbleached all-purpose flour containing roughly 10% to 10.5% protein provides enough gluten to hold sharp mold contours without turning tough.
Avoid high-protein bread flours, which yield dense, rubbery dough that resists stamping. Pure cake flour, while soft, can lack the structural tensile strength needed to hold vertical edges as the foot expands.
Culinary Anise Seed Oil vs. Anise Extract
Authentic flavor requires pure culinary anise seed oil (distilled from Pimpinella anisum) rather than commercial anise extract. Anise extract contains water and high proof alcohol that evaporate quickly in the oven, leaving a muted flavor.
Pure anise essential oil is concentrated and fat-soluble; just a few drops infuse the dough with a clean, licorice-like aroma that deepens over weeks of curing. Pair this internal essence with a traditional bed of whole anise seeds scattered across the baking sheet to gently toast the bottoms.
Step-by-Step Master Recipe and Method
Follow this exact formula to achieve picture-perfect cookies. Using a kitchen scale for metric weights guarantees consistent results regardless of regional ingredient variations.
Formula Specifications
- Prep Time: 45 minutes
- Beating Time: 15–20 minutes
- Drying Period: 12–24 hours
- Bake Time: 12–15 minutes per sheet
- Curing Time: 2–4 weeks
- Yield: Approximately 36–48 medium cookies
Ingredients
- Eggs: 4 large eggs (approx. 200g without shells), room temperature
- Powdered Sugar: 500g (approx. 4 cups), sifted twice to remove lumps
- Baker’s Ammonia (Ammonium Bicarbonate): 1/2 teaspoon (approx. 2.5g)
- Whole Milk or Kirschwasser: 1 tablespoon (15ml), for dissolving leavener
- Pure Culinary Anise Oil: 4 to 6 drops (or 1 teaspoon pure anise extract)
- Salt: 1/4 teaspoon fine sea salt
- Unbleached All-Purpose Flour: 500g (approx. 4 cups), plus extra for dusting
- Whole Anise Seeds: 2 to 3 tablespoons, for dressing the baking sheets
Phase 1: Building the Egg-Sugar Emulsion
Wipe the bowl and whisk attachment of a stand mixer with a clean cloth to eliminate grease traces. Add the four room-temperature eggs. Whip on medium speed for 3 to 4 minutes until frothy, pale, and doubled in volume.
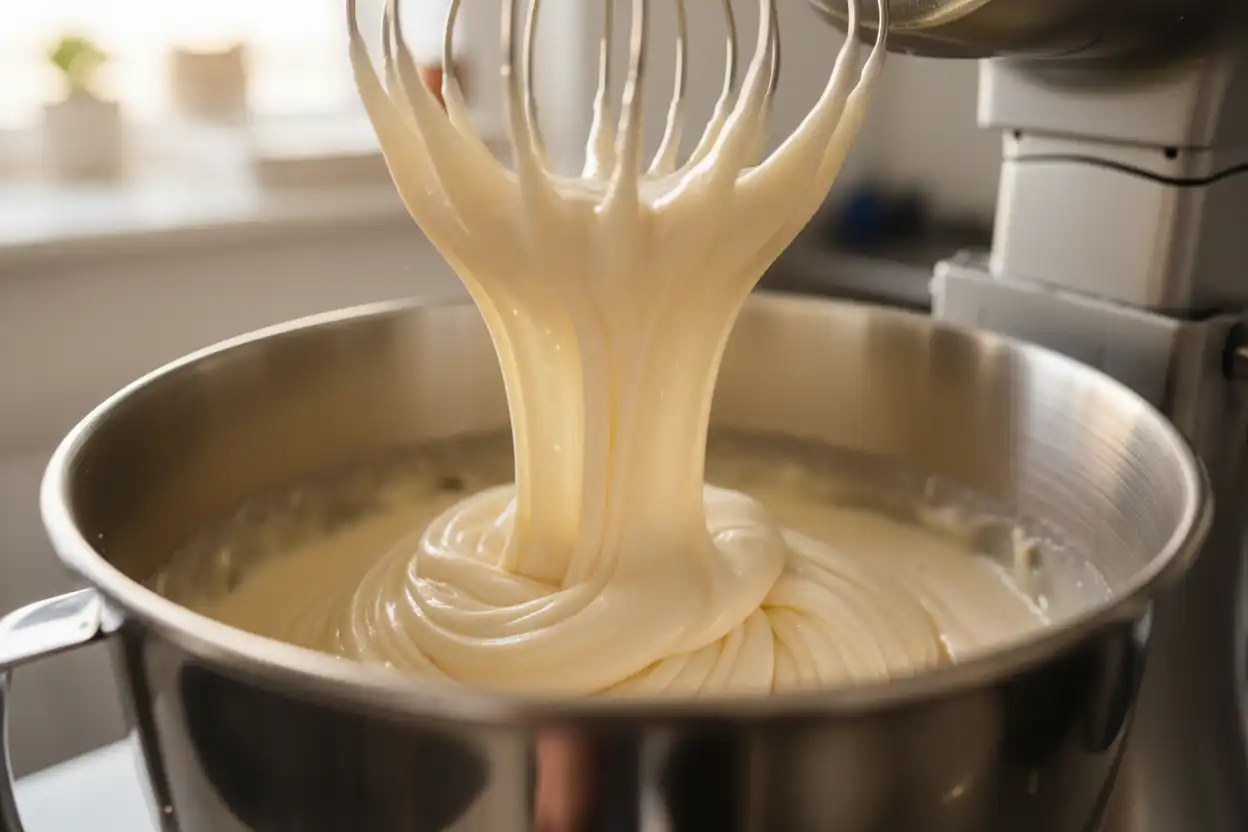
Reduce the mixer speed to low and slowly add the sifted powdered sugar one spoonful at a time. Once incorporated, increase the speed to medium-high and whip continuously for 15 to 20 minutes.
Do not cut this beating stage short. The mixture must transform into a thick, glossy, ivory batter that falls from the whisk in a slow, wide ribbon. This prolonged whipping dissolves the sugar completely and suspends thousands of tiny air bubbles that give the cookie its internal lift.
Phase 2: Introducing Flavor and Leavening
In a small glass cup, stir the 1/2 teaspoon of baker’s ammonia into the 1 tablespoon of milk or Kirschwasser. The mixture will cloud over and emit a sharp, pungent aroma. Let it rest for 2 minutes to dissolve completely.
Pour the dissolved leavener, the anise oil, and the fine salt into the whipped egg mixture. Run the mixer on low for 60 seconds to combine these active agents thoroughly without deflating the batter.
Phase 3: Incorporating Flour and Dough Hydration
Swap the mixer whisk for the flat paddle attachment. Add roughly one-third of the flour (around 170g) and mix on low speed until combined. Add the second third, mixing gently until smooth.
Turn the dough out onto a clean work surface dusted with the final portion of flour. Knead the remaining flour into the dough by hand for 3 to 5 minutes.
The finished dough should feel firm, pliable, and smooth—comparable to dense modeling clay. It must be soft enough to take an impression, but firm enough that it does not cling to clean, dry fingers. Wrap the dough tightly in plastic wrap and let it rest on the counter for 30 minutes to relax the gluten.
Phase 4: Rolling, Embossing, and Cutting
Cut the rested dough in half, keeping the unused portion tightly wrapped in plastic to prevent it from skinning over. Dust your work counter lightly with a 50/50 blend of all-purpose flour and cornstarch.
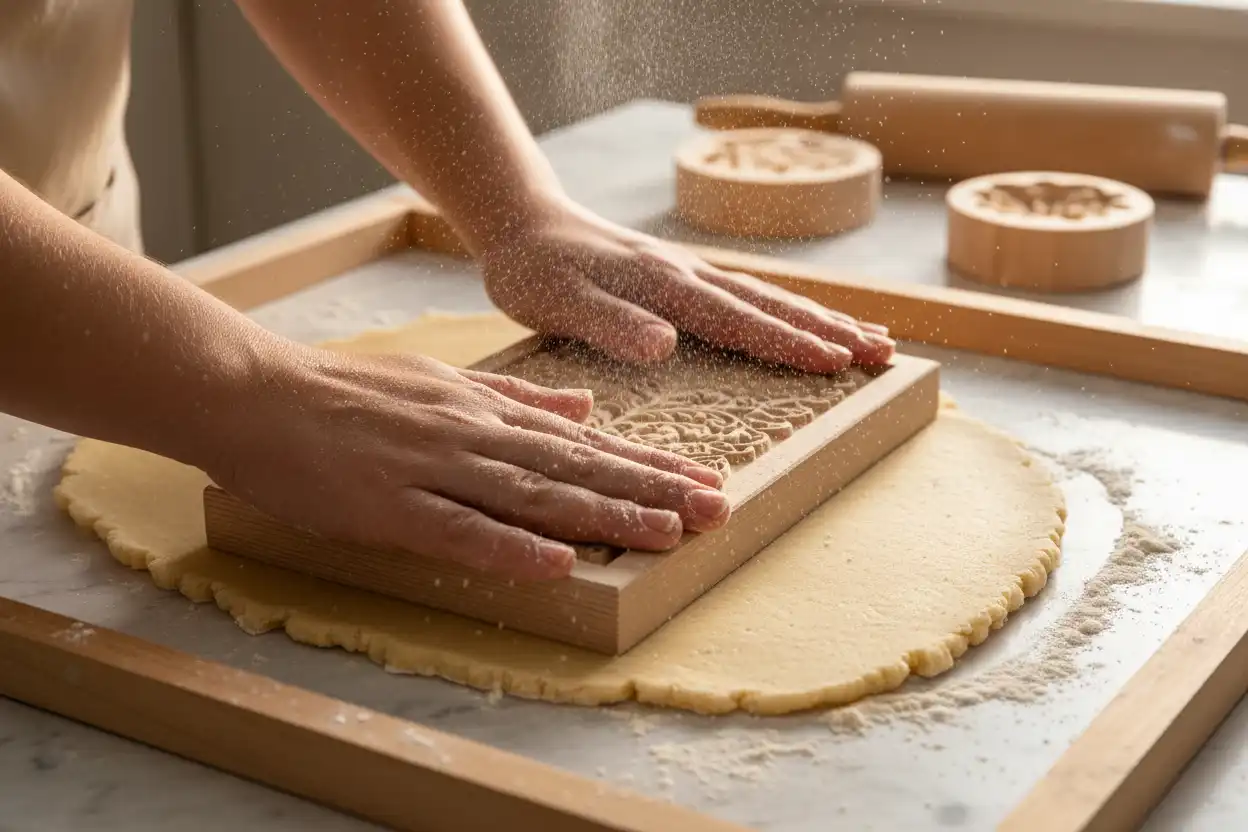
Set your 3/8-inch thickness rails on either side of the dough. Using a smooth rolling pin, roll the dough outward until it sits flush with the rails.
Lightly dust your mold or carved rolling pin with flour, tapping it upside down against your palm to dislodge any excess sitting in fine lines. Press the mold straight down into the dough with firm, balanced weight.
Lift the mold straight up to reveal the raised relief. Using a fluted pastry cutter or sharp chef’s knife, slice between the impressions, leaving a clean 1/8-inch border around each image.
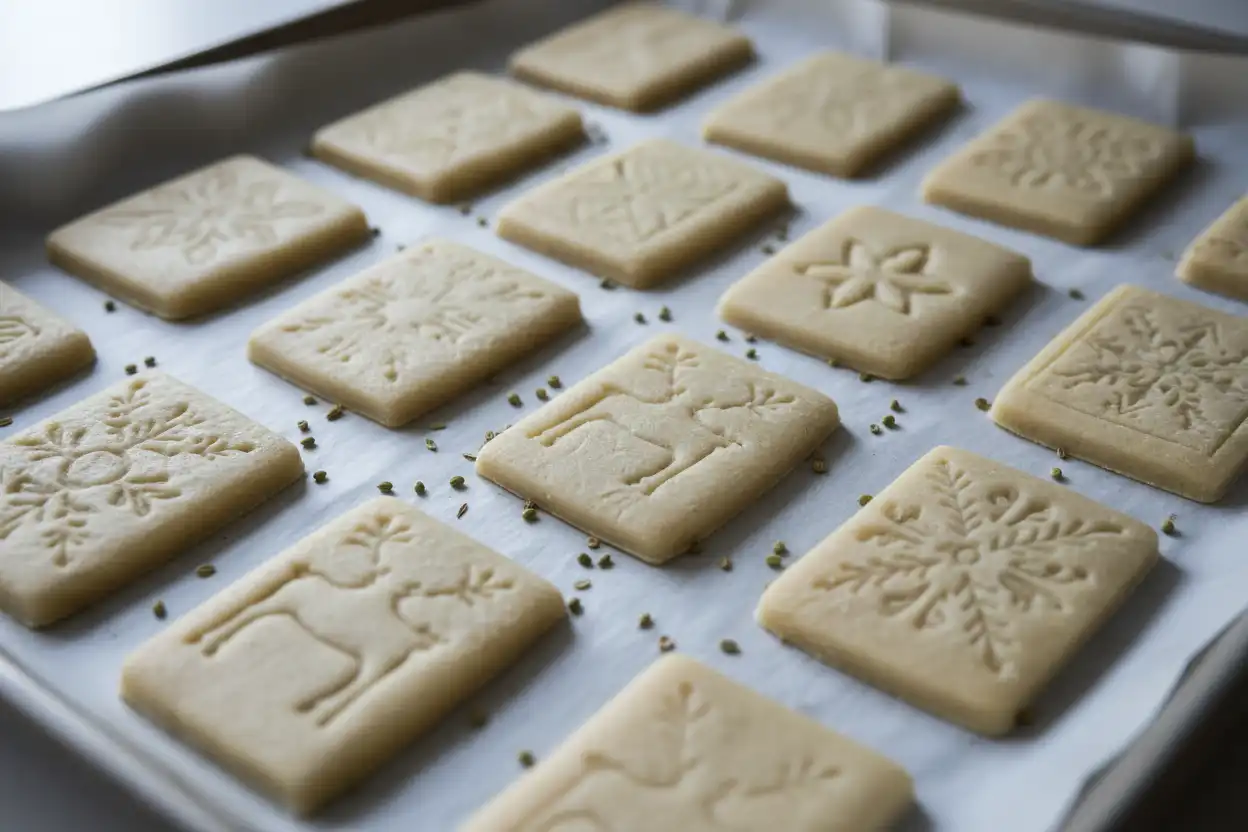
Using a thin offset metal spatula, transfer the cut cookies onto parchment-lined baking sheets that have been generously sprinkled with whole anise seeds. Leave at least 1 inch of space between cookies.
Phase 5: The Crucial Drying Phase
Place the loaded baking sheets in a cool, dry room away from drafty open windows, pets, and kitchen steam. Let the cookies dry uncovered for 12 to 24 hours.
Do not disturb the trays during this window. At the 12-hour mark, gently touch the surface of a sample cookie. The top should feel dry, cool, and chalky, with no stickiness. The bottom edge, where the cookie contacts the parchment, should still feel slightly soft and pliable.
Phase 6: The Low-Temperature Bake
Preheat your oven to 300°F (150°C). Position the oven rack in the lower third of the oven. If your oven has strong bottom heat, stack two baking sheets together to insulate the bottoms of the cookies from burning.
Bake one sheet at a time for 12 to 15 minutes. Watch the cookies closely through the oven window after the 6-minute mark. You will see the bottom edge soften and puff outward, lifting the dry top plate to form the foot.
The finished Springerle must remain creamy ivory on top. If the raised details begin to turn light brown, drop your oven temperature by 15°F immediately. Slide the parchment sheet of hot cookies directly onto a wire rack and let them cool completely.
Ingredient and Method Comparison Chart
Small variations in leaveners, flours, and mold materials can alter the texture and definition of your cookies. Review this comparison to select the combination that matches your kitchen setup.
| Element | Standard Option | Alternative Option | Structural Impact | Flavor & Visual Outcome |
|---|---|---|---|---|
| Leavening Agent | Baker’s Ammonia (Ammonium Bicarbonate) | Baking Powder (Double-Acting) | Ammonia produces clean vertical lift; baking powder can cause the top to crown or dome. | Ammonia keeps the top pure ivory; baking powder can cause slight surface browning. |
| Flour Type | Unbleached All-Purpose (10–10.5% protein) | Pastry Flour (8–9% protein) | All-Purpose holds crisp deep reliefs; pastry flour produces a more delicate crumb. | Pastry flour softens faster during aging; all-purpose holds up better to prolonged handling. |
| Sugar Base | Powdered Sugar (Sifted 10X) | Castor / Baker’s Granulated Sugar | Powdered sugar dissolves instantly for a satin crust; castor sugar needs extra whipping. | Powdered sugar gives a smooth, porcelain finish; castor sugar can leave tiny pinhole pits. |
| Mold Material | Hand-Carved Pearwood | Cast Food-Grade Resin / Cellulose | Wood absorbs trace surface moisture; resin releases dough quickly with minimal flour. | Wood yields softer organic edges; resin captures extremely sharp, modern detail. |
| Drying Method | Room Air Dry (18–24 Hours) | Forced Air Fan Dry (8–10 Hours) | Ambient air creates a balanced crust; direct fan drafts can warp thin edges. | Natural drying produces level feet; fan drafts can cause uneven, lopsided expansion. |
The Critical Drying and Baking Stages
The drying phase is just as important as the mixing phase. If you bake Springerle too soon, the steam from the interior will rupture the soft top, destroying your pressed design.
Environmental Controls for Drying
Target a room temperature around 65°F to 70°F (18°C to 21°C) with relative humidity between 40% and 50%. In humid climates, run a dehumidifier in the room where your trays are drying.
Never place drying sheets inside an unheated oven or a closed cabinet. Without open air circulation, moisture gets trapped around the cookies, leaving the top crust sticky and underdeveloped.
Visual Cues: Reading the Crust
Do not rely solely on a timer to gauge drying. Instead, look for these physical indicators before heating your oven:
- Color Shift: The dough turns from a translucent, glossy cream to an opaque, chalky matte white.
- Tactile Snap: Gently touch the highest raised point of a cookie design. It should feel firm, dry, and unyielding, similar to dry clay.
- Underbelly Softness: Gently lift one cookie and touch its underside. The base should remain cool, moist, and slightly elastic.
Managing the Heat
Springerle require gentle, steady bottom heat to activate the leavener while protecting the top from browning. Keep these heating guidelines in mind:
- Place an oven thermometer on the center rack to verify that your oven does not spike above 300°F (150°C).
- If your oven runs hot from the top heating element, slide an empty baking sheet onto the very top rack to deflect direct radiant heat.
- Bake with the oven exhaust open or prop the door open with a heat-proof wooden spoon for the first 2 minutes if using baker’s ammonia. This lets the initial burst of ammonia gas vent cleanly outside the oven.
The Curing Window: Aging for Texture and Flavor
Freshly baked Springerle are dry, hard, and brittle. This is normal. Historically, these cookies were designed to endure long winters without spoiling, relying on weeks of resting to reach their ideal texture.
The Science of the Softening Period
During aging, the dry starches and sugars inside the cookie slowly pull moisture from the air. This moisture softens the interior into a tender crumb reminiscent of almond paste or marzipan, all while keeping the outer crust crisp.
At the same time, the aromatic anethole compounds in the anise seed oil infuse through the dense crumb, smoothing out the sharp herbal notes into a warm, mellow flavor.
How to Cure Your Cookies Properly
- Allow the cookies to cool completely on wire racks for at least 6 hours after baking.
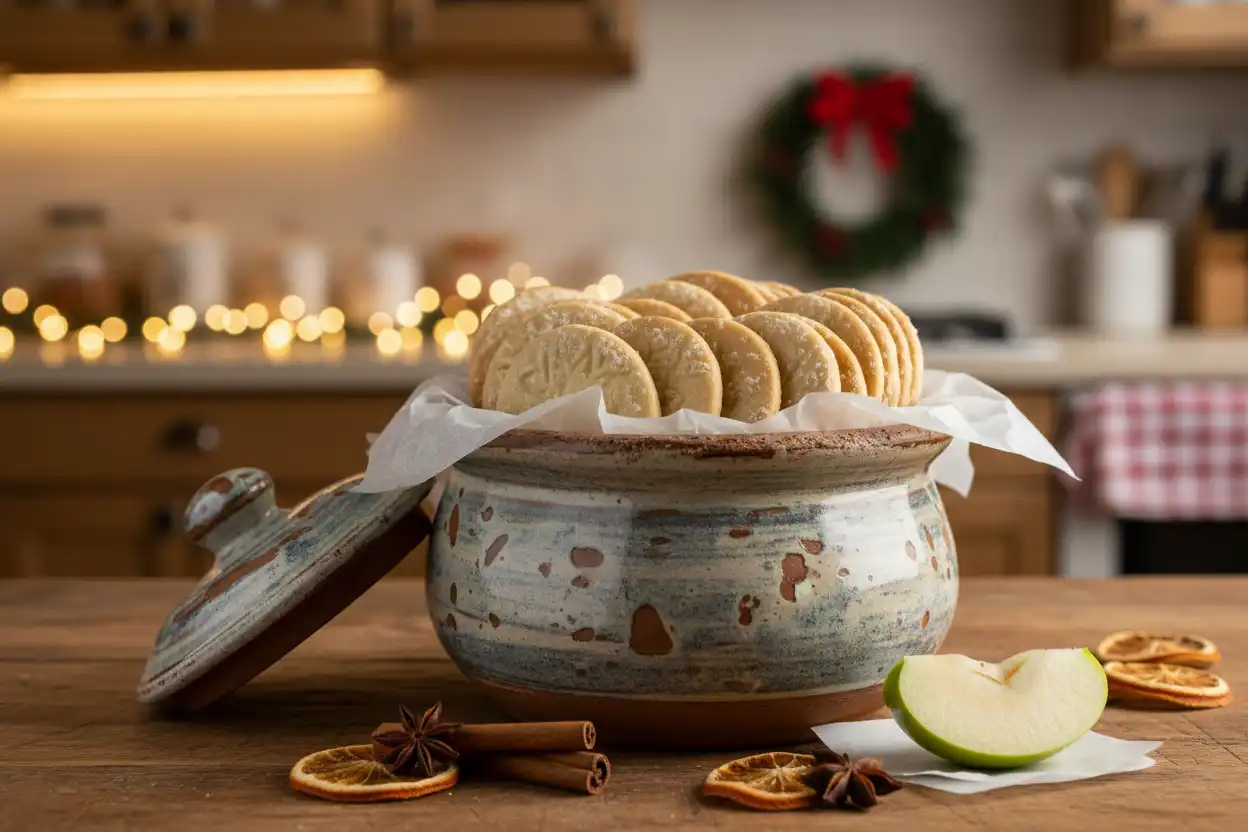
- Pack the cookies into food-safe metal tins or stoneware crocks, placing sheets of parchment or wax paper between each layer. Store the container in a cool, dark room for 2 to 4 weeks.
- If your cookies remain hard after two weeks, place a fresh slice of tart apple (such as Granny Smith) on a square of wax paper on top of the cookies inside the tin. Seal the container tightly.
- Check the tin every 48 hours and replace the apple slice with a fresh one to prevent mold growth. Within four to six days, the cookies will absorb the humidity and soften up nicely.
- Alternatively, clean, untreated orange or lemon peel can provide the needed moisture while adding a subtle citrus aroma to the anise profile.
Troubleshooting Common Springerle Failures
Most Springerle mistakes stem from moisture imbalances, incorrect beating times, or rushing the process. Use this checklist to identify and fix issues with your batch.
Problem: The Design Disappeared or Blistered in the Oven
Cause: The cookies did not dry long enough, or the ambient humidity was too high. Without a firm, dehydrated top crust, escaping steam erupts straight through the relief, blowing out the fine details.
Correction: Extend the drying window to 24 hours. In humid rooms, dry the cookies near a dehumidifier until the surface forms a firm, chalk-like barrier before baking.
Problem: The Cookie Formed No “Foot” (Füßchen)
Cause: The dough dried completely from top to bottom, or the baker’s ammonia was expired. If the bottom of the cookie dries out entirely, it cannot expand downward to lift the rest of the dough.
Correction: Check your leavener by dissolving 1/4 teaspoon in hot water; it should fizz vigorously and release a strong scent. If your home has very dry winter air, cut the drying window back to 10 to 12 hours.
Problem: The Finished Cookies Turned Brown on Top
Cause: The oven temperature was too high, the baking sheet sat too close to the top heating element, or baking powder was substituted for baker’s ammonia.
Correction: Drop your oven temperature to 285°F (140°C), double up your baking sheets, and bake on the lowest oven rack. Shield the top of the cookies with a layer of aluminum foil if needed.
Problem: The Dough Stole Detail or Stuck in the Mold
Cause: The dough was too warm, under-floured, or the mold details were clogged with residue from past batches.
Correction: Dust the mold with a 50/50 blend of cornstarch and flour before every single press. Clean your molds immediately after use with a soft toothbrush and cool water to keep the carved lines sharp.
Problem: The Cookies Retain a Harsh Chemical Smell
Cause: The cookies were underbaked, too thick, or stacked in storage before the leavening gases could fully escape.
Correction: Leave the baked cookies on open cooling racks for a full 12 hours so the ammonia gas dissipates completely before packing them into storage tins.
Pro Baker Tips for Flawless Relief Work
These advanced techniques will help you achieve clean, professional results with your embossed bakes.
Controlling Dough Stickiness
Never add excess raw flour directly to your mixing bowl to fix sticky dough. Extra flour throws off the egg-to-dry-ingredient ratio, yielding a crumbly cookie that cracks during the drying phase. Instead, wrap the mixed dough in plastic and chill it in the refrigerator for 25 minutes; this lets the starches hydrate, making the dough much easier to handle.
The Clean Cutting Sequence
Do not cut individual cookies out of the sheet immediately after embossing. Instead, press your entire sheet of dough first, then let it rest flat for 5 minutes. This brief rest lets the compressed gluten settle, preventing the squares from warping out of shape when cut.
Insulating the Base
Professional bakers often bake Springerle on heavy, insulated aluminum pans lined with silicone baking mats beneath parchment paper. This extra insulation slows down heat transfer from the bottom element, giving the cookies a steady, controlled lift without scorching the anise seeds.
Kitchen Best Practices and Environmental Control
Because Springerle rely on environmental dehydration, keeping your workspace steady and controlled is essential.
- Avoid Concurrent Steaming: Never boil stocks, steam vegetables, or run a high-heat dishwasher cycle in the kitchen while Springerle are drying. High humidity will soften the drying crust.
- Use Dry Weight Scales: Measure dry ingredients with a digital gram scale. Flour density varies significantly based on packing and humidity; weighing your ingredients ensures consistent dough firmness every time.
- Maintain Dedicated Brushes: Use dedicated culinary brushes for dusting molds, and wash them without soap to prevent lingering fragrances from transferring to your dough.
- Inspect Mold Integrity: Before pressing, check antique wooden molds for fine cracks or built-up oil residues. Clean them thoroughly and let them dry completely before use.
Authentic Regional Flavor Variations
While whole green anise seed remains the gold standard, historic European bakers also tailored Springerle recipes to regional tastes across Alsace, Switzerland, and Bavaria.

Bavarian Lemon Zest (Zitronen-Springerle)
Omit the anise oil and seeds entirely. Fold the finely microplaned zest of two fresh organic lemons and 1/2 teaspoon of pure lemon oil into the egg-sugar emulsion. The natural citrus oils produce a bright, refreshing cookie that pairs beautifully with Earl Grey or green tea.
Alsatian Winter Spice (Lebkuchen-Stil)
Combine classic anise with festive holiday spices. Sift 1 teaspoon of ground cinnamon, 1/2 teaspoon of ground ginger, 1/4 teaspoon of ground cloves, and 1/4 teaspoon of ground nutmeg directly into the dry flour blend. Scatter whole coriander seeds alongside the anise seeds across the baking sheet.
Swiss Chocolate Reliefs (Schokoladen-Springerle)
Substitute 40g of your all-purpose flour with 40g of Dutch-processed dark cocoa powder. Add 1/2 teaspoon of ground espresso powder to the creamed eggs to deepen the chocolate base. These chocolate reliefs feature striking contrast lines across the embossed surfaces.
Recommended Sourcing and Supplies
Quality ingredients and traditional equipment can make all the difference in your holiday baking. These vetted resources will point you in the right direction.
- Specialty Leaveners: Look for food-grade ammonium bicarbonate through established pastry purveyors, traditional German grocers, or compounding pharmacies.
- Authentic Molds: High-precision resin replicas of museum-carved wooden molds can be sourced from heritage suppliers like Änis-Paradies in Switzerland or specialty American carvers.
- Pure Essential Oils: Use only culinary-grade essential oils clearly labeled for food preparation. Avoid cosmetic fragrance oils or synthetic extracts containing water and glycerin.
Related Baking Guides
Continue exploring traditional European holiday baking with these related guides:
- Traditional German Lebkuchen: The Authentic Nuremberg Honey Cookie Guide
- Authentic Dutch Speculoos: Carved Mold Techniques and Spice Blends
- Pfeffernüsse Masterclass: Glazing, Curing, and Balancing Molasses Spices
- The Food Chemistry of Baker’s Ammonia (Ammonium Bicarbonate) in Heritage Baking
- How to Care for, Clean, and Restore Antique Wooden Cookie Molds
Historical and Technical References
For deeper insight into the cultural history and food science behind these historic cookies, explore these trusted sources:
- The State Museum of Baden-Württemberg (Landesmuseum Württemberg): Maintains one of Europe’s largest collections of fifteenth- and sixteenth-century Swabian carved pearwood baking molds.
- Max Planck Institute for Food Research: Research archives on traditional European fermentation, leavening agents, and the thermal decomposition of ammonium salts in baked doughs.
- The Bread and Pastry Museum (Museum Brot und Kunst, Ulm, Germany): Extensive historical exhibitions covering the craft, evolution, and community roles of festive pictorial breads and pressed cookies.
Key Takeaways
- Beat whole room-temperature eggs and powdered sugar for a full 15 to 20 minutes to build an airy, stable emulsion.
- Use authentic baker’s ammonia (ammonium bicarbonate) to achieve clean vertical lift, crisp feet, and a pure ivory-white top.
- Roll the dough to a uniform 3/8-inch thickness using wooden rails to ensure the cookies bake and rise evenly.
- Allow the stamped cookies to dry uncovered for 12 to 24 hours to form a firm top crust that locks in fine design details.
- Bake at a gentle 300°F (150°C) on the lower oven rack to push expanding steam downward and prevent surface browning.
- Store the hard, freshly baked cookies in sealed tins for two to four weeks with an apple slice to soften the interior into a tender crumb.
Final Thoughts
Baking traditional Springerle is a mindful craft that rewards patience, precision, and attention to detail. This centuries-old recipe skips modern baking shortcuts in favor of classic technique, connecting your holiday kitchen to centuries of European baking heritage. Treat the multi-day process as a relaxing holiday ritual, and your kitchen will be rewarded with beautiful, picture-perfect cookies that taste as good as they look.
Frequently Asked Questions
Can I substitute baking powder for baker’s ammonia in this recipe?
You can substitute an equal amount of double-acting baking powder, but the finished cookies will differ. Baking powder can cause the embossed top to dome, softening sharp lines, and the residual alkaline salts may cause light surface browning. Baker’s ammonia remains the best choice for sharp, ivory-white cookies with defined feet.
Why did my Springerle spread flat instead of forming feet?
Flat, spreading cookies usually mean the drying phase was cut short or the ambient humidity was too high. Without a dry, chalk-like top crust, leavening gases vent across the entire surface rather than pushing downward to build the foot. Always let the cookies dry for a full 12 to 24 hours before baking.
How long will baked Springerle cookies keep in storage?
Stored properly in airtight tins in a cool, dry pantry, Springerle keep well for up to three to four months. Their low moisture and butter-free dough make them naturally shelf-stable, and their warm anise flavor will continue to mature and deepen over time.
Why do my cookies still smell like ammonia after baking?
A lingering ammonia smell means the cookies were underbaked or packed away into airtight tins while still warm. The small amount of moisture remaining in underbaked dough traps the ammonia gas. Bake the cookies until the foot is set, then let them cool on open wire racks for at least 12 hours.
Can I make Springerle if I dislike the taste of licorice or anise?
Yes. While anise is traditional, you can substitute the anise oil with equal amounts of culinary lemon oil, pure orange oil, or almond extract. Ground cinnamon, ginger, and nutmeg also make a wonderful holiday spice blend without any licorice flavor.
Can I dry my Springerle in the refrigerator?
Do not dry Springerle in the refrigerator. Refrigerator air is cold and moist, which prevents the sugar and egg crust from dehydrating properly. Dry your trays at room temperature on a counter or dining table away from steam and direct drafts.
Why did my dough tear and stick inside the mold crevices?
Dough sticks when it is too warm, under-floured, or pressed with an un-dusted mold. Lightly dust your mold with a 50/50 mix of flour and cornstarch before every press, and chill warm dough in the refrigerator for 20 minutes before rolling.
Can I paint finished Springerle with food coloring?
Yes. Once your Springerle are baked and completely cooled, you can highlight details using paste food colors diluted with high-proof clear alcohol like vodka or everclear. The alcohol evaporates quickly without softening the delicate embossed crust.