
The Ultimate Gooey Chocolate Chip Cookies Recipe and Baking Guide
Table of Contents
- Quick Summary: The Secret to Gooey Cookies
- Introduction
- The Science Behind the Gooey Texture
- Key Ingredients and Their Roles
- Step-by-Step Gooey Chocolate Chip Cookie Recipe
- Cookie Texture Comparison Table
- Expert Baking Tips and Advanced Techniques
- Common Mistakes and How to Avoid Them
- Best Practices for Storage, Freezing, and Reheating
- Recommended Baking Tools
- Related Baking Guides
- External References & Research
- Key Takeaways
- Final Thoughts
- Frequently Asked Questions
The Secret to Perfectly Gooey Chocolate Chip Cookies
To achieve a rich, gooey chocolate chip cookie center with slightly golden edges, focus on three critical factors: moisture retention, chocolate selection, and thermal timing. Using dark brown sugar provides hygroscopic moisture, while an extra egg yolk adds emulsifying fats that soften the crumb.
Chopping semi-sweet bar chocolate instead of using bagged chocolate chips creates large, molten chocolate pools. Bagged chips contain stabilizers like lecithin that force them to keep their shape, preventing that signature gooey pull.
Baking the dough balls at a higher temperature (375°F / 190°C) for a shorter duration (9 to 11 minutes) sets the outer structure quickly while keeping the interior rich, soft, and warm.
- Fat Ratio: Melted, slightly cooled unsalted butter adds density and chew.
- Sugar Ratio: High brown sugar to white sugar ratio (3:1) holds water during baking.
- Starch Addition: One teaspoon of cornstarch relaxes gluten formation for a tender crumb.
- Chilling Step: Resting the dough for 24 hours fully hydrates the flour starches.
Introduction
Achieving the ideal chocolate chip cookie is one of the most sought-after goals in home baking. Many recipes deliver thin, crispy wafers or cake-like mounds that dry out quickly. This guide breaks down the precise culinary mechanics required to produce bakery-quality gooey chocolate chip cookies every time.
Whether you are an experienced baker looking to refine your technique or a dessert enthusiast craving a soft, molten center, understanding dough chemistry is the key. Small adjustments in ingredient ratios, mixing methods, and baking temperatures completely change your final texture.
By following this science-backed strategy, you will master the balance between crisp outer rims and soft, melt-in-your-mouth centers. Every step in this recipe serves a specific structural purpose to guarantee consistent, high-yield results.
The Science Behind the Gooey Texture
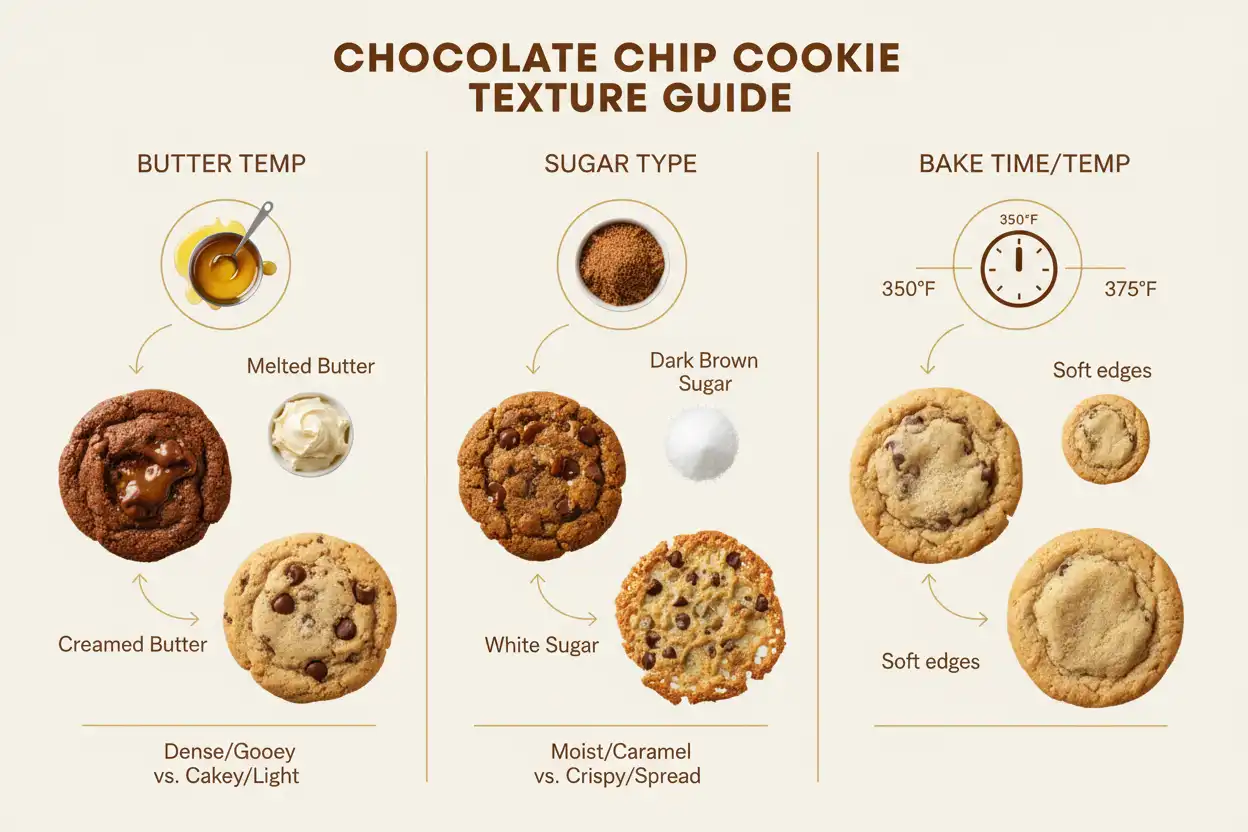
A gooey cookie center is not raw dough; it is a fully baked, highly emulsified structure with high moisture content and low starch gelatinization. Achieving this texture requires controlling how proteins, fats, and sugars react under oven heat.
1. Moisture Control via Brown Sugar
Granulated white sugar promotes spread and crispness because it crystallizes readily as it cools. Dark brown sugar contains molasses, which is naturally hygroscopic. This means brown sugar actively attracts and holds onto moisture during and after baking.
Shifting your recipe toward a higher ratio of dark brown sugar slows down evaporation in the oven. This creates a dense, fudgy crumb that stays soft for days.
2. Fat Emulsification and Egg Yolks
Egg whites consist mostly of water and protein, which dry out and expand during baking to create structure. Egg yolks contain lecithin, an emulsifier that binds fat and water into a smooth paste.
Replacing one whole egg white with an additional egg yolk introduces rich fat without adding excess water. This extra yolk softens gluten strands, keeping the center thick and tender.
3. Starch Modification with Cornstarch
All-purpose flour contains gluten-forming proteins that create structure when mixed with liquids. Too much gluten development turns a cookie tough or bread-like.
Adding a small amount of cornstarch dilutes the overall protein content of the dough. Cornstarch absorbs liquid, thickens the center, and prevents the flour proteins from creating a firm matrix.
4. Thermal Dynamics: High Heat and Fast Bakes
Baking at a standard 350°F (175°C) gives heat time to penetrate the core of the cookie slowly. By the time the edges turn golden, the center has reached a higher internal temperature, drying out the starches.
Increasing the oven temperature to 375°F (190°C) speeds up edge setting via the Maillard reaction. The exterior sets fast, locking the inner dough in place before its internal temperature exceeds 175°F (80°C).
Key Ingredients and Their Roles
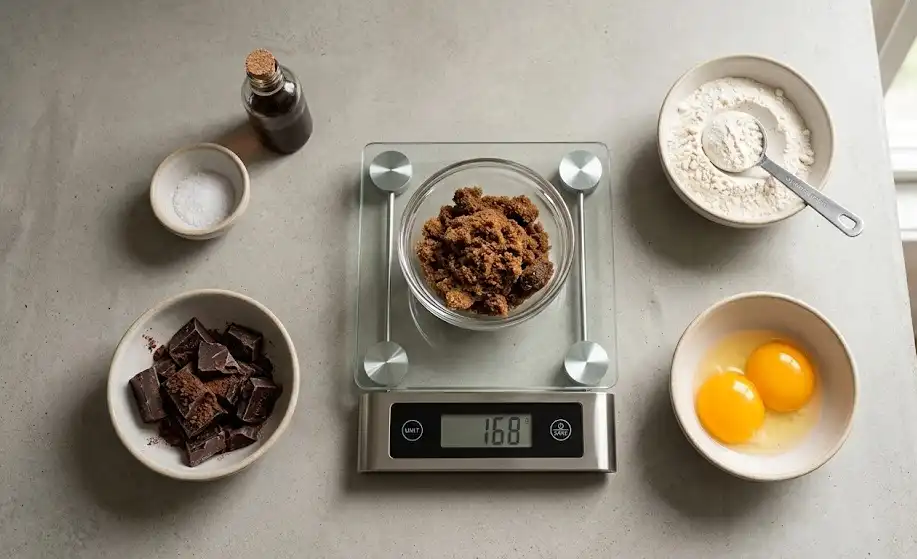
Every ingredient in a gooey cookie recipe plays a specific chemical role. Substituting ingredients without understanding their structural properties can ruin the final product.
Unsalted Butter (Melted vs. Creamed)
Creaming cold butter with sugar traps air bubbles, causing cookies to rise and bake into a lighter, cake-like texture. Using melted butter eliminates trapped air, yielding a denser, chewier cookie.
Melted butter also allows the sugar crystals to partially dissolve before baking. This partial solution yields a uniform, fudgy interior with minimal crumbly air pockets.
Dark Brown Sugar vs. Granulated Sugar
A 3:1 ratio of dark brown sugar to white granulated sugar offers the optimal balance of moisture, flavor, and edge structure. Dark brown sugar provides deep caramel and butterscotch notes from its high molasses content.
The small portion of white granulated sugar ensures the edges brown slightly and develop a delicate, micro-thin crunch to support the soft interior.
Chopped Chocolate Bars vs. Bagged Chips
Standard commercial chocolate chips are manufactured to maintain their teardrop shape when exposed to oven heat. Manufacturers add soy lecithin and lower the cocoa butter percentage to prevent melting.
Chopping high-quality chocolate bars (between 60% and 70% cacao) introduces varied piece sizes. The small flecks melt directly into the dough, while larger chunks form wide, molten rivers of chocolate.
| Ingredient | Standard Function | Gooey Cookie Function |
|---|---|---|
| Unsalted Butter | Creamed cold for rise | Melted warm for density and fudginess |
| Sugar Composition | 50% White / 50% Brown | 75% Dark Brown / 25% White |
| Eggs | 2 Whole Eggs | 1 Whole Egg + 1 Extra Egg Yolk |
| Chocolate Type | Standard Chocolate Chips | Chopped 60%-70% Chocolate Bars |
Step-by-Step Gooey Chocolate Chip Cookie Recipe
Follow these precise steps and measurements to execute the recipe perfectly. Using a digital kitchen scale produces far more consistent results than using volume measuring cups.
Prep Time and Yield
- Prep Time: 20 minutes
- Chill Time: 24 hours (Minimum 2 hours)
- Bake Time: 10 minutes
- Yield: 12 large cookies (approx. 85g each)
Ingredients Mass Measurements
- Unsalted Butter: 170g (3/4 cup), melted and cooled slightly
- Dark Brown Sugar: 200g (1 packed cup)
- Granulated White Sugar: 50g (1/4 cup)
- Large Egg: 1 whole egg (room temperature)
- Egg Yolk: 1 extra large yolk (room temperature)
- Vanilla Extract: 2 teaspoons (10ml)
- All-Purpose Flour: 240g (2 cups spooned and leveled)
- Cornstarch: 1 teaspoon (3g)
- Baking Soda: 3/4 teaspoon (4g)
- Fine Sea Salt: 3/4 teaspoon (4g)
- Semi-Sweet Dark Chocolate: 250g (chopped from chocolate bars)
- Flaky Sea Salt: Optional finishing garnish
Detailed Instructions
Step 1: Melt and Cool the Butter
Melt the unsalted butter in a saucepan or microwave. Set it aside to cool for 10 minutes until warm to the touch, but not piping hot. Pouring hot butter over eggs will scramble the proteins and ruin the dough structure.
Step 2: Emulsify Sugars and Wet Ingredients
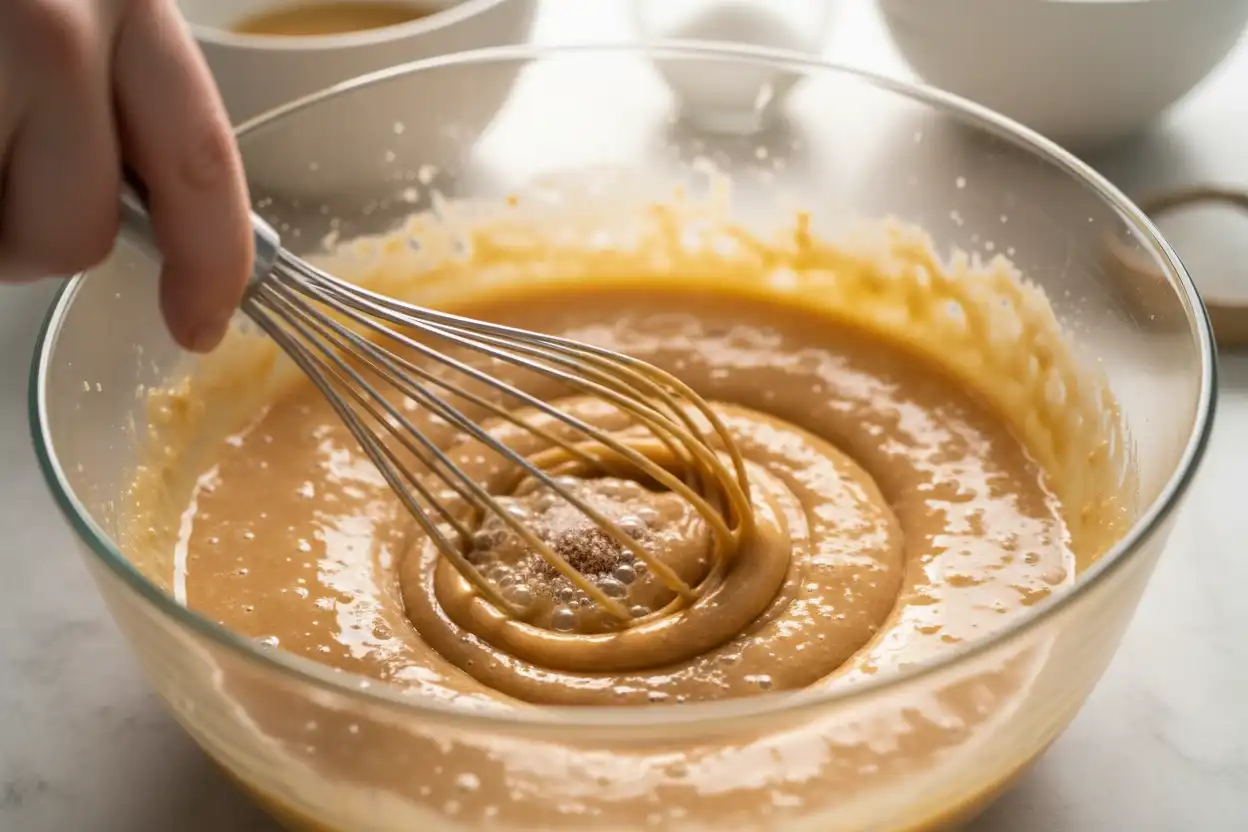
In a large mixing bowl, combine the melted butter, dark brown sugar, and granulated white sugar. Whisk vigorously for 2 full minutes until the mixture turns glossy and fully unified. Add the whole egg, extra egg yolk, and vanilla extract. Whisk for another minute until the mixture lightens in color slightly.
Step 3: Combine Dry Ingredients
In a separate medium bowl, whisk together the all-purpose flour, cornstarch, baking soda, and fine sea salt. Ensuring the cornstarch and baking soda are evenly distributed prevents hot spots or bitter pockets in the finished cookies.
Step 4: Combine Wet and Dry Mixtures
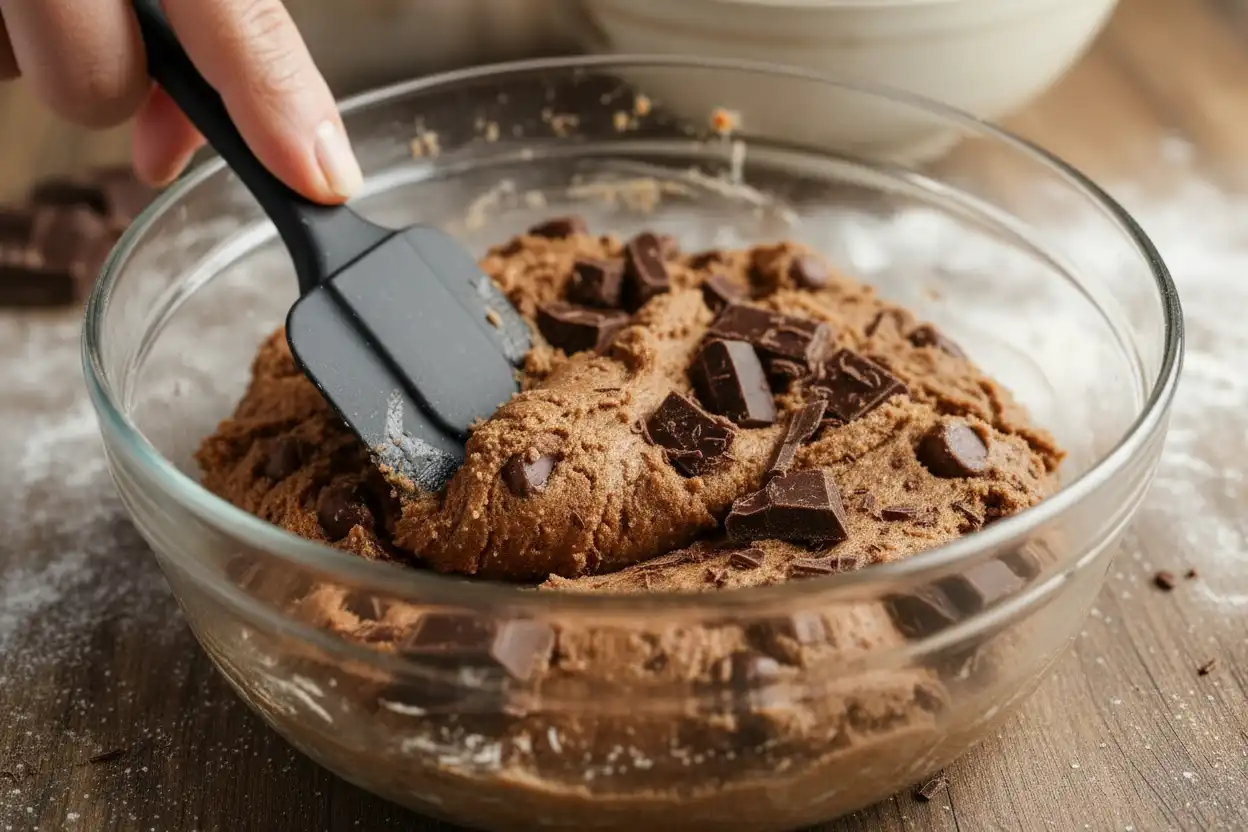
Pour the dry flour mixture into the wet ingredients. Use a silicone spatula to fold the ingredients together gently just until no dry flour streaks remain visible. Avoid overmixing, as excess stirring develops gluten and creates a tough texture.
Step 5: Fold in Chopped Chocolate Pools
Add 200 grams of the chopped chocolate into the dough, reserving 50 grams for top garnish later. Fold gently with your spatula to distribute the chocolate evenly throughout the thick dough.
Step 6: Portion and Chill the Dough
Scoop out large dough portions weighing roughly 85 grams each (about 3 tablespoons). Shape them into tall, rough cylinders rather than smooth spheres. Press a few pieces of the reserved chocolate onto the top of each dough ball. Cover the dough balls tightly and chill in the refrigerator for at least 24 hours.
Step 7: High-Heat Baking
Preheat your oven to 375°F (190°C) with an oven rack set in the middle position. Line a heavy-duty aluminum baking sheet with parchment paper. Place 6 dough balls spaced at least 3 inches apart on the pan.
Bake for 9 to 11 minutes. The edges should appear set and golden brown, while the center remains soft, slightly pale, and puffy.
Step 8: The Pan-Bang and Cooling Rest
Remove the baking sheet from the oven and firmly tap it twice against your countertop. This collapses any large air pockets, forcing the warm, molten center to condense into an ultra-gooey layer. Sprinkle immediately with flaky sea salt. Allow the cookies to rest on the hot pan for 15 minutes before transferring them to a cooling rack.
Cookie Texture Comparison Table
Adjusting key variables shifts a cookie recipe between four primary style profiles. The table below outlines how ingredient ratios dictate final textures.
| Texture Profile | Primary Fat State | Sugar Dominance | Egg Ratio | Bake Temp / Time |
|---|---|---|---|---|
| Gooey (Our Recipe) | Melted, warm butter | High Dark Brown Sugar | 1 Whole Egg + 1 Extra Yolk | 375°F (190°C) for 9-11 min |
| Chewy | Melted, cooled butter | Balanced Brown & White | 1 Whole Egg + 1 Egg Yolk | 350°F (175°C) for 11-13 min |
| Cakey | Creamed room-temp butter | High Granulated White Sugar | Multiple Whole Eggs | 350°F (175°C) for 12-15 min |
| Crispy & Thin | Liquid oil or hot butter | 100% Granulated White Sugar | 1 Whole Egg + Liquid Milk | 325°F (160°C) for 15-18 min |
Expert Baking Tips and Advanced Techniques
Fine-tuning simple baker’s habits turns good cookies into extraordinary desserts. Implement these professional bakery practices during preparation.
1. Hydrate the Dough via Cold Resting
Do not bake the dough immediately after mixing. Allowing the portioned dough to rest in the refrigerator for 24 to 48 hours allows enzymes to break down starches into simple sugars.
During this rest, the flour fully absorbs liquid from the eggs and melted butter. This produces a rich caramel flavor profile and prevents excess spreading in the oven.
2. The Cookie Ring Trick for Perfect Geometry
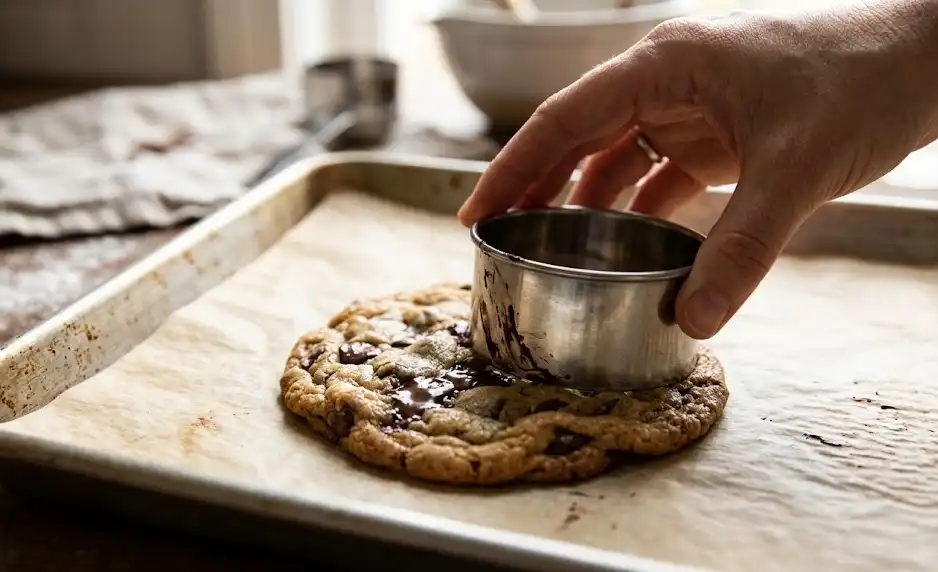
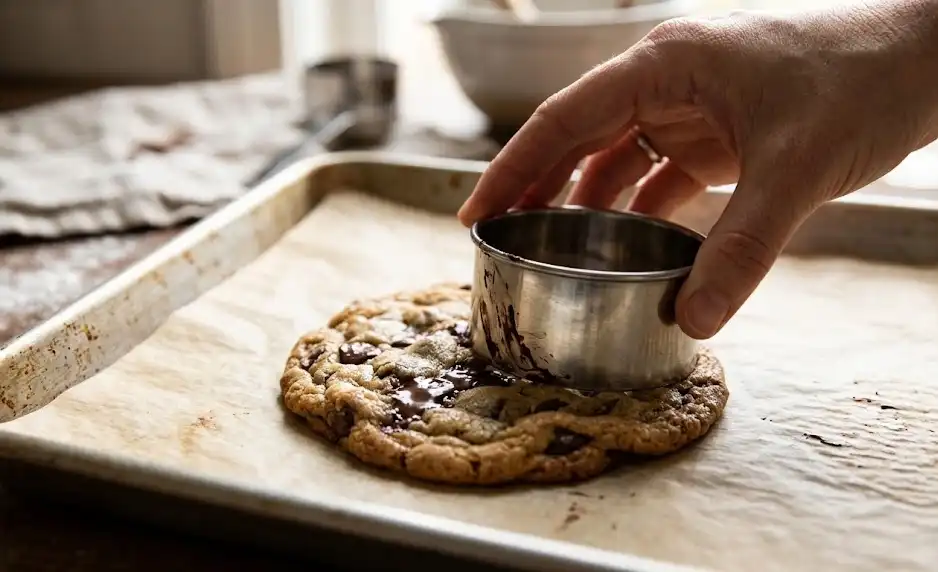
To fix uneven edges immediately after baking, place a round cookie cutter or glass bowl (larger than the cookie) over the hot cookie. Swirl it gently in a circular motion against the baking sheet for five seconds.
This pulls in stray edges, creating a perfectly round circle with a thick, compressed, gooey center.
3. Use Heavy Aluminium Baking Sheets
Avoid thin, dark steel baking pans or non-stick metal trays. Thin dark pans absorb heat aggressively, burning the bottom surfaces of your cookies before the center cooks.
Use light-colored, heavy-gauge aluminum baking sheets lined with parchment paper. This ensures gentle, even heat conductivity across the pan.
Common Mistakes and How to Avoid Them
Measuring Flour by Volume Instead of Weight
Scooping flour directly out of a bag with a measuring cup packs the flour down tightly. You can easily end up with up to 30% more flour than required, leading to dry, cakey cookies that fail to spread.
Solution: Use a digital kitchen scale to measure exactly 240 grams of flour. If using cups, fluff your flour with a fork, spoon it gently into the cup, and level it off with a butter knife.
Baking Cold Dough on Warm Baking Sheets
Placing dough balls on a baking sheet that is still warm from an earlier round causes the fat to melt instantly. The cookies spread paper-thin before the oven heat sets their structure.
Solution: Always let your aluminum baking sheets cool completely to room temperature before loading a fresh batch of chilled dough balls.
Overbaking Past the Visual Cue
Cookies continue baking on the hot aluminum pan for several minutes after removal from the oven. If you wait until the interior looks firm before pulling them out, they will turn dry and hard once cooled.
Solution: Pull the baking sheet out when the outer inch of each cookie is light gold, but the center still appears pale, wet, and slightly underdone.
Best Practices for Storage, Freezing, and Reheating
Proper storage prevents moisture loss, preserving that soft interior texture over several days.
Storing Baked Cookies
Store fully cooled cookies in an airtight container at room temperature. Add a single slice of plain white bread into the container. The cookies will draw moisture from the bread, maintaining their soft, gooey centers for up to five days.
Freezing Raw Cookie Dough
Freeze pre-portioned dough balls on a parchment-lined baking tray for two hours until solid. Transfer the frozen balls into a sealable freezer bag for up to three months.
Bake directly from frozen at 375°F (190°C) for 11 to 13 minutes. There is no need to thaw the dough first.
Reheating for Maximum Gooeyness
To revive room-temperature or thawed cookies, heat them in a preheated toaster oven at 300°F (150°C) for 3 minutes. Alternatively, microwave a single cookie on a paper towel for 8 to 10 seconds to instantly remelt the chocolate pools.
Recommended Baking Tools
Investing in reliable, accurate kitchen tools removes guesswork and ensures professional results.
- Digital Kitchen Scale: Essential for precise gram measurements of flour, sugars, and butter.
- Heavy Commercial Half-Sheet Pans: Light aluminum pans prevent burnt bottoms.
- #16 Mechanical Cookie Scoop: Portions consistent 3-tablespoon dough balls for uniform baking.
- Oven Thermometer: Built-in oven dials are notoriously inaccurate. A cheap hanging thermometer confirms true internal temperatures.
- Silicon Spatulas: Ideal for gentle folding without overworking gluten strands.
Related Baking Guides
Expand your home baking skills with these companion recipes and foundational guides:
- The Science of Brown Butter: How to Intensify Dessert Flavors
- Chewy vs. Cakey Brownies: Controlling Fudge Density
- Essential Pantry Staples for Professional Home Bakers
- How to Store Freezed Raw Dough for Fresh Daily Bakes
- The Ultimate Guide to Chocolate Types: Cacao Percentages Explained
External References & Research
For further scientific study into the culinary physics of starch, sugar, and baking mechanics, consult these authoritative resources:
- King Arthur Baking Company: Comprehensive guides on flour protein percentages and starch hydration behavior.
- Exploratorium Food Science: Detailed analysis of sugar caramelization and the Maillard reaction in baked goods.
- USDA FoodData Central: Official nutritional profiles and moisture content metrics for dairy fats and cocoa products.
Key Takeaways
- Melted butter combined with dark brown sugar delivers high moisture and a dense, chewy crumb.
- An additional egg yolk supplies emulsifying fat that softens gluten structure.
- Chopped chocolate bars melt into wide pools, whereas bagged chips hold their shape due to stabilizers.
- Chilling the dough for 24 hours hydrates starch molecules, deepening caramel flavors and controlling spread.
- Baking at 375°F (190°C) sets the outer edges quickly while keeping the center soft and warm.
Final Thoughts
Mastering gooey chocolate chip cookies comes down to respecting the science of baking. By controlling butter temperature, selecting high-moisture sugars, opting for chopped bar chocolate, and baking at a higher heat for less time, you consistently achieve the perfect contrast of crisp edges and molten centers.
Prepare your dough a day in advance to let those rich butterscotch flavors develop fully. Once you experience the texture of a properly hydrated, high-temp baked cookie, you will never go back to standard recipes.
Frequently Asked Questions
Why are my cookies cakey instead of gooey?
Cakey cookies result from over-measuring flour, creaming cold butter with sugar, or using too many whole egg whites. Excess flour absorbs moisture, while egg whites introduce steam and lift. To fix this, weigh your flour with a digital scale, use melted butter, and add an extra egg yolk instead of a second whole egg.
Can I use chocolate chips instead of chopped chocolate bars?
Yes, but your cookies will not have molten pools of chocolate. Commercial chocolate chips contain stabilizers and less cocoa butter so they keep their teardrop shape when baked. Chopped chocolate bars melt freely throughout the dough, creating thick, gooey rivers of chocolate in every bite.
How long should I chill gooey cookie dough before baking?
Chill your cookie dough for at least 2 to 4 hours, though 24 hours is ideal. Cold dough slows down fat melt in the oven, keeping the cookies thick. Chilling also hydrates the flour starches, producing a richer caramel flavor and a denser, gooier center.
Is it safe to eat cookies with a soft center?
Yes, provided the internal temperature reaches at least 160°F (71°C) during baking. This temperature pasteurizes eggs and flour. The center remains gooey due to the high fat, melted chocolate, and sugar ratios rather than unbaked dough.
Why did my cookies spread too thin and flat?
Excessive spreading happens if the dough fat is too warm when entering the oven, if you baked on hot cookie sheets, or if there was too much granulated white sugar. Ensure you chill your dough balls thoroughly and let your baking pan cool completely between batches.
What does cornstarch do in a cookie recipe?
Cornstarch dilutes the gluten-forming proteins in all-purpose flour. It absorbs excess moisture without creating a firm gluten matrix, softening the crumb. This keeps the interior tender, thick, and gooey without tasting floury.
How do I reheat stored cookies to make them gooey again?
Warm room-temperature cookies in a 300°F (150°C) toaster oven for 3 minutes, or microwave a single cookie on a paper towel for 8 to 10 seconds. This softens the starches and remelts the chocolate pools instantly.
Can I freeze the raw dough balls for later baking?
Yes. Scoop the dough into balls, freeze them solid on a tray for two hours, then store them in a sealable freezer bag for up to three months. Bake frozen dough balls at 375°F (190°C) for 11 to 13 minutes without thawing first.