The Ultimate Guide to Perfect Iced Sugar Cookies: Recipes, Techniques, and Expert Decorating Secrets
- Introduction
- The Anatomy of an Iced Sugar Cookie
- Essential Ingredients and Science
- Step-by-Step Baking Guide
- Royal Icing Masterclass
- Comparison: Cookie Dough Types
- Expert Tips and Advanced Tricks
- Troubleshooting Common Mistakes
- Storage and Shelf Life Best Practices
- Essential Tools & Resources
- Internal Linking Suggestions
- External Authority References
- Key Takeaways
- Conclusion
- Frequently Asked Questions
Quick Answer: Perfect iced sugar cookies require a non-spreading dough chilled before baking, combined with a stable royal icing made from powdered sugar, meringue powder, and water. The secret to smooth, professional-looking cookies is chilling the cutouts thoroughly, baking at a moderate temperature until just set without browning, and letting the base layer dry completely before flooding or piping fine details.
Key Takeaways:
- Always use cold butter and precise measurements to prevent excessive spreading in the oven.
- Meringue powder provides food safety and reliable drying consistency for royal icing.
- Mastering the 10-count flood consistency prevents icing runoff and creates a smooth, glossy surface.
Introduction
There is a distinct magic in biting into a beautifully decorated iced sugar cookie. The contrast between a tender, buttery interior and a crisp, sweet glaze creates a timeless bakery experience.
This comprehensive guide is designed for home bakers, parents baking alongside children, and aspiring cookie artists. Whether you are preparing for holiday celebrations or refining your decorating technique, this manual provides the exact roadmap you need.

By the time you finish reading, you will understand the precise science of dough stability, royal icing consistency, and professional decorating workflows. Let us dive into the craft of mastering iced sugar cookies.
The Anatomy of an Iced Sugar Cookie
An exceptional iced sugar cookie is not merely sweet. It relies on architectural structural integrity balanced with a delicate, melt-in-your-mouth crumb.
The Cookie Base
The base must maintain sharp edges during baking while offering a tender interior bite. Too much leavening causes puffiness and distortion, ruining your canvas.
The Icing Layer
The icing provides sweetness, moisture seal, and visual artistry. It must dry to a hard, matte or satin finish that withstands gentle stacking without cracking.
Essential Ingredients and Science
Baking is culinary chemistry. Understanding your ingredients ensures consistent results every single time you mix a batch.
Butter Selection
Always use unsalted butter so you control the sodium content. Cold butter cut into flour provides flaky pockets, while softened butter blends smoothly for a denser, cookie-cutter-friendly crumb.
Sugar Chemistry
Granulated white sugar provides structure, crisp edges, and spread. Powdered sugar contains cornstarch, which creates a softer, more delicate crumb that holds fine shapes.
Flour and Protein Content
All-purpose flour provides the ideal gluten structure. Too much kneading or improper measuring leads to tough cookies.
Step-by-Step Baking Guide
Follow this rigorous, step-by-step framework to produce professional cutout sugar cookies from scratch.
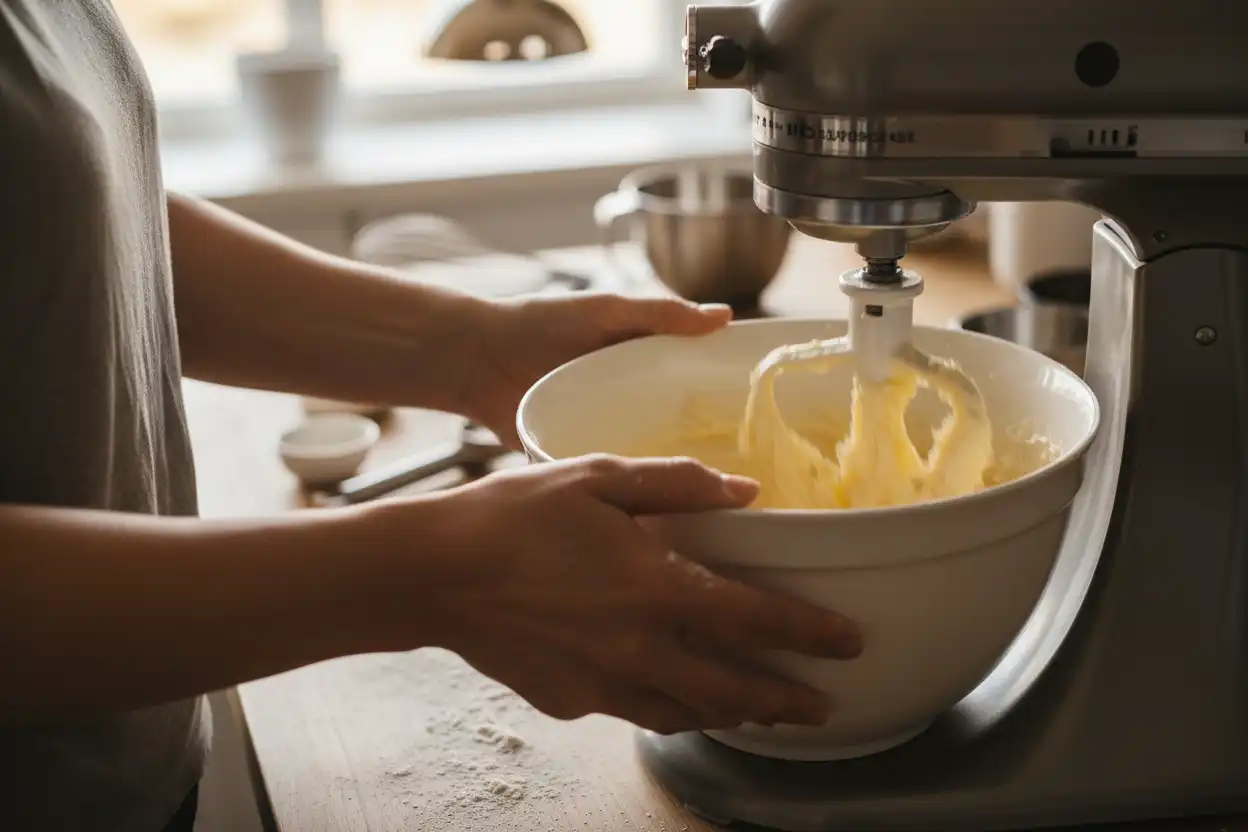
1. Creaming Fat and Sugar
Beat unsalted butter and granulated sugar on medium speed for exactly two minutes. Do not overwhip, as incorporating excess air causes the cookies to puff and distort in the oven.
2. Adding Wet Elements
Add pasteurized egg and high-grade vanilla extract. Mix until fully emulsified, scraping down the bowl sides to ensure even incorporation.
3. Incorporating Dry Ingredients
Whisk all-purpose flour, fine salt, and optional baking powder together. Add dry ingredients to the wet mixture in three batches on low speed until just combined.
4. Rolling and Chilling
Roll the dough between two sheets of parchment paper to an even quarter-inch thickness. Chill the sheets in the refrigerator for at least two hours before cutting shapes.
5. Baking Parameters
Bake on light-colored aluminum baking sheets lined with parchment paper at 350°F (175°C) for 8 to 11 minutes. Remove them when edges are matte and firm, before any golden browning occurs.
Royal Icing Masterclass
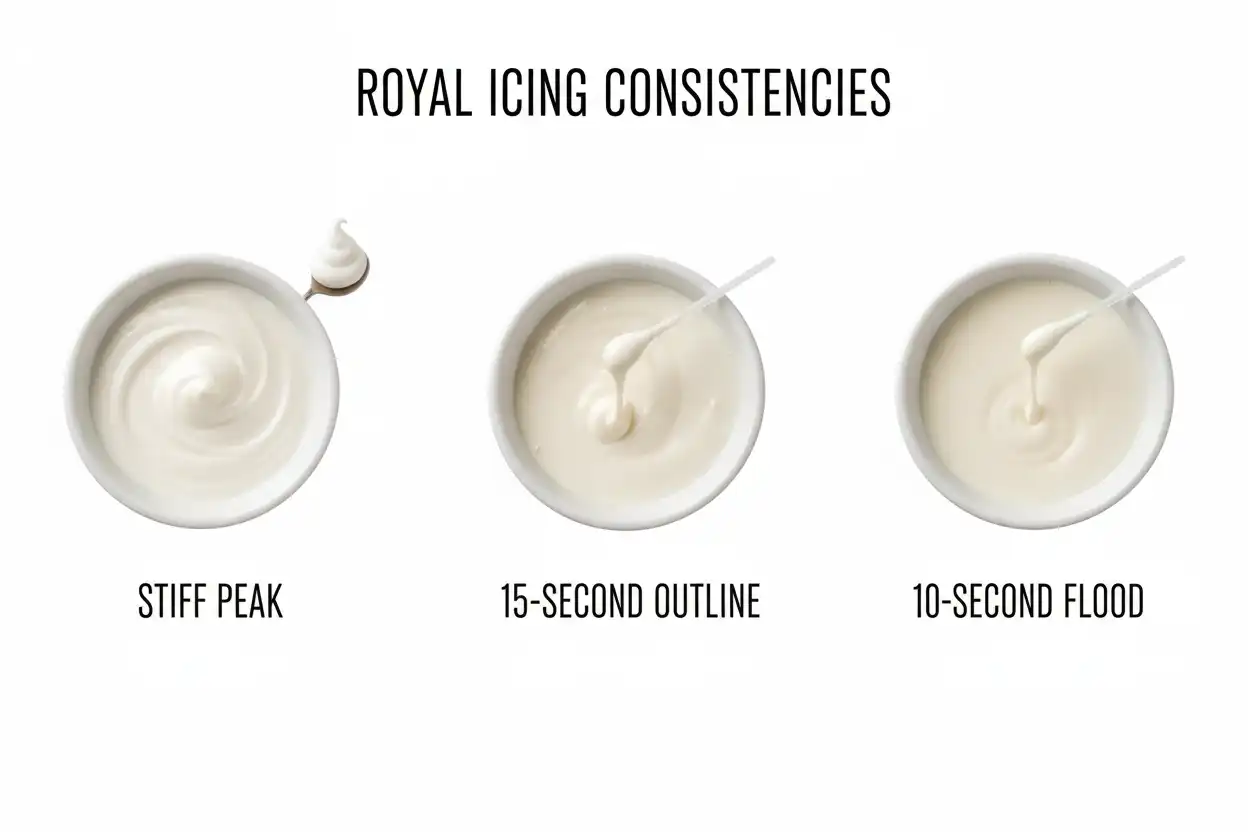
Royal icing is the gold standard for decorating sugar cookies. It dries hard and provides a smooth surface for painting or piping.
Standard Royal Icing Formula
Combine four cups of sifted powdered sugar, three tablespoons of meringue powder, and a half cup of warm water. Beat on medium-high speed for five to seven minutes until glossy stiff peaks form.
Mastering Consistencies
Adjust your icing consistency using water drops measured by pipettes.
- Stiff Peak: Used for intricate flower petals and lettering.
- Outline Consistency (15-second): Used for piping dams to hold flood icing.
- Flood Consistency (10-second): Flows smoothly to fill cookie surfaces flat.
Comparison: Cookie Dough Types
Review how different formulation choices impact your final baked cookies.
| Dough Characteristic | Standard Cutout Dough | Soft-Batch Style | Shortbread Base |
|---|---|---|---|
| Spread Control | Excellent (holds sharp shapes) | Moderate (spreads slightly) | High spread risk if warm |
| Texture | Firm exterior, tender crumb | Cakey and soft | Crumbly and melting |
| Best For | Detailed royal icing art | Quick family baking | Rustic glazed treats |
Expert Tips and Advanced Tricks
Elevate your baking from amateur to artisan with professional techniques.
The Parchment Slide Technique
Cut your shapes directly on parchment paper, peel away excess scrap dough from around them, and slide the entire parchment paper onto your baking tray. This preserves crisp geometric edges.
Eliminating Air Bubbles
Pop surface air bubbles in flood icing immediately using a toothpick or fine scribe tool before the icing forms a skin.
Common Mistakes and How to Avoid Them
Even experienced bakers encounter challenges. Here is how to fix them.
Cookies Spreading Out of Shape
Why it happens: The butter was too warm or the dough lacked sufficient chill time before entering the hot oven.
How to fix it: Chill cut-out shapes on their baking pans in the freezer for ten minutes immediately before baking.
Icing Bleeding or Crazing
Why it happens: Applying wet flood icing onto an under-dried base layer or drying cookies in high humidity.
How to fix it: Use a desk fan to accelerate surface drying and prevent color bleeding.
Storage and Shelf Life Best Practices
Proper storage keeps your decorated cookies fresh and visually pristine for weeks.
Short-Term Storage
Store decorated cookies in a single layer inside an airtight container lined with parchment paper at room temperature for up to one week.
Freezing Baked Undecorated Cookies
Freeze baked, undecorated cookies stacked between parchment layers inside freezer-safe containers for up to three months. Thaw completely in the refrigerator before decorating.
Essential Tools & Resources
Equip your kitchen with tools designed for precision baking and decorating.
- Precision digital kitchen scale for gram measurements.
- Rolling pin with adjustable thickness rings (1/4 inch).
- Disposable piping bags and PME stainless steel piping tips (#1.5 or #2).
- Scribe tool or toothpick for detail work.
Internal Linking Suggestions
Explore these related articles on our site to expand your baking repertoire:
- Ultimate Guide to Gingerbread Cookies and Royal Icing
- How to Measure Flour Correctly Every Time
- Essential Baking Tools for Beginner Pastry Chefs
- Gluten-Free Sugar Cookie Alternatives That Actually Work
- Mastering French Macarons: Step-by-Step Tutorial
- Quick and Easy Buttercream Frosting Recipes
- How to Build a Professional Home Baking Station
- Holiday Cookie Packaging and Gift Box Ideas
External Authority References
For deep scientific food insights and safety guidelines, consult these trusted resources:
- USDA Food Safety and Inspection Service for egg safety guidelines.
- The Joy of Baking for foundational pastry techniques.
- King Arthur Baking Company for professional flour and ingredient science guides.
Key Takeaways
- Temperature control during dough rolling and chilling dictates final cookie shape retention.
- Royal icing consistency is adjustable and dictates your decorating capabilities.
- Proper drying times prevent bleeding and surface cracking.
Conclusion
Mastering iced sugar cookies combines culinary precision with creative expression. By respecting ingredient ratios, chilling your dough, and practicing icing consistencies, you will produce bakery-quality treats at home.
Gather your ingredients, preheat your oven, and enjoy the rewarding process of crafting edible art.

Frequently Asked Questions
Can I make sugar cookie dough ahead of time?
Yes, unbaked sugar cookie dough wraps tightly in plastic wrap and stores safely in the refrigerator for up to three days or in the freezer for up to three months. Thaw overnight in the refrigerator before rolling and cutting your shapes.
Why do my sugar cookies bubble up while baking?
Cookies bubble when too much air is beaten into the butter and sugar during the initial creaming stage, or when excess leavening agent is used. Keep creaming times brief and ensure your baking powder is measured precisely.
How long does royal icing take to dry completely?
Royal icing typically forms a surface crust within fifteen to thirty minutes under a desk fan, but it requires twelve to twenty-four hours to dry and harden completely all the way through before stacking or packaging.
Can I freeze decorated sugar cookies?
Yes, fully dried decorated cookies freeze exceptionally well. Place them in a single layer inside a rigid airtight container with parchment paper between layers. Thaw them slowly inside the closed container to prevent condensation damage.
Do I have to use meringue powder in royal icing?
Meringue powder provides food safety and reliable drying consistency. If you prefer traditional raw egg whites, you can substitute pasteurized egg whites, though drying times and final stability may vary slightly.
Why is my royal icing separating or looking dull?
Icing separates when mixed too long or when contaminated with oils from bowls or utensils. Ensure all mixing equipment is thoroughly degreased with lemon juice or white vinegar before preparing your batch.