The Definitive Guide to Small Batch Chocolate Chip Cookies: Science, Technique, and Master Recipe
Quick Summary: How to Bake Small Batch Chocolate Chip Cookies
A small batch chocolate chip cookie recipe produces between two and six cookies without leaving excess dough or dozens of leftovers. Success relies on balancing fat-to-flour ratios and solving the single-egg problem using a single large egg yolk or a precisely measured tablespoon of beaten egg.
Using melted butter creates a dense, chewy center with crisp edges, while brown sugar provides moisture and deep caramel notes. The dough mixes in one bowl using a fork or spatula in under ten minutes, with no stand mixer required.
Core Ratios for 4 Bakery-Style Cookies:
- Butter: 2 tablespoons (28g) melted or softened
- Sugars: 3 tablespoons (38g) light brown sugar + 1 tablespoon (12g) granulated white sugar
- Liquid Binder: 1 large egg yolk (approx. 18g)
- Flour: 1/2 cup (60g) all-purpose flour
- Leavening & Salt: 1/8 teaspoon baking soda + 1/8 teaspoon fine sea salt
- Chocolate: 1/3 cup (55g to 60g) chopped dark chocolate or semi-sweet chips

Why Small Batch Baking Requires a Different Approach
Baking a standard batch of chocolate chip cookies yields anywhere from 24 to 36 cookies. For single-person households, couples, college students, or busy individuals seeking an immediate treat, this volume presents an obvious storage problem.
Freezing pre-portioned dough balls offers a partial solution, but standard recipes still demand significant initial time, large mixing equipment, and multiple dirty bowls. A dedicated small batch recipe delivers instant gratification using minimal pantry staples.
Baking at a micro-scale introduces distinct physical and chemical challenges that do not exist in large-scale baking. When ingredient amounts drop to tablespoons and fractions of a gram, minor measuring inaccuracies produce massive texture discrepancies.
This guide breaks down the culinary science behind scaling down doughs. You will master the exact mechanics needed to achieve crisp edges, chewy centers, and rich flavor in batches of four to six cookies.
The Mathematics and Pitfalls of Recipe Downscaling
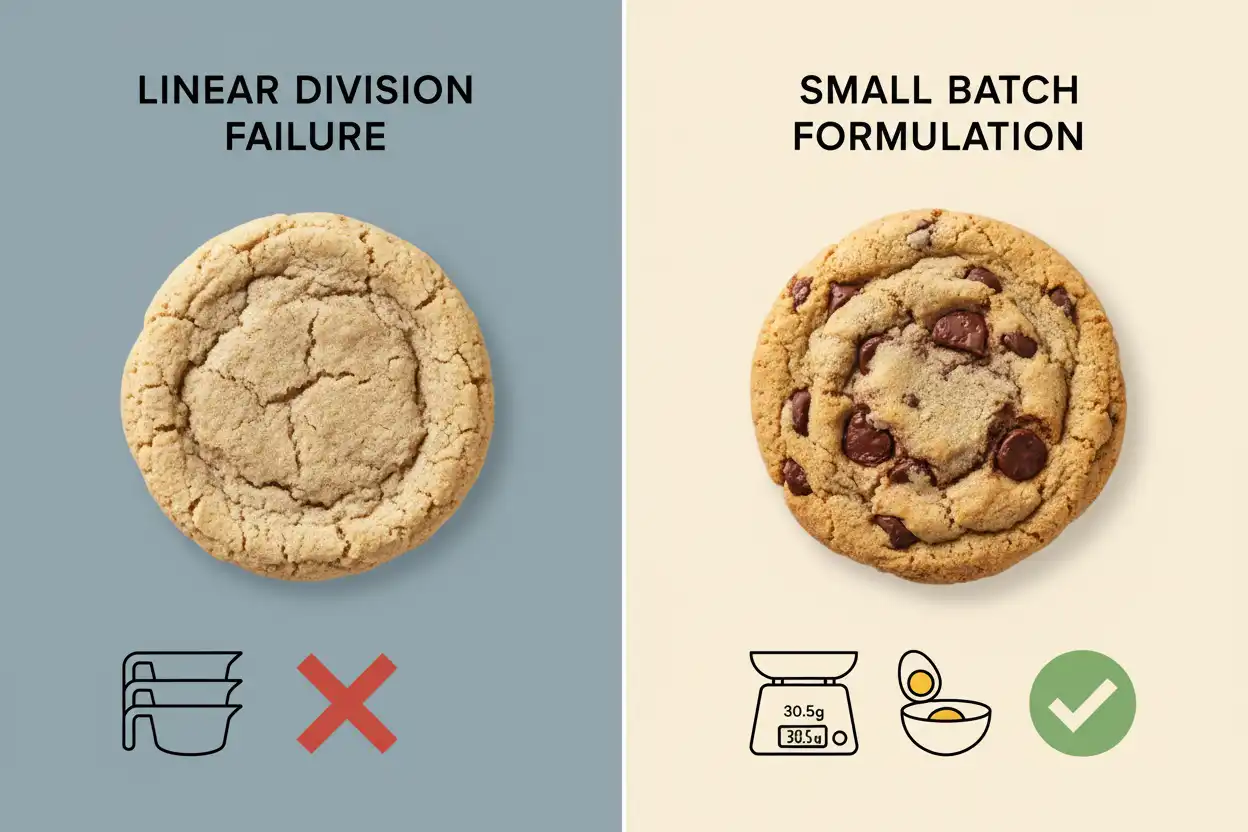
Most home bakers assume dividing a standard recipe by four yields an identical small batch. In practice, this linear division almost always produces dry, cakey, or overly flat cookies.
The primary culprit is non-linear ingredient scaling. Standard recipes rely on whole eggs, broad surface-area evaporation, and equipment absorption allowances that fail when scaled down directly.
Surface Area and Evaporation Dynamics
Small amounts of dough lose moisture rapidly to the surrounding ambient air during mixing and resting. In a commercial batch, moisture lost to the bowl surface represents less than 0.5% of total hydration.
In a four-cookie recipe, two grams of water clinging to the sides of your mixing bowl can represent a 10% loss of total liquid. This loss quickly leads to dry, crumbly dough that resists spreading.
The Margin of Error in Small Measurements
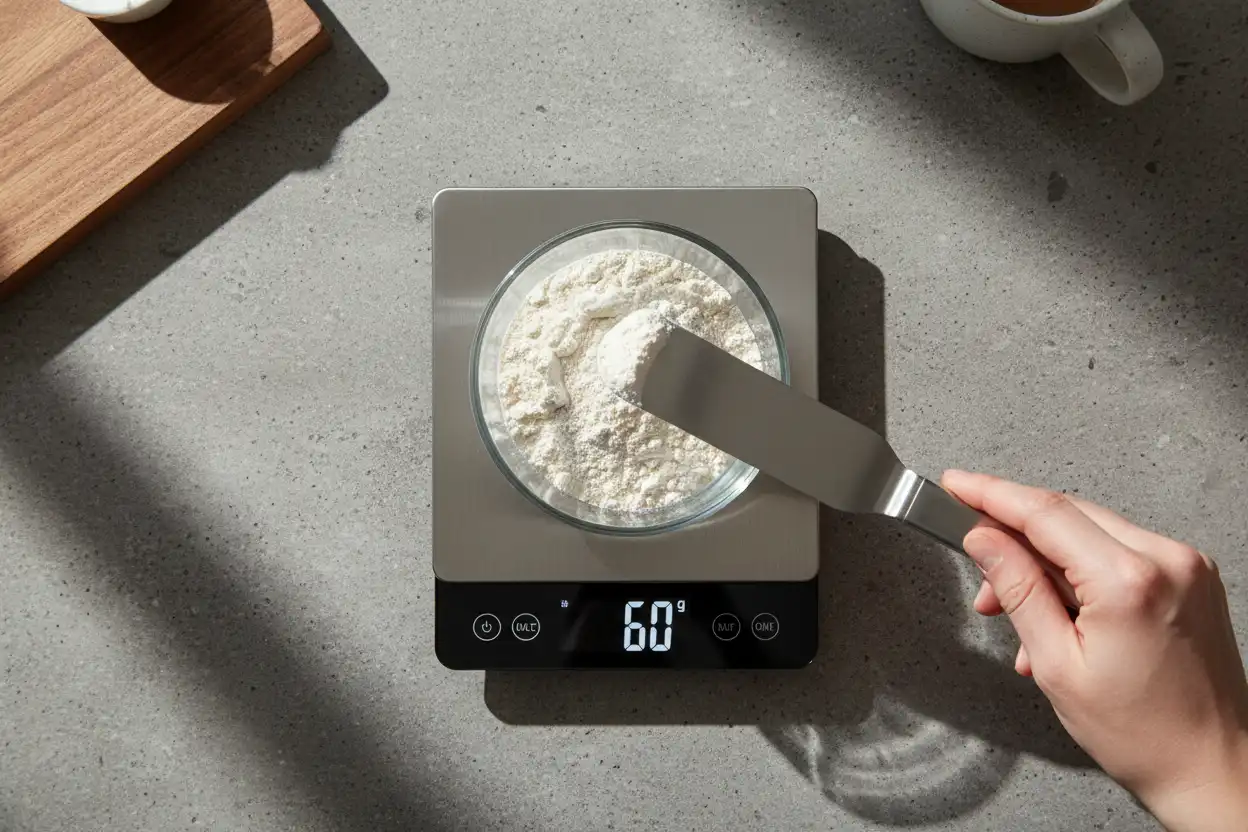
A standard cup of all-purpose flour weighs approximately 120 grams. If you scoop with a measuring cup and pack an extra 10 grams into a full batch, the error rate is under 3%.
If you pack an extra 10 grams into a 60-gram small batch recipe, you have altered the flour ratio by nearly 17%. That single mistake shifts the cookie from chewy to dense and floury.
Ingredient Chemistry at Micro-Scale
Every ingredient in a small batch recipe performs structural, chemical, and hygroscopic duties. Understanding these interactions lets you adjust textures precisely to your preference.
Flour Protein and Hydration
All-purpose flour with a protein content between 10% and 11.5% provides the optimal balance of tenderness and chew. Lower-protein pastry flour lacks the gluten matrix needed to hold melted chocolate pockets.
High-protein bread flour (12.5% to 14%) creates an intensely chewy, bakery-style texture. If you use bread flour in micro-batches, add one extra teaspoon of liquid to accommodate its higher water absorption rate.
Fat States: Melted vs. Creamed vs. Browned Butter
The physical state of the butter dictates the finished cookie structure. Melted butter creates denser, chewier cookies with shiny tops because it limits air incorporation during mixing.
Creaming softened butter with sugar traps micro-pockets of air, yielding a taller, softer, cake-like cookie. For small batches, melted butter is preferred because it requires only a fork to emulsify and delivers superior chew.
Brown butter introduces nutty aromatic compounds while driving off water content. American butter contains roughly 16% to 18% water; browning eliminates this moisture entirely.
When using brown butter in small batches, you must replace the lost water volume. Add one teaspoon (5ml) of milk or water per two tablespoons of butter to prevent dry dough.
Sugar Chemistry and Spread Control
Brown sugar contains molasses, which is naturally acidic and hygroscopic. The acid reacts with baking soda to create lift, while the moisture-retaining properties keep cookie centers soft for days.
White granulated sugar promotes spreading and caramelization along the outer edges, providing necessary crispness. A 3-to-1 ratio of brown sugar to white sugar yields the ideal balance of a fudgy center and a golden, crunchy perimeter.
Leavening Micro-Dosing
Standard measuring spoons struggle with micro-batches. Most four-cookie recipes require exactly 1/8 teaspoon of baking soda (roughly 0.6 grams).
Excess baking soda creates an alkaline environment that accelerates browning too quickly, leaving a metallic aftertaste. Insufficient baking soda produces a dense, pale disk that fails to spread.
The Egg Conundrum: Yolk vs. Whole Egg Division
A single standard large egg without its shell weighs approximately 50 grams, consisting of 32 grams of white and 18 grams of yolk. Dividing a standard 24-cookie recipe down to four cookies requires roughly 8 to 12 grams of egg.
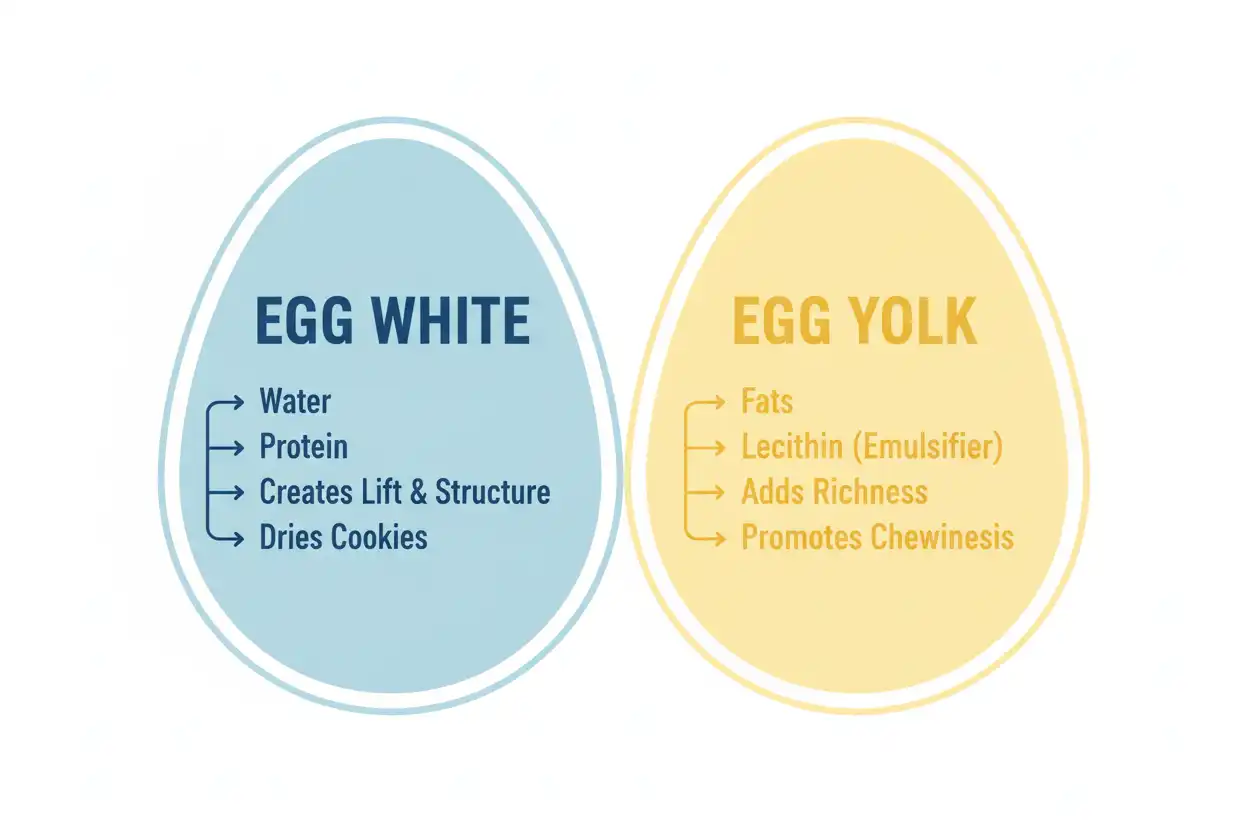
Egg whites provide water and albumin protein, which dry out quickly and encourage a light, spongy, cake-like crumb. Egg yolks supply fats, cholesterol, and lecithin, a natural emulsifier that produces rich, fudgy centers.
Method 1: The Single Egg Yolk Technique (Recommended)
Using one large egg yolk alone provides roughly 18 grams of rich fat and moisture without the drying albumen of the white. This method completely eliminates the hassle of measuring fractional eggs.
The natural lecithin in the yolk binds the melted butter and sugars into a glossy emulsion. This creates a dense, chewy crumb structure with exceptional shelf stability.
Method 2: The Whisk-and-Scale Technique
If you prefer a lighter cookie with crisper edges, crack a whole egg into a small bowl and whisk it thoroughly with a fork. Weigh out exactly 12 to 15 grams of the beaten egg on a digital scale, or measure one level tablespoon.
Discard the remaining egg or save it for morning scrambled eggs, an egg wash for pastry, or a quick omelet. This technique yields a classic balance between chew and edge snap.
Method 3: Eggless Liquid Binders
For bakers with egg allergies, substitute the egg component with one tablespoon (15ml) of whole milk, sweetened condensed milk, or unsweetened applesauce. Sweetened condensed milk yields a chewy, caramel-infused crumb, while regular milk produces a slightly flatter, crisper wafer.
The Master Small Batch Recipe (Yield: 4 to 6 Cookies)
This master recipe produces four large bakery-style cookies (approx. 55g each) or six standard home-style cookies (approx. 37g each). It requires no electric mixer, chilling time is optional, and clean-up takes less than five minutes.
Timing and Yield
- Prep time: 8 minutes
- Bake time: 10 to 12 minutes
- Total time: 20 minutes
- Yield: 4 large or 6 medium cookies
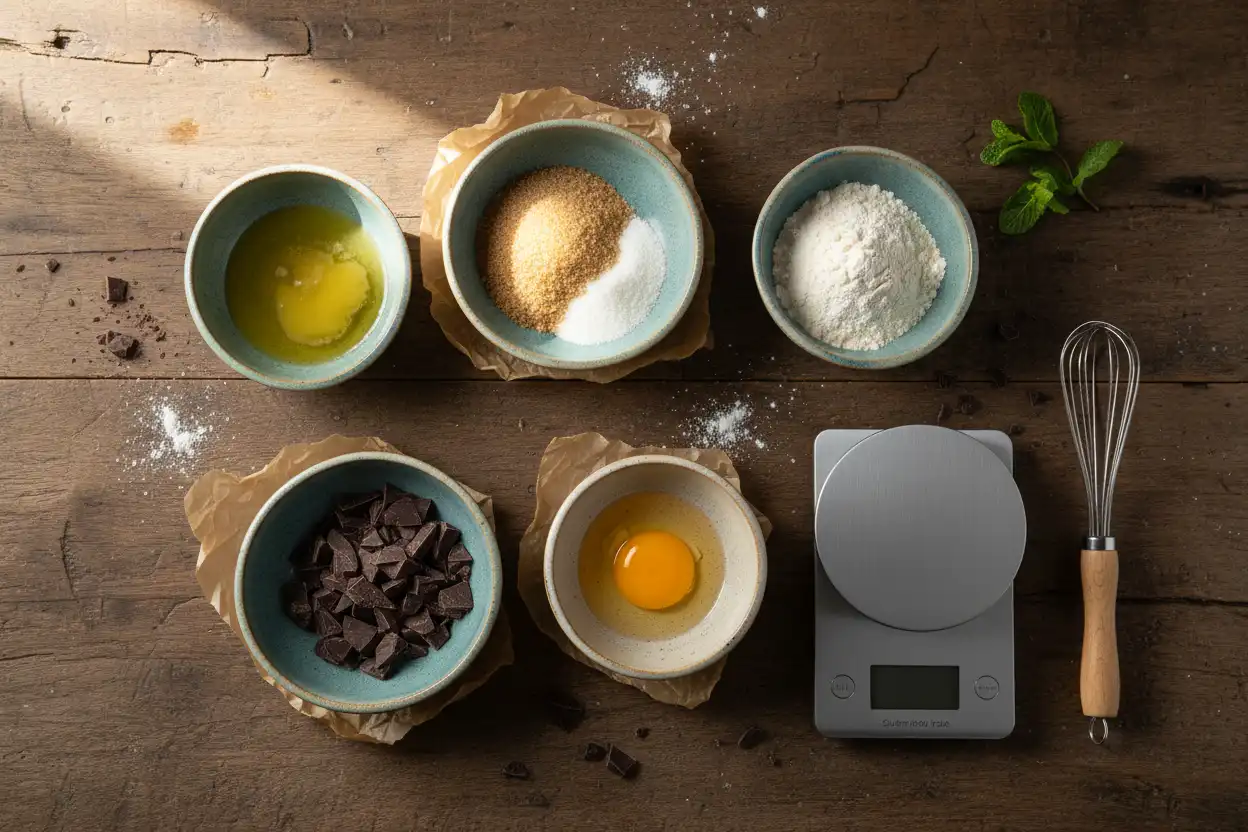
Exact Ingredients by Weight and Volume
- Unsalted Butter: 2 tablespoons (28g / 1 oz), melted and cooled slightly
- Light or Dark Brown Sugar: 3 tablespoons packed (38g / 1.3 oz)
- Granulated White Sugar: 1 tablespoon (12g / 0.4 oz)
- Egg Binder: 1 large egg yolk (approx. 18g), room temperature
- Pure Vanilla Extract: 1/2 teaspoon (2.5ml)
- All-Purpose Flour: 1/2 cup spooned and leveled (60g / 2.1 oz)
- Baking Soda: 1/8 teaspoon (0.6g)
- Fine Sea Salt: 1/8 teaspoon (0.8g)
- Semi-Sweet or Bittersweet Chocolate: 1/3 cup (60g / 2.1 oz) roughly chopped chunks or chips
- Flaky Sea Salt (Optional): Pinch for topping
Step-by-Step Photographic Technique Guide
Step 1: Melt and Emulsify Fats and Sugars
What: Melt the butter in a microwave-safe cereal bowl or small mixing bowl until completely liquefied. Allow it to sit for two minutes to cool below 110°F (43°C), then add both the brown and white sugars.
Why: Adding hot butter directly to the egg yolk will cook the egg proteins prematurely, creating scrambled bits in your dough. Allowing the butter to cool ensures a smooth mixture.
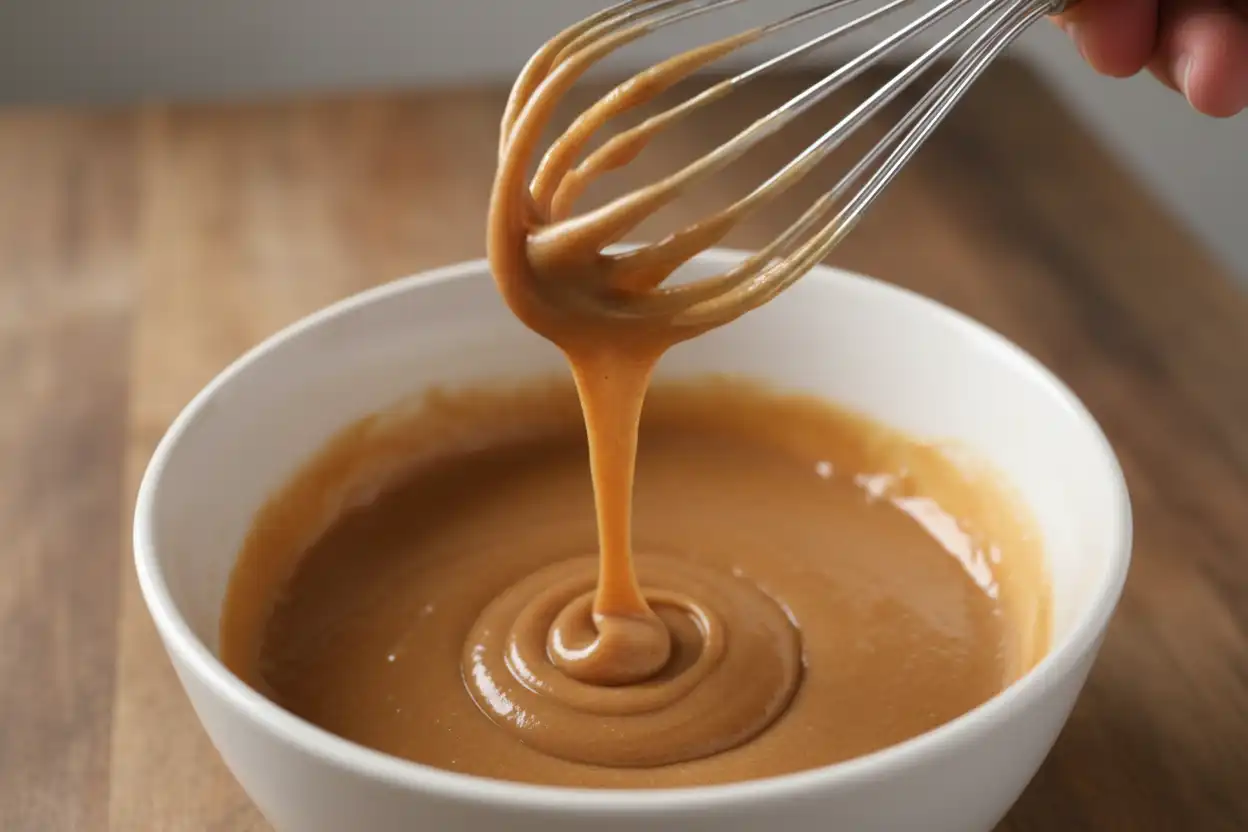
How: Whisk vigorously with a small fork or mini whisk for 45 to 60 seconds until the mixture transforms from a grainy oil slick into a smooth, thickened paste.
Pro Tip: Vigorous mechanical mixing at this stage dissolves the sugar crystals slightly into the butter fat, resulting in that coveted crackly, shiny top crust.
Step 2: Incorporate Liquid Binders
What: Add the single large egg yolk and pure vanilla extract directly into the sweetened butter base.
Why: The yolk’s natural water content hydrates the sugar granules, while the lecithin binds the fat and moisture into a uniform emulsion.
How: Stir continuously for 30 seconds until the mixture lightens slightly in color and takes on a glossy, ribbon-like consistency.
Common Mistake: Avoid using cold eggs straight from the refrigerator. A cold yolk solidifies melted butter on contact, breaking the emulsion and producing lumpy batter.
Step 3: Fold the Dry Ingredients
What: Add the all-purpose flour, baking soda, and fine sea salt directly into the bowl with the wet emulsion.
Why: Sifting is unnecessary for this small volume, but sprinkling the baking soda and salt across the top of the flour prevents concentrated pockets of leavening.
How: Switch to a small silicone spatula or wooden spoon. Gently fold the dry ingredients into the wet mixture until only a few faint streaks of dry flour remain.
Common Mistake: Do not overmix. Excessive stirring develops gluten strands, turning a tender, melt-in-your-mouth cookie into a tough, bread-like disk.
Step 4: Distribute the Chocolate
What: Pour the chopped chocolate chunks or chips into the bowl, reserving a few large pieces for the tops of the dough balls.
Why: Chopped chocolate bars create irregular shards, dust, and chunks. The chocolate dust melts throughout the dough matrix, while large chunks create molten pools.
How: Fold three to four times until the chocolate is evenly distributed. Stop immediately once the flour streaks disappear.
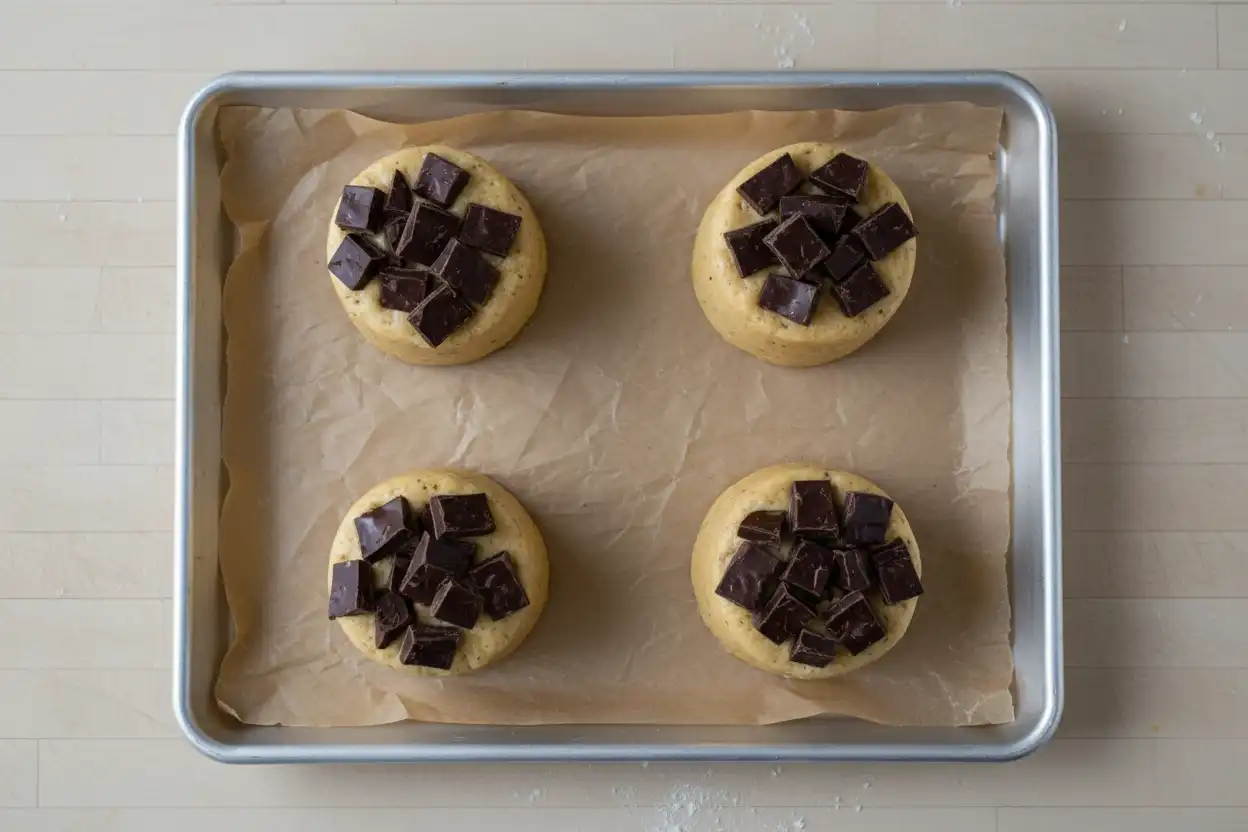
Pro Tip: Pressing two or three reserved chocolate chunks directly onto the top of each scooped dough ball guarantees photogenic, bakery-style molten tops.
Step 5: Portion and Shape the Dough
What: Divide the dough into four equal portions (approx. 50–55 grams each) or six smaller portions (approx. 35 grams each).
Why: Uniform sizing ensures that all cookies bake at the exact same rate, preventing small cookies from burning while larger ones remain raw.
How: Use a two-tablespoon cookie scoop or roll the portions gently between your palms into tall balls. Place them onto a small, parchment-lined baking sheet at least two inches apart.
Pro Tip: Shape the dough into tall cylinders rather than flat spheres. Tall cylinders spread outward more slowly, keeping the centers thick and gooey while edges crisp up.
Step 6: Bake and Execute the Pan-Bang Technique
What: Bake at 350°F (177°C) for 10 to 12 minutes in a standard oven, or 9 to 11 minutes in a countertop toaster oven.
Why: The cookies are ready when the edges are set and lightly golden brown, but the center remains pale and slightly soft to the touch.
How: Remove the pan from the oven at the 10-minute mark. Firmly tap the baking sheet against your counter or stovetop twice.
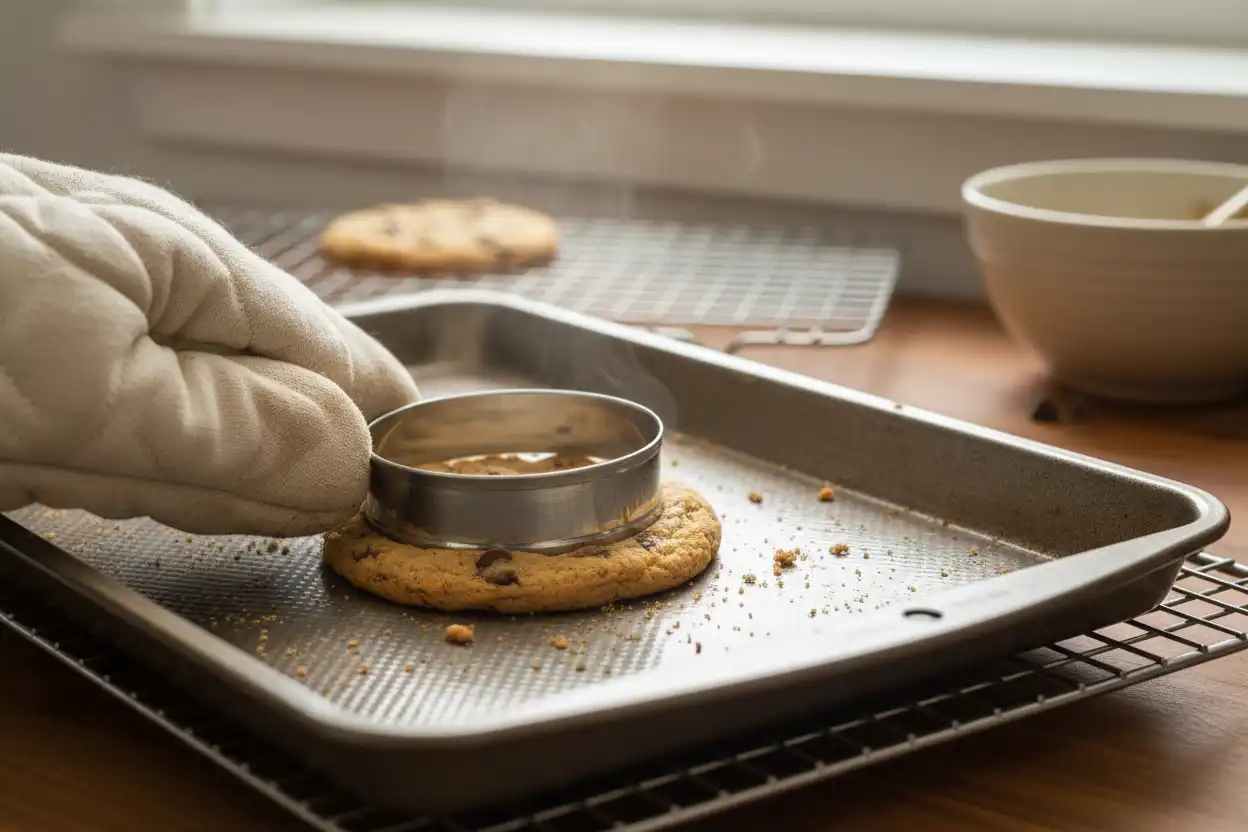
Pro Tip: Tapping the pan collapses rising air pockets, creating dense, rippled rings around the edge and an intensely fudgy center. Use a round biscuit cutter or large glass to swirl around the hot cookies for 5 seconds to form perfect circles.
Step 7: Cool and Set
What: Sprinkle immediately with flaky sea salt while hot. Allow the cookies to rest undisturbed on the hot baking sheet for 5 to 7 minutes before transferring to a cooling rack.
Why: Residual heat from the baking sheet finishes cooking the delicate center without drying out the exterior.
How: Use a small offset spatula to transfer them to a wire rack to finish setting.
Oven vs. Toaster Oven vs. Air Fryer
Small batches do not always justify heating a large standard oven. Compact countertop appliances work exceptionally well once you adjust for their unique heating profiles.
Standard Conventional Oven
Standard ovens provide exceptional thermal stability and even heat distribution across large cavities. However, preheating a 30-inch oven for four cookies consumes unnecessary energy and takes 15 to 20 minutes.
Always place your baking sheet on the middle rack. Baking too close to the bottom element burns the sugars before the centers set.
Toaster Oven and Countertop Convection
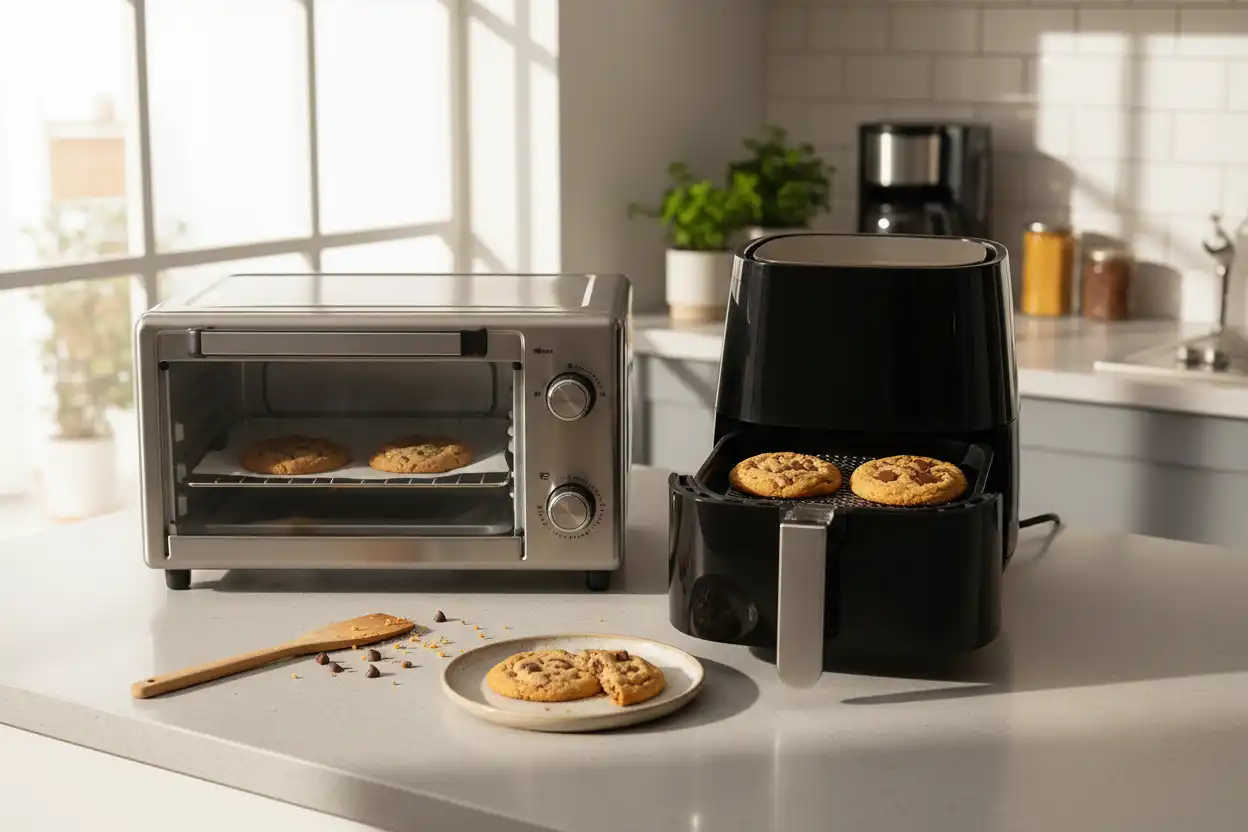
Toaster ovens heat up in under five minutes, making them ideal for rapid single-portion baking. Because quartz heating elements sit close to the food, the top and bottom can burn quickly.
Place a double layer of parchment paper beneath the dough, or stack two small quarter-sheet pans together to insulate the bottom. If the top browns too fast at the seven-minute mark, tent a loose piece of aluminum foil over the cookies.
Air Fryer (Convection Basket)
An air fryer is essentially a high-velocity convection oven with a small heating chamber. The aggressive airflow crisps exteriors rapidly and can blow lightweight parchment paper into the heating coil.
Lower the baking temperature by 25°F (to 325°F / 163°C) and reduce the bake time to 7 to 9 minutes. Always weigh down the corners of your perforated parchment paper with the dough portions.
Baking Methods and Appliance Comparison
Use this reference table to choose the right cooking method and calibrate your bake times accurately across different kitchen setups.
| Appliance Method | Preheat Time | Bake Temperature | Bake Duration | Resulting Texture Profile |
|---|---|---|---|---|
| Conventional Oven | 15–20 minutes | 350°F (177°C) | 10–12 minutes | Classic spread, golden edges, tender center |
| Toaster Oven | 3–5 minutes | 350°F (177°C) | 9–11 minutes | Crispier bottom crust, compact spread, gooey middle |
| Air Fryer | 2–3 minutes | 325°F (163°C) | 7–9 minutes | Ultra-crisp shell, deeply browned exterior, molten core |
| Cast Iron Skillet (Mini) | 15 minutes (in oven) | 350°F (177°C) | 14–16 minutes | Deep-dish style, caramelized bottom crust, spoon-soft center |
Dietary Adaptations and Flavor Variations
You can adapt this small batch base to accommodate specific dietary requirements or experiment with creative flavor combinations without destabilizing the dough structure.
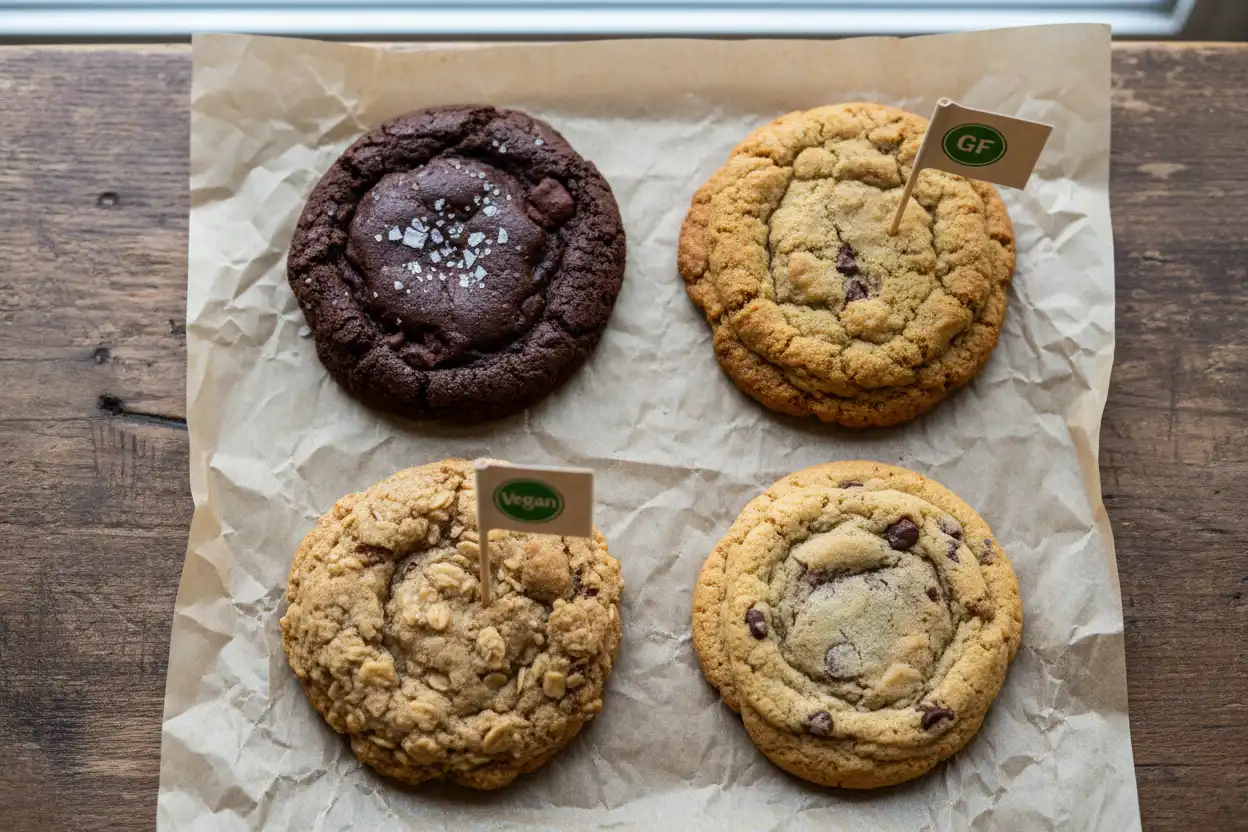
Gluten-Free Small Batch Conversion
Replace the 60 grams of all-purpose flour with an equal weight (60g) of a commercial 1:1 gluten-free baking blend that contains xanthan gum (such as King Arthur Measure for Measure or Bob’s Red Mill 1-to-1).
Gluten-free starches absorb liquids at a slower rate than wheat flour. Let the mixed dough sit at room temperature for 15 minutes before baking to allow the starches to hydrate fully and prevent grittiness.
Vegan and Dairy-Free Adjustments
Replace the 28 grams of butter with an equal amount of firm, high-fat vegan block butter (such as Miyoko’s or Naturli). Avoid soft tub margarines, which contain up to 40% water and cause excessive spreading.
Replace the single egg yolk with one tablespoon (15ml) of aquafaba (chickpea canning liquid) whipped with a fork until frothy, or one tablespoon of creamy unsweetened almond butter for a richer texture.
Small Batch Brown Butter & Espresso Adaptation
Brown 3 tablespoons of butter in a small saucepan until golden amber specks appear. Pour into a bowl and stir in 1 teaspoon of water to replace evaporated moisture, then let it cool.
Dissolve 1/4 teaspoon of instant espresso powder into the warm butter before mixing in your sugars. The espresso compounds amplify the chocolate notes without tasting overtly like coffee.
Troubleshooting Common Small Batch Failures
When working with small volumes, minor issues become immediately noticeable. Use this troubleshooting guide to diagnose and fix structural problems in your cookies.
Issue 1: The Cookies Spread Into One Thin, Greasy Sheet
Cause: The butter was too hot when mixed with the sugars, or the flour was measured inaccurately using a packed volume cup instead of weight.
Fix: Allow melted butter to cool until barely warm to the touch. Always weigh your flour with a digital scale (60 grams), or fluff your flour with a fork before spooning it gently into your measuring cup and leveling off.
Issue 2: The Cookies Turn Out Puffy, Dry, and Cake-Like
Cause: Too much flour was added, an entire whole egg was used instead of just the yolk, or the dough was overmixed.
Fix: Whole eggs add excess water from the egg white, creating steam that puffs the cookie like a sponge cake. Stick to a single egg yolk and fold the dry ingredients until just combined.
Issue 3: The Bottoms Burn Before the Center Bakes
Cause: The baking pan is too dark, or the toaster oven heating element sits too close to the pan surface.
Fix: Use light-colored aluminum baking sheets rather than dark, non-stick pans that absorb excess radiant heat. Double-pan your cookies by stacking two baking sheets together to create a heat buffer.
Issue 4: The Baked Cookies Are Pale and Doughy
Cause: The oven temperature was running low, or the baking soda was expired and failed to provide the necessary alkaline pH shift for browning.
Fix: Hang an inexpensive oven thermometer on the center rack to verify true temperature. Test your baking soda by dropping 1/4 teaspoon into a tablespoon of vinegar; it should fizz vigorously.
Professional Baker Tips and Edge Cases
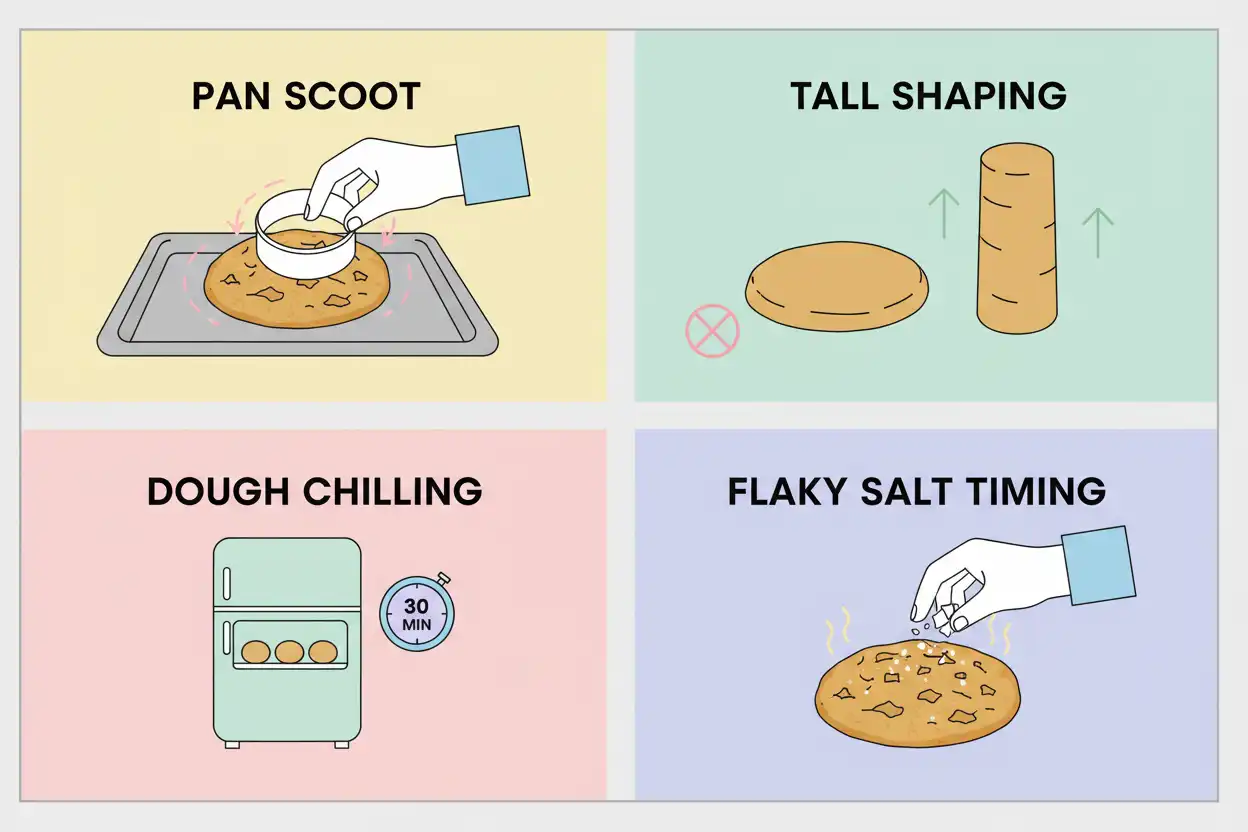
The “Pan Scoot” Technique for Perfect Circles
Home-baked cookies rarely bake into flawless geometric circles on their own. As soon as the baking sheet comes out of the oven, place an inverted round bowl or large circular cookie cutter over each molten cookie.
Gently swirl the cutter in a circular motion against the pan for five seconds. This shapes the pliable outer edges inward, creating round bakery-style edges with a thick rim.
Strategic Dough Chilling for Flavor Maturation
While this recipe bakes beautifully right after mixing, resting the dough in the refrigerator for 30 minutes to 24 hours improves the final result.
During chilling, flour enzymes break complex starches down into simple sugars, and the fats firm up. This slow hydration process produces a deeper caramel flavor, better ripples, and improved center chew.
High-Altitude Micro-Adjustments (Above 3,500 Feet)
At high elevations, lower air pressure allows moisture to evaporate faster, and leavening gases expand more quickly. This causes standard cookies to spread excessively and dry out.
For small batches at high altitudes, reduce the baking soda to a scant pinch (under 1/16 teaspoon), increase the flour by one teaspoon (about 3 grams), and raise the oven temperature to 365°F (185°C) to set the structure faster.
Best Practices for Consistent Results
- Use a Digital Gram Scale: Measuring by weight eliminates up to 95% of common small batch texture inconsistencies.
- Chop Real Chocolate Bars: Bar chocolate contains fewer stabilizers than standard commercial chips, creating superior pools of molten chocolate.
- Use Light-Colored Aluminum Pans: Dark pans absorb intense radiant heat and scorch delicate cookie bottoms before the center sets.
- Line with Parchment Paper: Silicone mats can cause excess spread with high-butter doughs; unbleached parchment paper yields the ideal balance of grip and release.
- Leave Room for Heat Circulation: Space the four dough balls at least two inches apart so hot air circulates evenly around each cookie.
Essential Micro-Baking Equipment
You do not need an elaborate kitchen setup for small batch baking. A few well-designed, compact tools streamline the process and improve consistency.
- Digital Kitchen Scale (0.1g Precision): Essential for weighing micro-doses of flour, butter, and leavening agents accurately.
- Eighth-Sheet or Quarter-Sheet Pan: Sized perfectly (9×13 inches or 6×9 inches) to fit easily into countertop toaster ovens and small standard racks.
- Mini Silicone Spatula: Allows you to scrape every gram of butter and emulsion cleanly from small mixing bowls.
- Two-Tablespoon (Size 30) Cookie Scoop: Delivers uniform dough balls instantly without sticky hands or uneven baking.
- Small Stainless Steel Wire Rack: Elevates hot cookies so air circulates beneath them, preventing soggy bottoms from trapped condensation.
Recommended Internal Reading
Explore these related guides to expand your small batch and dessert baking repertoire:
- The Ultimate Small Batch Fudgy Brownie Recipe (For Two)
- The Complete Guide to Butter Temperatures in Cookie Chemistry
- Top Countertop Toaster Ovens Tested for Precision Baking
- How to Freeze, Store, and Bake Single Cookie Dough Portions
- 10 Easy Single-Serve Desserts You Can Make in a Ramekin
External References and Authorities
These authoritative culinary science resources provide deeper insight into food chemistry, leavening reactions, and kitchen safety:
- King Arthur Baking Company: Baker’s Percentage and Recipe Downscaling Dynamics
- Serious Eats (J. Kenji López-Alt): The Food Lab: The Science of the Best Chocolate Chip Cookies
- USDA Food Safety and Inspection Service: Safe Handling Practices for Fresh Shell Eggs in Home Baking
- Exploratorium Science of Cooking: The Chemistry of Sugar, Caramelization, and the Maillard Reaction
Key Takeaways
- Skip the Whole Egg: Use a single large egg yolk to provide rich fat and moisture without the drying water content of egg white.
- Weigh Your Dry Ingredients: Measuring flour by weight (60 grams) prevents the dryness caused by accidental over-packing.
- Melted Butter Delivers Maximum Chew: Melted butter creates a dense, fudgy crumb and mixes easily with a fork in a single bowl.
- Pan-Bang for Bakery Rings: Tapping the hot baking pan collapses rising air pockets and yields rippled edges with a soft center.
- Countertop Appliances Excel at Micro-Baking: Toaster ovens and air fryers bake small batches efficiently when temperatures are calibrated.
Final Thoughts
Baking a small batch of chocolate chip cookies offers the ultimate balance of speed, portion control, and fresh bakery quality. By understanding the core ratios and the chemistry of egg and fat scaling, you can whip up warm, gooey cookies on demand in under twenty minutes.
Measure out your ingredients by weight, choose quality dark chocolate, and try the pan-bang technique on your next batch. You will get rich, bakery-level cookies every time, with zero wasted dough and almost no cleanup.
Frequently Asked Questions (FAQ)
Can I double this small batch recipe to make 8 to 12 cookies?
Yes, you can double every ingredient linearly. Use two large egg yolks (or one whole whisked large egg), 4 tablespoons of butter, 1/2 cup brown sugar, 2 tablespoons white sugar, 1 cup flour, 1/4 teaspoon baking soda, and 1/4 teaspoon salt. The bake time remains 10 to 12 minutes.
Why are my small batch cookies flat and greasy?
Flat, greasy cookies usually happen when the melted butter was added while still hot, dissolving the sugars into a runny syrup, or when the flour was under-measured. Ensure your butter cools to lukewarm and always weigh your all-purpose flour on a digital scale (60 grams).
Can I make this cookie dough ahead of time and freeze it?
Yes. Portion the dough into balls, place them on a parchment-lined plate in the freezer for one hour until solid, and transfer to an airtight bag. Bake directly from frozen at 350°F (177°C), adding 2 to 3 minutes to the total bake time.
What can I do with the leftover egg white?
Store the leftover egg white in a sealed container in the refrigerator for up to four days. Use it in morning scrambled eggs, whip it into a single-serving cocktail sour foam, or freeze it in an ice cube tray for later baking projects.
Why do you use baking soda instead of baking powder?
Baking soda reacts with the natural acids in brown sugar to create carbon dioxide, tenderizing the crumb while raising the dough pH. This higher pH accelerates the Maillard reaction, giving you golden-brown edges and complex caramel notes that baking powder cannot replicate.
Can I use chocolate chips instead of chopped bar chocolate?
Yes. Standard chocolate chips contain soy lecithin and stabilizers that help them hold their shape under heat. Chopped chocolate bars melt into wider, molten puddles. Both work well, so choose based on whether you prefer defined chocolate chips or layered chocolate pools.
Do I need to chill the dough before baking?
Chilling is not mandatory for this recipe; you can bake the dough immediately with excellent results. However, chilling the dough balls for 30 minutes in the refrigerator firms the butter and deepens the caramel flavor, resulting in a slightly thicker, chewier cookie.
How do I bake these cookies in an air fryer?
Line the bottom of your air fryer basket with a fitted piece of perforated parchment paper. Place two dough balls inside, spaced two inches apart. Bake at 325°F (163°C) for 7 to 9 minutes until the edges are golden brown and crisp.