Ready to bake a batch of Cookie Monster Cookies that looks like it crashed straight through a party table shouting, “Me want cookie!” These bright blue, googly-eyed treats are soft, chewy, silly, and guaranteed to steal the show at birthdays, classroom celebrations, movie nights, and weekend baking sessions with kids.
The magic of cookie monster cookies is simple: you start with a soft sugar-cookie-style dough, color it a bold Cookie Monster blue, add candy eyes, and finish each cookie with mini chocolate chip cookies pressed on top like the happiest monster snack attack ever. They’re playful enough for kids but delicious enough for grown-ups to sneak seconds.
If you love fun cookie recipes, this guide walks you through every step, from mixing the dough to getting that vibrant blue color and preventing the cookies from spreading into puddles. Let’s bake some blue monster magic!

What Makes These Cookie Monster Cookies So Fun?
These cookies are more than just cute. They’re a full-on dessert personality.
You’ll love them because they’re:
- Bright and eye-catching for party dessert tables
- Soft and chewy with a buttery vanilla flavor
- Easy to decorate without fancy piping skills
- Kid-friendly for little helpers who love adding eyes and cookie pieces
- Customizable for birthday themes, character parties, and even elmo and cookie monster cookies dessert spreads
The best part? Each cookie is supposed to look a little wild. Uneven eyes, tilted mini cookies, and goofy expressions only make them better.
Ingredients You’ll Need for Cookie Monster Cookies
Gather everything before you start so the process feels easy and fun. This cookie monster recipe uses simple baking staples plus a few decorating extras.
For the Blue Cookie Dough
- 2 ¾ cups all-purpose flour
- 1 teaspoon baking soda
- ½ teaspoon baking powder
- ½ teaspoon salt
- 1 cup unsalted butter, softened but not melted
- 1 ¼ cups granulated sugar
- 1 large egg
- 1 egg yolk
- 2 teaspoons vanilla extract
- Blue gel food coloring
- Optional: ½ cup white chocolate chips or mini chocolate chips mixed into the dough
For Decorating
- Candy eyeballs
- Mini chocolate chip cookies
- Optional: extra chocolate chips for texture
- Optional: blue sanding sugar for sparkle
Helpful Tools
- Large mixing bowl
- Hand mixer or stand mixer
- Measuring cups and spoons
- Rubber spatula
- Baking sheets
- Parchment paper
- Cookie scoop
- Cooling rack
Step 1: Prep Your Baking Station
Before the blue cookie chaos begins, set yourself up for success.
Preheat your oven to 350°F and line your baking sheets with parchment paper. Parchment helps the cookies bake evenly and makes cleanup easier, especially if little bakers are helping.
Set out your candy eyes and mini chocolate chip cookies nearby, but don’t place them on the dough just yet. The dough needs to be mixed, colored, scooped, and chilled first for the best monster shape.
Step 2: Mix the Dry Ingredients
In a medium bowl, whisk together:
- Flour
- Baking soda
- Baking powder
- Salt
This step may seem small, but it helps distribute the leavening evenly so your cookies puff and spread consistently. No one wants one cookie that rises like a mountain and another that melts like a pancake.
Set the bowl aside while you make the buttery base.
Step 3: Cream the Butter and Sugar
In a large bowl, beat the softened butter and granulated sugar together until the mixture looks light, fluffy, and slightly creamy. This usually takes about 2 to 3 minutes with a mixer.
Don’t rush this step. Creaming butter and sugar adds air to the dough, which gives the cookies a better texture. You’re aiming for soft and chewy, not dense and heavy.
If your butter is too warm or shiny, pause and chill it briefly before mixing. Softened butter should press easily with your finger, but it should not look greasy.
Step 4: Add the Egg, Yolk, and Vanilla
Beat in the egg, extra egg yolk, and vanilla extract until smooth.
The extra yolk helps create a richer, chewier cookie. It also makes the dough easier to shape, which is helpful when you’re making thick monster cookies that need to hold candy eyes and cookie toppings.
Scrape down the sides of the bowl with a rubber spatula so everything mixes evenly.
Step 5: Make the Dough Blue
Now comes the monster moment.
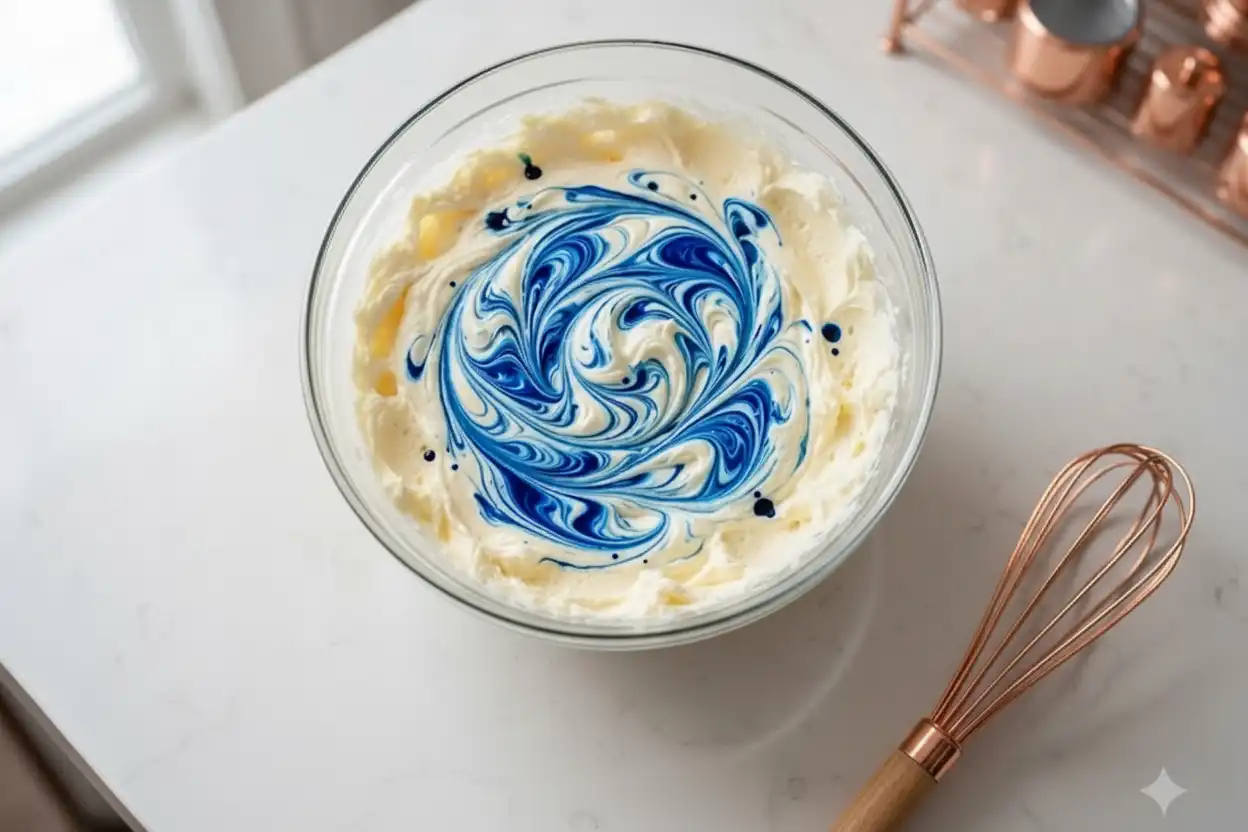
Add a few drops of blue gel food coloring to the wet mixture and beat until the color starts to spread. Continue adding small amounts until the dough looks deeply blue.
Gel food coloring works best because it adds strong color without making the dough too wet. Liquid food coloring can work in a pinch, but you may need more of it, and too much liquid can affect the texture.
Don’t panic if the color looks slightly intense in the bowl. Once the flour is added, the color will soften a bit.
How to Get the Bright Blue Color
For the boldest, most playful cookie monster cookies, color matters. You want bright blue, not pale sky blue or greenish blue.
Use these tricks for monster-level color:
- Choose gel food coloring instead of liquid for a stronger shade.
- Start with a small amount, then build slowly until the blue looks vivid.
- Color the wet ingredients first so the shade distributes before flour thickens the dough.
- Remember the dough lightens after adding flour, so go slightly darker than your final goal.
- Avoid overbaking, because browned edges can dull the blue color.
- Use a true royal blue or electric blue gel for the most classic monster look.
If your dough looks a little too dark, that’s okay. Once the cookies bake and get their googly eyes and mini cookie toppings, they’ll look wonderfully bold and party-ready.
Step 6: Add the Dry Ingredients
Gradually add the dry ingredients to the blue butter mixture. Mix on low speed until the dough just comes together.
Stop mixing as soon as you no longer see streaks of flour. Overmixing can make cookies tough, and these monsters should be soft and chewy.
If you’re adding chocolate chips or white chocolate chips into the dough, fold them in gently with a spatula. White chocolate chips look especially cute against the blue dough, while mini chocolate chips give a classic cookies-and-cream feel.
Step 7: Chill the Dough
Cover the bowl and chill the dough for at least 30 to 60 minutes.
Yes, waiting is hard. Cookie Monster would probably object. But chilling helps the butter firm up, which keeps the cookies thicker and prevents them from spreading too much in the oven.
If you want to make the dough ahead of time, you can chill it longer. Just let it sit at room temperature for a few minutes before scooping if it becomes too firm.
Step 8: Scoop and Shape the Cookies
Use a cookie scoop or spoon to portion the dough into balls, about 1 ½ to 2 tablespoons each.
Roll each dough portion gently between your palms, then place it on the lined baking sheet. Leave space between cookies because they will spread a little as they bake.
For a thick, bakery-style look, keep the dough balls slightly tall instead of flattening them. Think little blue dough mounds, not pancakes.
Step 9: Add Candy Eyes
Press two candy eyeballs gently into each dough ball before baking.
Place them near the top half of the cookie so there’s room for the mini chocolate chip cookie “mouth” below. For extra personality, make some eyes uneven or tilted. A little wonky is very on-theme.
If you prefer a cleaner look, you can add the eyes immediately after baking while the cookies are still soft. Both methods work, but adding them before baking helps them settle into the dough.
Step 10: Place the Chocolate Chip Cookies on Top, Monster Style
This is the step that turns blue cookies into full-on Cookie Monster magic.
Take a mini chocolate chip cookie and gently press it into the lower center of each dough ball, below the candy eyes. Angle it slightly so it looks like the monster is munching on it.
You can decorate in a few different ways:
- Whole mini cookie: Press one small cookie into the dough like a big open-mouth snack.
- Broken cookie piece: Use half a mini cookie for a chomped look.
- Crumbled cookie bits: Add small chunks around the mouth area for messy monster energy.
- Extra dramatic style: Press one mini cookie on top and scatter a few crumbs nearby.
Do not bury the mini cookie completely. It should sit partly on top of the dough so it stays visible after baking.

Step 11: Bake Until Just Set
Bake the cookies at 350°F for about 9 to 11 minutes, or until the edges look set and the centers still look slightly soft.
Try not to overbake them. The cookies will continue to firm up on the hot baking sheet after you remove them from the oven. Pulling them out while the centers still look soft helps keep that chewy texture.
If the mini chocolate chip cookies shift during baking, you can gently press them back into place as soon as the tray comes out of the oven.

Step 12: Cool Before Serving
Let the cookies cool on the baking sheet for about 5 minutes, then move them to a cooling rack.
The candy eyes and toppings need a little time to set. If you move the cookies too soon, they may bend or break. Once cooled, they’re ready for the dessert table, lunchbox surprise, or “just one more” kitchen snack.
Pro Tips to Prevent Cookie Monster Cookies from Spreading
If you want thick, cute, picture-worthy monster cookies, spreading is the big thing to control. These tips will help your cookies keep their shape.
- Chill the dough before baking. Cold dough spreads less than warm dough.
- Use softened butter, not melted butter. Melted butter can make cookies flatten quickly.
- Measure flour carefully. Too little flour can cause excess spreading. Spoon flour into the measuring cup, then level it off.
- Don’t overcrowd the baking sheet. Give each cookie enough room to expand.
- Use parchment paper instead of a greased pan. Greased pans can encourage spreading.
- Keep dough balls tall. A taller scoop helps create thicker cookies.
- Bake one tray at a time if possible. This gives more even heat and better control.
- Cool baking sheets between batches. Placing dough on a hot sheet can melt the butter too soon.
- Avoid overmixing after adding flour. Too much mixing can change the dough texture.
- Test one cookie first. If it spreads too much, chill the dough longer before baking the rest.
A little spread is normal, but these steps help keep your Cookie Monster faces round, chunky, and adorable.
Easy Decorating Variations
Once you master the basic version, you can turn this into one of your go-to fun cookie recipes for all kinds of events.
Try these ideas:
- Add blue sprinkles to the dough for extra color and crunch.
- Use mini sandwich cookies instead of mini chocolate chip cookies.
- Add a few chocolate chips around the mouth for a crumb-covered look.
- Make jumbo cookies by using larger dough scoops and full-size cookie pieces.
- Create a party platter with elmo and cookie monster cookies by making half the batch blue and half red.
For an Elmo-inspired version, use red gel food coloring, candy eyes, and an orange candy nose. Keep the same base dough and decorating method, then serve both characters together for a bright, cheerful cookie tray.

Storage and Make-Ahead Tips
These cookies are best enjoyed fresh, but they also store well.
To store baked cookies:
- Let them cool completely.
- Place them in an airtight container.
- Store at room temperature for up to a few days.
- Add a small piece of bread to the container to help maintain softness.
To make dough ahead:
- Prepare and color the dough.
- Cover tightly and refrigerate.
- Scoop and decorate when ready to bake.
- If the dough is very firm, let it rest briefly at room temperature before shaping.
For best results, add candy eyes and mini cookies close to baking time so the decorations look fresh and stay in place.
Troubleshooting Your Cookie Monster Cookies
Even silly cookies deserve a little baking backup. If something goes wrong, here’s how to fix it next time.
My cookies turned greenish-blue
This can happen if the butter or dough has a yellow tone and the blue coloring is too light. Use a stronger gel color and add enough to create a bold blue before baking.
My cookies spread too much
The dough may have been too warm, the butter too soft, or the flour under-measured. Chill the dough longer and make sure your baking sheets are cool before adding the next batch.
My candy eyes melted or shifted
Some candy eyes hold up better than others. If yours tend to melt, add them right after baking while the cookies are still warm and soft.
My mini cookies disappeared into the dough
Press them in gently, but don’t push too deep. Keep part of each mini cookie sitting above the surface so it remains visible after baking.
Serving Ideas for Maximum Cookie Chaos
These cookies are made for fun, so lean into the theme.
Serve them with:
- Cold milk in small bottles or cups
- A blue-and-white dessert table
- Chocolate chip cookie crumbs scattered on the platter
- Character-themed napkins and plates
- A party sign that says “Me Want Cookies!”
- Red Elmo-style cookies for a colorful character duo
They’re also adorable as edible party favors. Wrap each cookie individually in a clear treat bag, tie with a blue ribbon, and send guests home with a monster-sized smile.

Final Bite
This playful cookie monster recipe is sweet, simple, and packed with personality. With chewy blue dough, goofy candy eyes, and mini chocolate chip cookies placed right on top, every batch becomes a tray of happy little monsters.
Whether you’re baking for a birthday party, a classroom treat, a themed dessert table, or just a weekend kitchen adventure, these cookies bring instant smiles. They’re bright, silly, delicious, and exactly the kind of treat that reminds everyone baking should be fun.
If you try these blue monster cookies, leave a comment with your baking results! And don’t forget to share your cookie photos on social media using #CookieMonsterBaking so everyone can see your delicious monster creations.